Introduction to Red Velvet Cake
What is red velvet cake and why is it so popular?
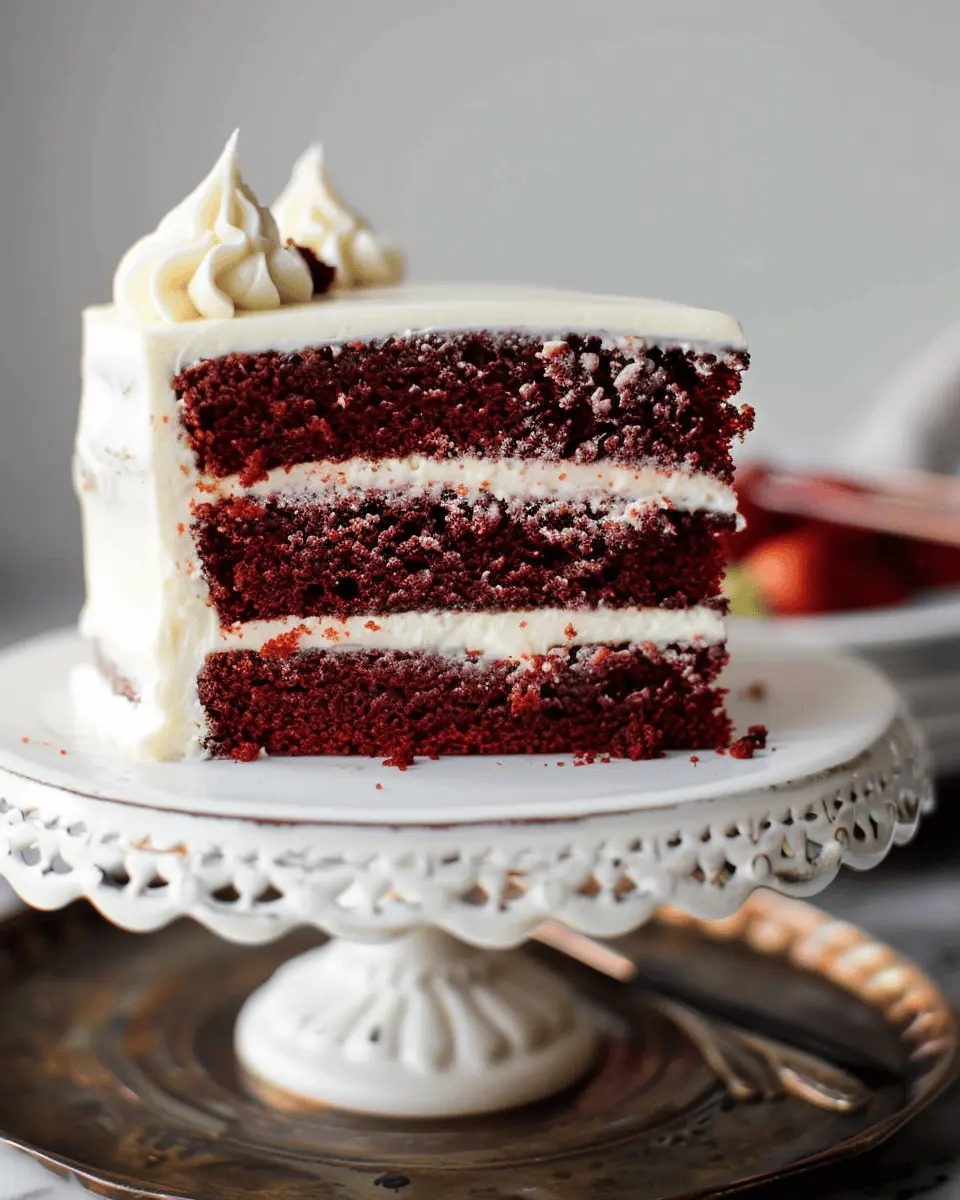
If you’ve ever been captivated by the striking allure of a vivid red velvet cake, you’re not alone. This deliciously unique dessert has become a favorite in homes and bakeries alike, celebrated for its vibrant color and scrumptious flavor.
So, what exactly is a red velvet cake? At its core, it’s a rich combination of cocoa powder, buttermilk, and a hint of vinegar, which gives it that characteristic tang. Traditionally layered with velvety cream cheese frosting, this cake is not just a feast for the eyes but also for the palate. The delightful balance of sweet and slightly tart flavors makes it stand out among other cakes.
The origins of red velvet cake are somewhat fuzzy, with various stories attributing its rise in popularity to different regions. Some say it gained fame during the 1920s thanks to a food company that promoted a boxed cake mix. Since then, it’s been cherished as a “celebration cake,” often gracing special occasions like birthdays and weddings.
But what truly fuels its popularity today? A large part of its charm lies in its visually stunning appearance; the vibrant red hue creates an instant wow factor. Factor in the creamy frosting, and you have a stunning dessert that’s both postcard-perfect and delicious. Plus, with the rise of social media, sharing mouthwatering photos of red velvet creations has elevated its status as a must-have treat for dessert lovers.
Regarding the preparation, baking a red velvet cake can be as straightforward or intricate as you make it. Scared of baking? Don’t be! With a little guidance and the right ingredients, you can whip up this beloved dessert in your own kitchen.
For insights on baking and decorating techniques, check out this comprehensive Guide to Cake Decoration. Ready to dive into the delicious world of red velvet cake? Let’s get started on this scrumptious adventure!
Ingredients for Red Velvet Cake
Key Ingredients for the Cake
When it comes to making a stunning red velvet cake, you’ll want to gather a few essential ingredients that come together to create that iconic flavor and texture. Here’s what you need:
- All-purpose flour: Approximately 2 cups will give the cake its structure.
- Granulated sugar: Sweeten things up with around 1.5 cups.
- Cocoa powder: Just a couple of tablespoons add a subtle chocolate flavor.
- Baking soda & baking powder: These leavening agents help the cake rise beautifully.
- Vegetable oil: About a cup keeps your cake moist and flavorful.
- Buttermilk: Two cups add acidity for tenderness—don’t skip this!
- Eggs: Use about 2 large eggs to bind your batter together.
- Red food coloring: This is what gives our cake that beautiful, rich hue.
For extra tips on selecting quality ingredients, check out resources like NutritionalScience.org for insights.
Essential Ingredients for the Cream Cheese Frosting
Now, let’s not forget the cream cheese frosting, which is the perfect pairing for your red velvet delight. Here’s what you’ll require:
- Cream cheese: An 8-ounce package should do the trick, providing that creamy texture.
- Unsalted butter: You’ll want about 1/2 cup to lend richness and stability.
- Powdered sugar: Around 3 cups will sweeten your frosting without adding grit.
- Vanilla extract: A tablespoon infuses lovely flavor—pure is best!
Creating this delectable frosting is a cinch, and it balances the slight tang of the red velvet cake, making each bite wonderful. Interested in more frosting techniques? You can explore BakingTips.com for expert advice.
With these ingredients in hand, you’re well on your way to baking a showstopper. Happy baking!
Step-by-Step Preparation for Red Velvet Cake
Making a beautiful red velvet cake at home doesn’t have to feel daunting! With the right preparation, you’ll be bringing that delightful splash of color and flavor to your next celebration. Let’s dive into the process of crafting a red velvet cake with a rich cream cheese frosting. Follow these steps, and you’ll be well on your way to impressing your friends and family.
Gather Your Ingredients
Before anything else, having all your ingredients at the ready takes out the stress of mid-baking surprises. Here’s what you’ll need for both the red velvet cake and the cream cheese frosting:
-
For the Red Velvet Cake:
-
2 ½ cups all-purpose flour
-
1 ½ cups granulated sugar
-
1 cup vegetable oil
-
1 cup buttermilk, at room temperature
-
2 large eggs, at room temperature
-
2 tablespoons cocoa powder
-
1 tablespoon red food coloring
-
1 teaspoon vanilla extract
-
1 teaspoon baking soda
-
1 teaspoon white vinegar
-
½ teaspoon salt
-
For the Cream Cheese Frosting:
-
8 oz cream cheese, at room temperature
-
½ cup unsalted butter, at room temperature
-
4 cups powdered sugar
-
2 teaspoons vanilla extract
Once you have everything measured and ready to go, you’ll feel much more organized.
Preheat the Oven and Prepare the Cake Pans
Next, it’s time to create the perfect environment for your red velvet cake to rise and bake. Preheat your oven to 350°F (177°C). While it’s warming, prepare your cake pans:
- Grease two 9-inch round cake pans with baking spray or butter and dust with flour.
- Optionally, you can line the bottoms with parchment paper for added protection, which helps to easily release the cake from the pans.
Create the Cake Batter
Now to the fun part! Combine your wet and dry ingredients to create the batter. Here’s how:
- In a large mixing bowl, whisk together the flour, sugar, cocoa powder, and salt.
- In another bowl, mix the oil, buttermilk, eggs, vanilla extract, and red food coloring.
- Gradually add the wet ingredients to the dry ingredients, mixing until just combined. Don’t over-mix; a few lumps are okay!
- In a small bowl, mix the baking soda and vinegar until foamy, and then fold it into the batter.
Pro tip: Most baking experts recommend baking with room-temperature ingredients to achieve the best texture—so let those eggs and buttermilk sit out for about half an hour before you begin.
Bake the Cake Layers
Pour your beautifully mixed batter evenly into the prepared cake pans. Bake for about 30 to 35 minutes, or until a toothpick inserted in the center comes out clean. The cake should spring back when gently pressed.
Once baked, allow the layers to cool in the pans for 10 minutes before transferring them to wire racks to cool completely. Patience is key—slicing into your cake while it’s warm can lead to crumbling!
Make the Cream Cheese Frosting
While your cake layers cool down, let’s whip up a luscious cream cheese frosting:
- In a mixing bowl, beat the cream cheese and butter together until smooth.
- Gradually add in the powdered sugar, blending on low until combined, then increase your mixer speed.
- Stir in the vanilla extract, and beat until the frosting is creamy and fluffy. If it’s too thick, a tablespoon of milk can help adjust the consistency.
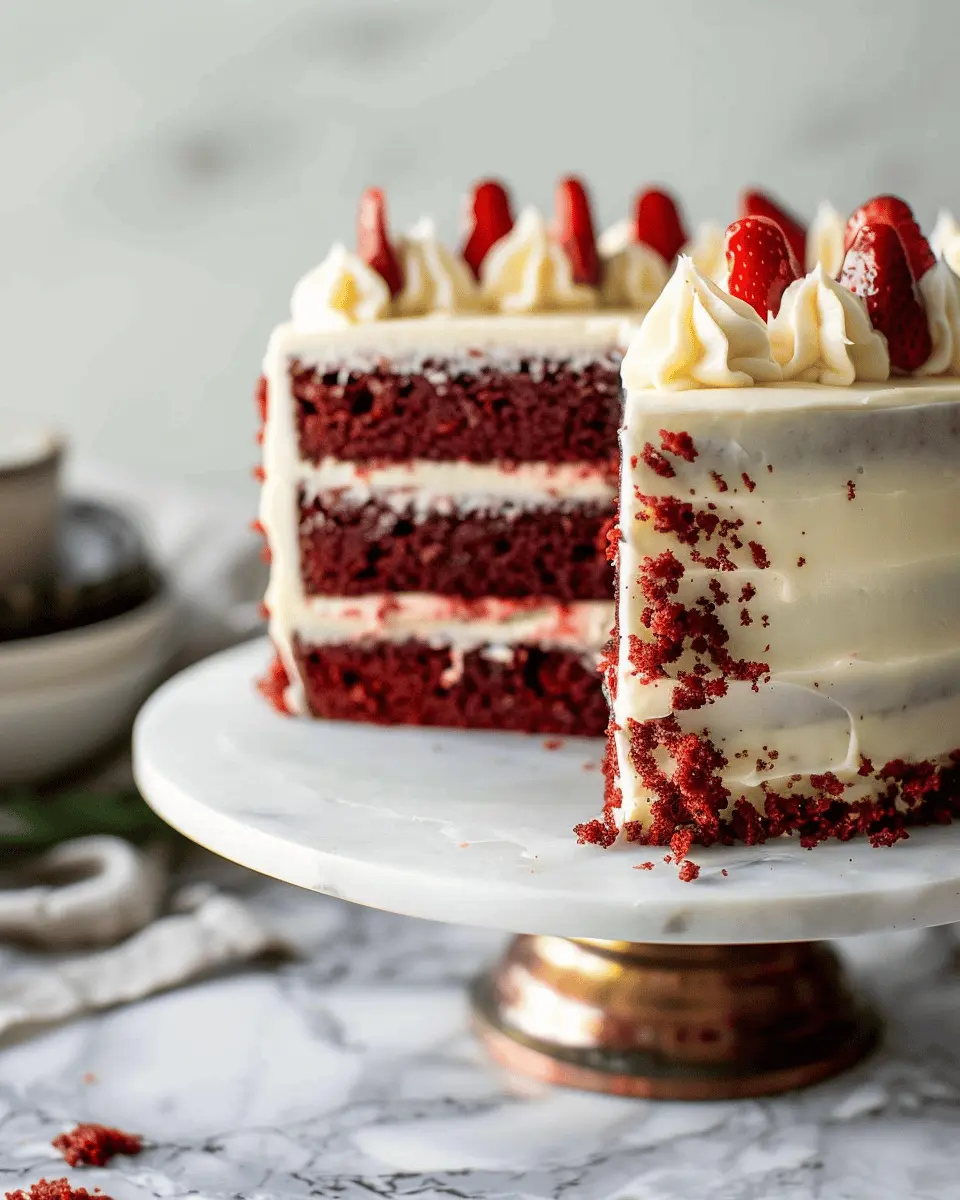
Assemble and Frost the Cake
Now, the moment you’ve been waiting for—it’s time to assemble your red velvet cake! Here’s how:
- Place one layer of the cake on a serving plate. Spread a generous amount of cream cheese frosting on top.
- Gently layer the second cake on top, then frost the top and sides with remaining frosting.
- For an extra touch, you might sprinkle some chocolate shavings or crushed nuts around the edges.
And just like that, you’ve got yourself a stunning red velvet cake that’s sure to be the talk of the table! Enjoy every decadent slice and share your creation with those you love. For some great serving ideas, check out sources like Food Network for inspiration. Happy baking!
Variations on Red Velvet Cake
If you love the classic red velvet cake, get ready to explore some delightful variations that will satisfy your cravings! Whether you’re hosting a gathering or just treating yourself, these adaptations are sure to please.
Red Velvet Cupcakes
Who doesn’t love a mini version of a classic dessert? Red velvet cupcakes are perfect for parties or an afternoon treat. Simply use the same batter from your red velvet cake, but divide it into a cupcake tin. Bake for about 20 minutes, then top with that dreamy cream cheese frosting. You can even add cute toppings—think sprinkles or chocolate shavings—to make them extra fun. Plus, individual servings make sharing (or not sharing) a breeze!
Red Velvet Sheet Cake
For a fuss-free option, consider a red velvet sheet cake. This is especially great for potlucks or family gatherings. Spread the same luscious cream cheese frosting over a full sheet cake and slice it into squares. It’s simple, satisfying, and cuts down on the time spent in the kitchen. Just imagine cutting into that vibrant cake—your friends and family won’t be able to resist!
Gluten-Free Red Velvet Cake
Eating gluten-free doesn’t mean you have to miss out on the deliciousness of red velvet cake. Swap in a gluten-free flour blend, like almond or coconut flour, to create a cake that’s just as moist and flavorful. Many enthusiasts have shared their successful adaptations, showing that gluten-free can be just as tasty. Be sure to check out resources like the Gluten-Free Baking Academy for tips on achieving the best results.
With these variations, you’ll have a red velvet cake for every occasion! Which one are you going to try first?
Cooking Tips and Notes for Red Velvet Cake
Common Mistakes to Avoid
When making a red velvet cake, it’s essential to avoid certain pitfalls, like using too much cocoa powder. A hint is all you need to balance the flavor without overpowering the rich red hue. Additionally, not measuring your flour correctly could lead to a dense cake. For consistent results, weigh your flour or use the spoon-and-level method.
Another common mistake is rushing the mixing process. Overmixing can lead to a tough texture. Aim for a light hand when blending your wet and dry ingredients. Baking at the incorrect temperature can also result in uneven baking; always preheat your oven beforehand!
Ingredient Substitutions and What to Look Out For
If you’re short on ingredients, there are some fantastic substitutions you can make. For buttermilk, mix regular milk with a spoonful of vinegar or lemon juice and let it sit for a few minutes. If you want a dairy-free option, almond milk works well, too.
For the cream cheese frosting, consider using a vegan cream cheese if you’re looking for plant-based alternatives. Just remember that flavor can vary, so taste as you go. Always choose the best quality ingredients possible for the most delicious red velvet cake experience!
For more baking tips, check out King Arthur Baking and Serious Eats.
Serving Suggestions for Red Velvet Cake
Ideal pairings for red velvet cake
When it comes to enjoying a slice of red velvet cake, pairing it with complementary flavors can elevate your dessert experience. Consider serving it alongside:
- Fresh Berries: Strawberries or raspberries add a tart contrast that beautifully balances the sweetness of the cream cheese frosting.
- Coffee or Tea: A nice cup of coffee or herbal tea can enhance the rich flavors of the cake. Try brewing a light chai for a unique twist.
- Ice cream: A scoop of vanilla or even a tangy lemon sorbet can provide a refreshing contrast to the cake’s density.
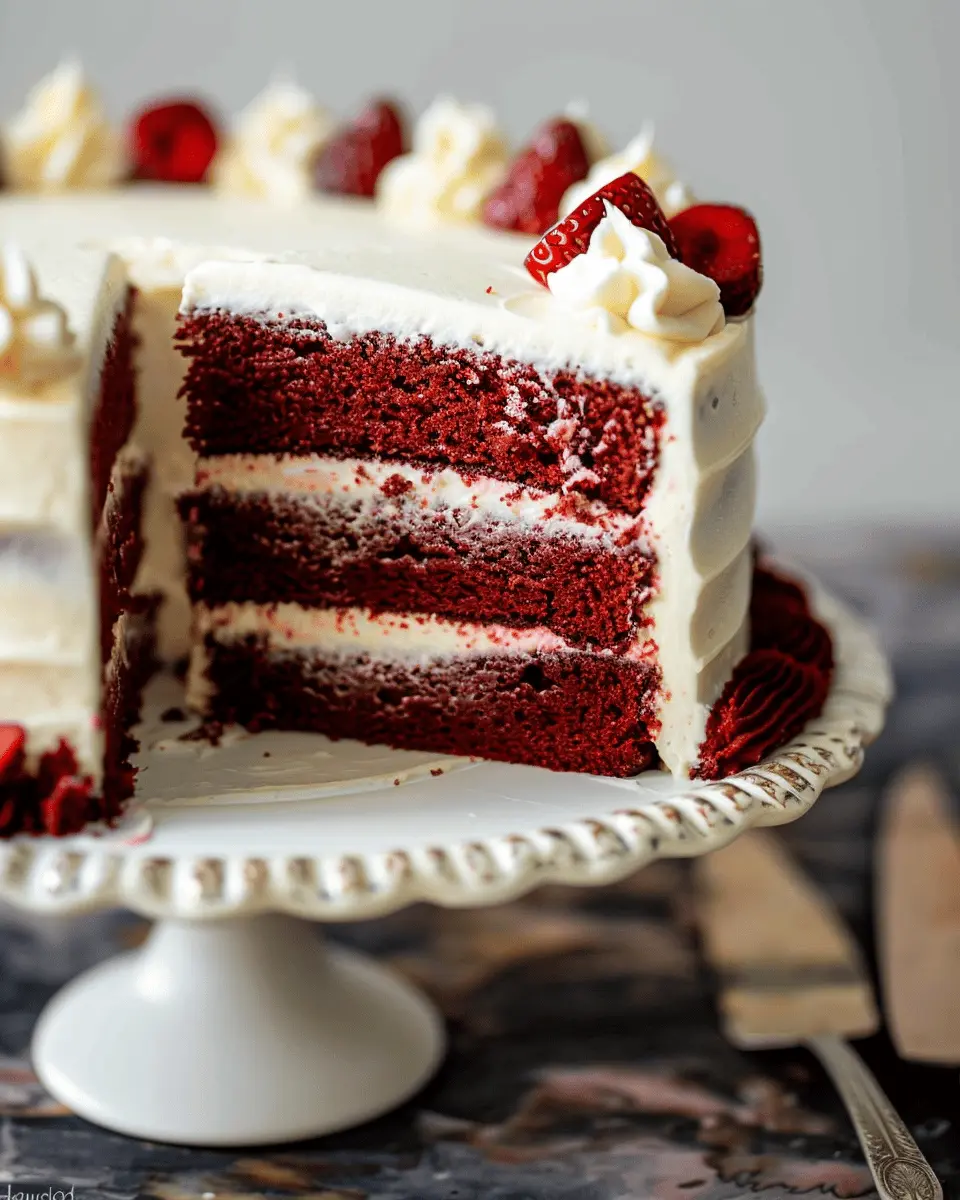
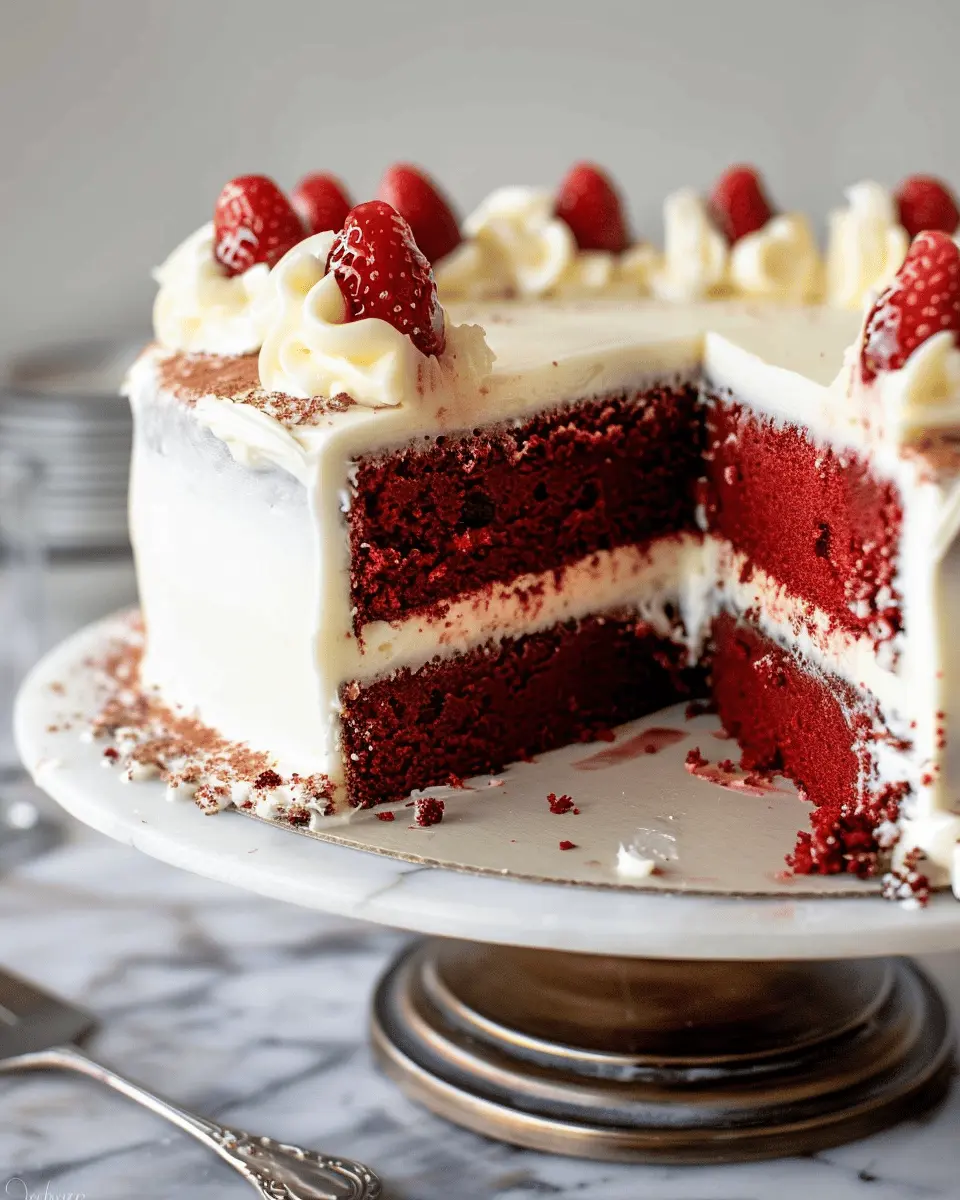
Presentation tips for a stunning cake display
A gorgeous presentation can make your red velvet cake the star of the show. Here are a few tips:
- Layered Look: Use a tall cake stand to showcase the cake’s layers. The height will draw attention and create an inviting visual.
- Garnish with Fresh Mint: A few sprigs of mint or a dusting of cocoa powder can add a touch of elegance.
- Serving Plates: Use colorful or patterned plates to add personality and make the red hue pop.
For more tips on cake decoration, check out Baker’s Royal. Utilizing these suggestions will not only enhance the flavor balance but also create a memorable presentation.
Time Breakdown for Red Velvet Cake
Planning to bake a delicious red velvet cake? Here’s a simple time breakdown to help you manage your kitchen hustle effectively!
Preparation Time
First, gather your ingredients and prepare your baking pans. This should take about 20-30 minutes. It’s the perfect moment to preheat your oven and get your ingredients ready.
Baking Time
Next up, you’ll spend around 25-30 minutes letting your cake bake to perfection. The aroma wafting through your kitchen will be simply irresistible!
Cooling and Assembly Time
Allow an additional 30-45 minutes for cooling the cake completely before you frost it. Patience pays off here, as a well-cooled red velvet cake is essential for smooth frosting.
By breaking it down, you’ll see that your cake is just a few busy hours away from being enjoyed!
For a deeper dive into cake tips, check out Serious Eats for expert baking advice.
Nutritional Facts for Red Velvet Cake
When indulging in a slice of red velvet cake, it’s nice to know what you’re treating yourself to! Here’s a quick breakdown of the nutritional facts you might be curious about.
Calories per serving
A standard serving of red velvet cake typically contains around 350–400 calories. This can vary based on portion size and frosting thickness.
Sugar content
It’s also worth noting that this delightful dessert packs in about 25–30 grams of sugar per slice. If you’re watching your sugar intake, consider enjoying it in moderation.
Key nutrients
In terms of key nutrients, red velvet cake provides a small amount of iron from cocoa powder and dairy, along with some calcium from the cream cheese frosting.
For more insights into dessert nutrition, check out Nutrition.gov for a deeper dive into the health aspects of your favorite sweet treats.
FAQs about Red Velvet Cake
Can I use liquid food coloring instead of gel?
Absolutely! While gel food coloring is preferred for a vibrant and consistent red hue, liquid food coloring can be used as well. Just keep in mind that liquid colors may require a bit more to achieve the desired shade. For a richer red velvet cake, invest in high-quality gel food coloring—you’ll be glad you did. If you want some expert tips on color mixing, check out this Baker’s Journal article.
How do I prevent my cake from drying out?
To avoid a dry red velvet cake, focus on the following:
- Measure accurately: Ensure you measure your flour correctly. Consider using a kitchen scale for precision.
- Do not overmix: Mix until just combined. Overmixing can develop gluten, leading to a tougher texture.
- Keep an eye on baking time: Start checking your cake for doneness a few minutes earlier. You want it to be moist without underbaking.
Pro tip: Adding a little bit of sour cream or buttermilk can enhance moisture and flavor, making your cake even more delectable.
What’s the best way to store leftover red velvet cake?
To store your leftover red velvet cake, follow these simple steps to keep it fresh:
- Wrap it well: Use plastic wrap or place the cake in an airtight container. This helps to keep the moisture locked in.
- Refrigerate: If your cake is frosted with cream cheese frosting, it’s best to refrigerate it. This ensures the frosting stays fresh and edible for longer.
- For longer storage: Consider freezing individual slices. Wrap them tightly in plastic wrap before placing them in a freezer bag. They can last for up to three months.
By following these storage tips, your red velvet cake will stay delicious and moist long after you’ve baked it!
Conclusion on Red Velvet Cake
Final thoughts and encouragement to bake your own
Making a red velvet cake is more than just following a recipe; it’s about creating a delightful experience that you can share with friends and family. The rich color and luxurious flavor, especially when paired with cream cheese frosting, makes it a showstopper at any event. Don’t let any intimidation hold you back—baking this cake is incredibly rewarding.
Consider experimenting with different decorations or serving it alongside a homemade vanilla bean ice cream. Embrace the creative process! If you want to dive deeper into baking techniques, you can check out resources like The Baking Journal. So, roll up your sleeves, get those ingredients ready, and enjoy the sweet journey that is creating your own red velvet cake. Happy baking!
PrintRed Velvet Cake with Cream Cheese Frosting: The Best Homemade Delight

Indulge in a moist and delicious red velvet cake topped with creamy cheese frosting, the perfect dessert for any occasion.
- Prep Time: 30 minutes
- Cook Time: 30 minutes
- Total Time: 1 hour
- Yield: 12 servings 1x
- Category: Dessert
- Method: Baking
- Cuisine: American
- Diet: Vegetarian
Ingredients
- 2 cups all-purpose flour
- 1 1/2 cups granulated sugar
- 1 teaspoon baking soda
- 1 teaspoon salt
- 1 teaspoon cocoa powder
- 1 1/2 cups vegetable oil
- 1 cup buttermilk
- 2 large eggs
- 2 tablespoons red food coloring
- 1 teaspoon vanilla extract
- 1 teaspoon white vinegar
- 8 ounces cream cheese
- 1/2 cup unsalted butter
- 4 cups powdered sugar
- 1 teaspoon vanilla extract
Instructions
- Preheat the oven to 350°F (175°C). Grease and flour two 9-inch round cake pans.
- In a large bowl, sift together the flour, sugar, baking soda, salt, and cocoa powder.
- In a separate bowl, mix the oil, buttermilk, eggs, food coloring, vanilla, and vinegar until well combined.
- Gradually add the wet ingredients to the dry ingredients and mix until smooth.
- Divide the batter evenly between the prepared pans.
- Bake for 25-30 minutes or until a toothpick inserted comes out clean.
- Allow cakes to cool in the pans for 10 minutes before transferring to wire racks to cool completely.
- For the frosting, beat the cream cheese and butter until smooth. Gradually add powdered sugar and vanilla, mixing until creamy.
- Once the cakes are cool, spread frosting between the layers and over the top and sides of the cake.
Notes
- For best results, use room temperature ingredients.
- Try adding a hint of lemon zest for extra flavor in the frosting.
Nutrition
- Serving Size: 1 slice
- Calories: 350
- Sugar: 40g
- Sodium: 250mg
- Fat: 15g
- Saturated Fat: 8g
- Unsaturated Fat: 5g
- Trans Fat: 0g
- Carbohydrates: 50g
- Fiber: 1g
- Protein: 3g
- Cholesterol: 70mg
Keywords: Red Velvet Cake, Cream Cheese Frosting, dessert, cake