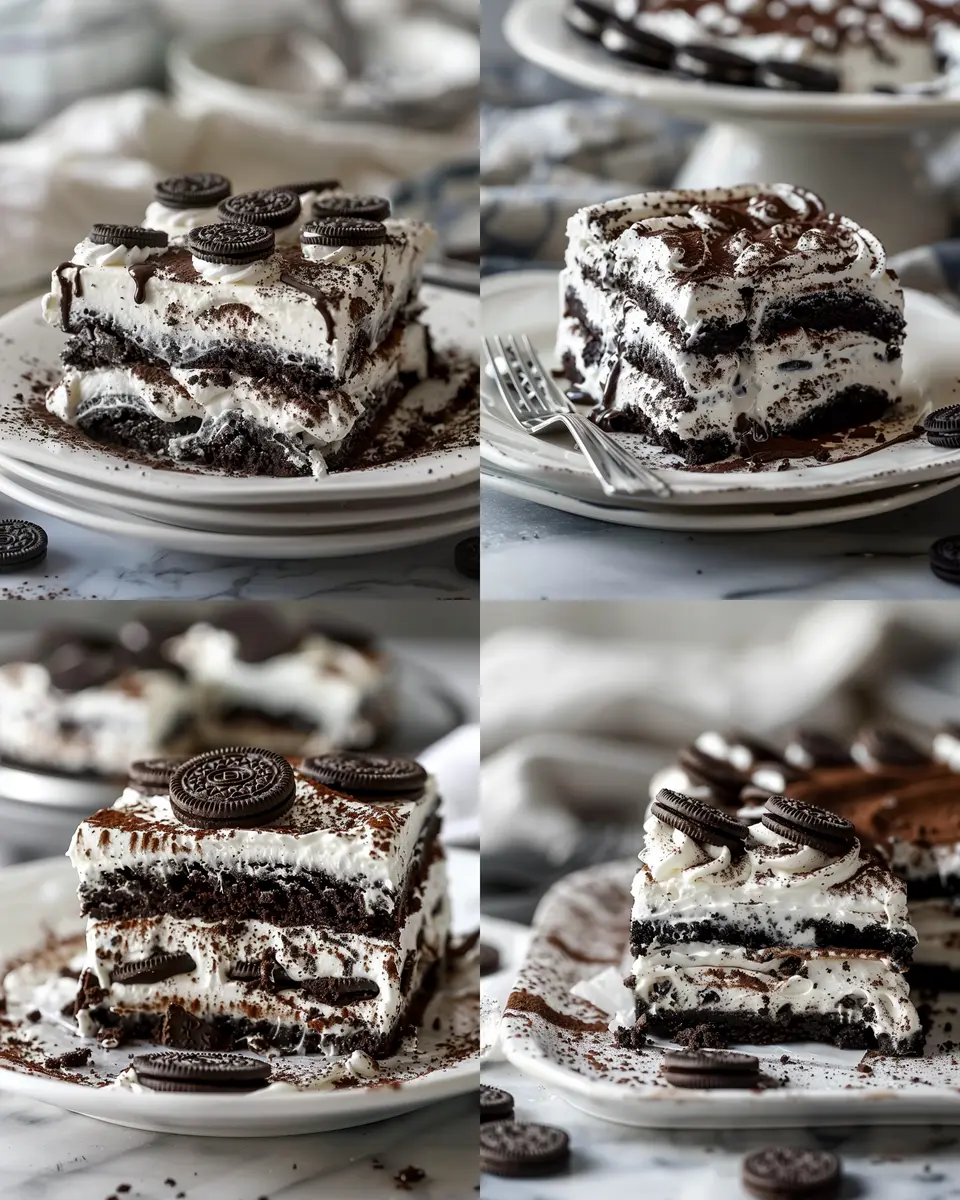
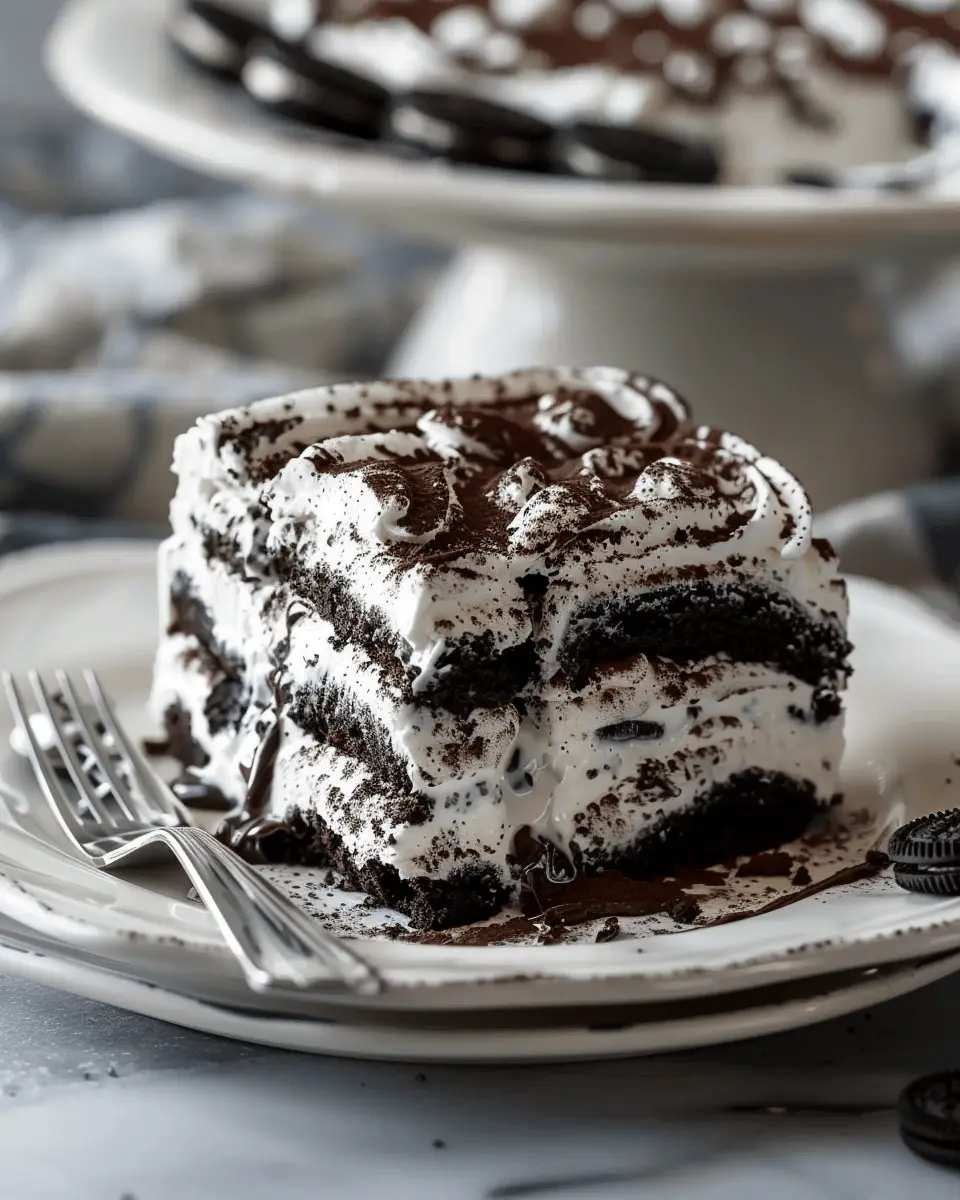
Introduction to Oreo Icebox Cake
When it comes to desserts that are both delicious and easy to prepare, the Oreo Icebox Cake stands out as a timeless favorite. This no-bake dessert is perfect for young professionals who are juggling busy schedules but still want to indulge in something sweet and satisfying. Imagine coming home after a long day at work, craving a delightful treat that doesn’t involve hours in the kitchen. The answer? This creamy, airy dessert that requires minimal effort and produces a deliciously impressive result.
Why Oreo Icebox Cake is the Perfect Dessert for Young Professionals
Life as a young professional can be hectic, filled with long hours and social commitments. Amidst all the chaos, finding time to bake can feel overwhelming. That’s where the Oreo Icebox Cake steps in to save the day. What makes this dessert so appealing?
- Minimal Ingredients: You only need a handful of ingredients—Oreos, cream, and a few others. This means less shopping and less stress.
- No Baking Required: Say goodbye to preheating the oven and washing endless baking dishes. Just layer your ingredients, pop it in the fridge, and let the magic happen!
- Last-Minute Versatility: Whether you have a potluck, a spontaneous dinner with friends, or simply want to impress your partner with a sweet treat, this cake is incredibly adaptable. You can use it as a base and add your personal touches: perhaps some fresh berries or a drizzle of chocolate sauce?
Curious about the origins of this layered delight? You might enjoy checking out this brief history of icebox cakes, where you’ll discover how this dessert has evolved over the years.
And here’s another perk: making an Oreo Icebox Cake means you can prepare it in advance and simply enjoy at your convenience. That way, when the dessert craving strikes, you’ve got a delicious, chilled treat ready to go—a dream for busy professionals!
In conclusion, if you’re looking for a dessert that is as delightful as it is effortless, the Oreo Icebox Cake is the winning choice. It allows you to indulge your sweet tooth without sacrificing precious time. So grab those Oreos, and let’s get baking—or chill-ing!
Ingredients for Oreo Icebox Cake
Creating a delicious Oreo Icebox Cake is simple, yet every layer brings a delightful surprise. Before diving into the recipe, let’s gather the essential ingredients you’ll need to craft this scrumptious dessert.
Key Ingredients
- Oreo Cookies: The star of the show! You’ll need about 36 whole cookies to create a luscious base and layers.
- Cream Cheese: Using 8 oz of softened cream cheese helps achieve that rich and creamy texture that pairs so well with the chocolate cookies.
- Whipped Topping: For a light and airy feel, grab 2 cups of cool whipped topping (like Cool Whip) to mix with the cream cheese.
- Milk: You’ll want 1 cup of milk to dip the Oreos in, allowing them to soften perfectly without losing their iconic flavor.
- Sugar: A touch of sweetness, about ½ cup of sugar, balances the flavors and enhances the cream cheese mixture.
Optional Additions
For an extra twist, consider adding:
- Chocolate Shavings: A handful will elevate the presentation.
- Fresh Berries: Strawberries or raspberries add a refreshing touch.
Whether you’re making this for a special occasion or just to treat yourself, gathering these ingredients is the first step towards indulgence. Ready to create some magic in your kitchen? Let’s keep the frosty fun going! For more ideas on how to indulge in delicious desserts, check out Epicurious for inspiration.
Step-by-Step Preparation for Oreo Icebox Cake
Creating a delicious Oreo Icebox Cake is like channeling your inner chef but without all the fuss. This playful dessert is not only a crowd-pleaser but also incredibly simple to prepare. Follow these steps, and you’ll have a delightful treat that’s perfect for any occasion!
Prepare the Whipped Cream
The first step in crafting your Oreo Icebox Cake is making the heavenly whipped cream that will serve as the cake’s foundation. You’ll need:
- 2 cups of heavy whipping cream
- 1/2 cup of powdered sugar
- 1 teaspoon of vanilla extract
-
Whip it good: In a mixing bowl, combine the heavy cream, powdered sugar, and vanilla extract. Using an electric mixer, whip the mixture on medium speed until soft peaks form. You want that light and airy texture—think cloud-like!
-
Taste test: Once it’s reached the right consistency, give it a gentle taste. You might want a bit more sweetness. Feel free to adjust the powdered sugar as per your preference.
Pro tip: If you’re interested in diving deeper into whipping techniques, check out Serious Eats for expert insights.
Layer the Cake
Next up is the layering process. This is where the magic really starts to happen!
-
Gather your ingredients: You’ll need a pack of Oreo cookies (or a generic chocolate sandwich cookie if you prefer) and your prepared whipped cream.
-
Dip those Oreos: Pour some milk into a shallow dish, and take each Oreo, dipping it quickly into the milk. You don’t want them soggy; just a quick dip will do the trick!
-
Lay the groundwork: Place a single layer of the dipped Oreos at the bottom of your serving dish. This will form the base of your cake.
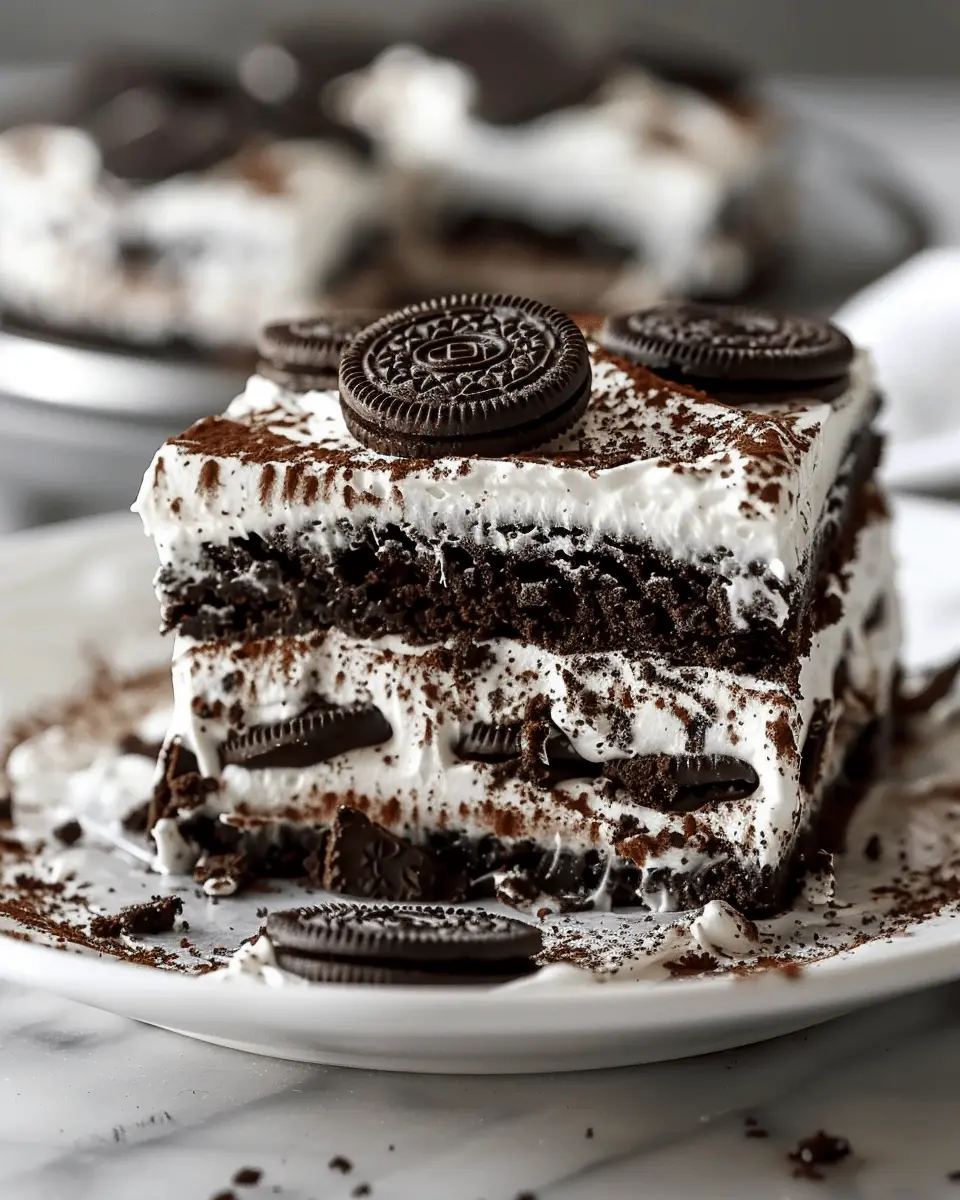
Build the Layers
Here’s where you get to stack up the goodness.
-
First creamy layer: Spread about one cup of your whipped cream over the first layer of Oreos. Make sure to cover them evenly so each cookie gets its share of that whipped perfection.
-
Add more cookies: Repeat the dipping and layering process. Layer the dipped Oreos and whipped cream until you reach your desired cake height—usually three to four layers. Finish with a layer of whipped cream on top. The beauty of this dessert is in its simplicity; there’s no need for perfection!
Chill the Cake
Now that your layers are built, it’s time for a bit of patience.
-
Wrap it up: Cover your Oreo Icebox Cake with plastic wrap or aluminum foil. This will help it set and meld flavors while chilling.
-
Refrigerate: Pop it into the fridge for at least four hours, but overnight is even better. The longer it sits, the more delicious it gets as the cookies soften beautifully.
Add the Chocolate Drizzle
Finally, let’s take this dessert over the top with a chocolate drizzle.
-
Melting magic: Melt about 1/2 cup of chocolate chips in the microwave. Heat in 30-second intervals, stirring in between until smooth and glossy.
-
Drizzle and shine: Once your Oreo Icebox Cake has chilled, remove it from the fridge. Use a spoon or a piping bag to drizzle the melted chocolate over the top. This not only adds flavor but makes your cake look stunning!
-
Slice and enjoy: Grab a sharp knife, cut yourself a generous slice, and savor every bite.
This Oreo Icebox Cake is a fantastic treat that’s sure to impress. Whether it’s a casual weeknight dessert or the centerpiece of a gathering, it’s bound to elicit smiles and tummy rumbles. So go ahead and indulge—life’s too short to skimp on sweetness!
Variations on Oreo Icebox Cake
Creating an Oreo Icebox Cake is a delightful way to indulge in something sweet, but why stop there? With a few creative twists, you can personalize this classic dessert to fit your taste. Here are some variations that are sure to impress!
Mint Oreo Icebox Cake
If you’re a fan of the classic mint and chocolate combo, the Mint Oreo Icebox Cake is your calling. Simply swap out traditional Oreos for mint-flavored Oreos. The minty aroma paired with rich, creamy layers creates an experience akin to enjoying a refreshing mint chocolate chip ice cream. For an extra kick, add a drop of mint extract to the whipped cream. Voilà—summer in dessert form!
Peanut Butter Oreo Icebox Cake
For those who believe everything tastes better with peanut butter, this variation is sure to be a hit. Use peanut butter-filled Oreos and mix a spoonful of creamy peanut butter into your whipped cream. The result is a Peanut Butter Oreo Icebox Cake that perfectly balances the chocolate and nutty flavors. You can also sprinkle chopped peanuts on top to add texture and a little extra crunch.
Golden Oreo Icebox Cake
Want something a bit lighter? The Golden Oreo Icebox Cake offers a delightful vanilla flavor that’s perfect for a sunny day. Replace regular Oreos with Golden Oreos and layer in some vanilla pudding between the layers of cookies. This combination lends a milder sweetness that’s incredibly satisfying. You can even incorporate layers of fresh fruit like berries for a colorful touch!
Whichever version you choose, these variations on the classic Oreo Icebox Cake will satisfy your cravings while adding a fun twist to your dessert repertoire! If you’re curious about creating unique icebox cake recipes, check out this collection of creative twists for more inspiration.
Cooking Tips and Notes for Oreo Icebox Cake
When making an Oreo Icebox Cake, simplicity is key, but a few tips can elevate your dessert game. First, choose your cookies wisely—regular Oreos work beautifully, but don’t hesitate to experiment with flavored varieties for an exciting twist. Try using double-stuffed Oreos for extra creaminess or even mint Oreos for a refreshing spin.
Preparation is everything. Make sure you allow the cake to chill for at least four hours—or even overnight—for the flavors to meld perfectly. The cream will soften the cookies, giving that signature cake-like texture. Also, if you’re feeling creative, top your cake with whipped cream or chocolate shavings for a delightful finish.
Finally, consider serving individual portions in mason jars for a fun presentation. This not only looks fabulous but makes portion control a breeze. For more ideas on layering desserts, check out this article. Enjoy crafting your Oreo Icebox Cake!
Serving Suggestions for Oreo Icebox Cake
When it comes to enjoying your Oreo Icebox Cake, the possibilities for serving are as delightful as the dessert itself. Here are some ideas to elevate your cake experience:
Choose the Perfect Accompaniments
Pairing your Oreo Icebox Cake with complementary flavors can enhance the dessert’s rich, creamy profile. Consider serving it with:
-
Fresh Berries: Strawberries, raspberries, or blueberries add a burst of freshness and a hint of acidity that balances the creaminess.
-
Whipped Cream: A dollop on top not only looks appealing but also adds an airiness that cuts through the density of the cake.
-
Chocolate Sauce: Drizzling some chocolate sauce can take your dessert to the next level, giving it an indulgent touch.
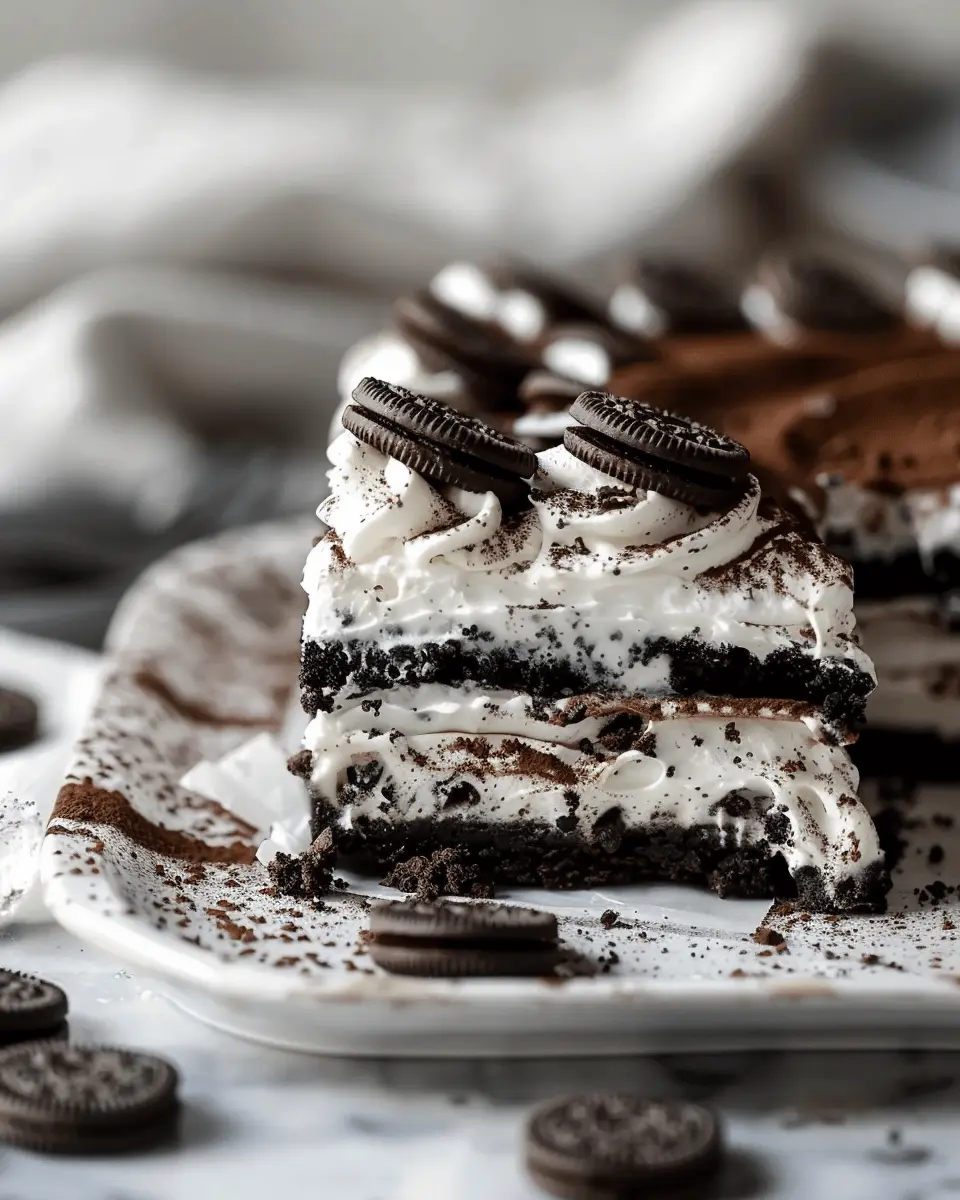
Presentation Matters
For a more elegant touch, try plating your Oreo Icebox Cake in individual servings. Slice the cake into squares, and plate them on dessert dishes. Garnish with a sprinkle of crushed Oreos or mint leaves for a pop of color.
Perfect Pairing with Beverages
You can serve your cake alongside a refreshing glass of iced coffee or cold brew. The coffee’s boldness will perfectly complement the sweetness of the cake.
By paying attention to these serving suggestions, you’ll not only impress your guests but also make your Oreo Icebox Cake a memorable centerpiece for any occasion. For more creative dessert pairings, check out this article from Serious Eats for extra inspiration!
Time Breakdown for Oreo Icebox Cake
Preparation Time
Creating your delicious Oreo Icebox Cake is super simple with only about 20 minutes of prep. You’ll spend this time gathering ingredients, assembling the layers, and getting everything ready to chill.
Chill Time
After assembling, patience is key—your cake needs at least 4 hours in the fridge (or overnight if you can wait!). This chilling time allows the layers to meld and create that signature creaminess.
Total Time
So, if you add it all up, you’re looking at a total commitment of around 4 hours and 20 minutes from prep to plate. A true crowd-pleaser, this cake is worth every minute! Enjoy making your memories, and for more tips on no-bake desserts, check out sites like Serious Eats for inspiration.
Nutritional Facts for Oreo Icebox Cake
When you’re whipping up this delightful Oreo Icebox Cake, it’s good to know what you’re indulging in.
Calories
A slice of this indulgent cake typically has around 300 calories. This makes it a rich treat that can fit into your dessert plans without tipping the scales.
Protein
Oreo Icebox Cake isn’t exactly a protein powerhouse, offering about 4 grams per serving. If you’re looking for a post-workout snack, consider pairing it with some Greek yogurt to boost that protein intake!
Sugars
This scrumptious dessert contains approximately 25 grams of sugar. While it satisfies your sweet tooth, keeping an eye on added sugars is always wise, especially if you’re managing your overall sugar intake. If you’d like to dive deeper into understanding sugar’s effects on your health, the American Heart Association provides some fantastic resources.
Feeling inspired yet? Keep these nutritional facts in mind as you enjoy your delicious cake!
FAQs about Oreo Icebox Cake
How long can you keep Oreo Icebox Cake in the fridge?
Once you’ve whipped up your delicious Oreo Icebox Cake, you can expect it to stay fresh in the fridge for about 3 to 5 days. It’s best stored in an airtight container, which helps retain its creamy texture and unique flavors. If you notice any signs of spoilage, like odd smells or a change in texture, it’s best to err on the side of caution and discard it.
Can I make Oreo Icebox Cake ahead of time?
Absolutely! In fact, making an Oreo Icebox Cake in advance can enhance its flavor. Preparing it the day before allows the layers to meld beautifully. Just make sure you cover it well before putting it in the fridge. If you’re hosting a gathering or simply want to treat yourself, this make-ahead recipe is a lifesaver.
What are some good substitutes for Oreos in this recipe?
If you’re feeling adventurous or have dietary preferences, you can totally switch things up! Here are a few great substitutes for Oreos in your Oreo Icebox Cake:
- Chocolate wafers: These can bring a similar crunch and flavor to your cake.
- Graham crackers: A classic choice that adds a subtle sweetness.
- Pepperidge Farm Milano cookies: If you want a fancier spin, these chocolate-filled cookies offer a delightful twist.
Feel free to experiment! The important thing is to find a cookie that complements the creamy layers. And if you’re interested in more creative ideas, check out Food Network for inspiration on cookie substitutions.
Happy baking!
Conclusion on Oreo Icebox Cake
In wrapping up our scrumptious journey with the Oreo Icebox Cake, it’s clear that this dessert is ideal for any gathering or cozy night in. The layers of rich cream and flavorful Oreos create a delightful treat that’s surprisingly easy to make. Simply prepare it ahead of time and let it chill, allowing the flavors to meld beautifully.
Whether you’re hosting friends or enjoying a quiet evening, this cake is sure to impress. Don’t hesitate to customize it with your favorite toppings or modifications. So grab some Oreo cookies and whip up this delicious dessert—you won’t regret it!
For more delectable dessert ideas, check out this collection of no-bake desserts that will satisfy your sweet tooth.
Oreo Icebox Cake: The Easy Indulgence You’ll Love Making

Oreo Icebox Cake is a no-bake dessert that combines creamy layers with crunchy cookie goodness, perfect for any occasion!
- Prep Time: 20 minutes
- Total Time: 4 hours 20 minutes
- Yield: 8 servings 1x
- Category: Dessert
- Method: No-bake
- Cuisine: American
- Diet: Vegetarian
Ingredients
- 2 packs Oreo cookies
- 1 cup heavy cream
- 1 cup cream cheese
- 1/2 cup powdered sugar
- 1 teaspoon vanilla extract
Instructions
- In a bowl, whip the heavy cream until stiff peaks form.
- In another bowl, beat cream cheese with powdered sugar and vanilla until smooth.
- Fold the whipped cream into the cream cheese mixture.
- In a baking dish, layer Oreo cookies and the cream mixture, repeating until all ingredients are used.
- Refrigerate for at least 4 hours before serving.
Notes
- Allow the cake to chill overnight for best results.
- Feel free to add chopped Oreos for extra texture.
Nutrition
- Serving Size: 1 slice
- Calories: 320
- Sugar: 25g
- Sodium: 200mg
- Fat: 22g
- Saturated Fat: 12g
- Unsaturated Fat: 8g
- Trans Fat: 0g
- Carbohydrates: 30g
- Fiber: 1g
- Protein: 3g
- Cholesterol: 60mg
Keywords: Oreo Icebox Cake, no-bake dessert, easy recipe