Introduction to Easy Vintage Heart Cake
The Allure of Vintage Baking
There’s something incredibly inviting about vintage baking, isn’t there? The delicious aroma of freshly baked goods wafting from the oven can instantly transport you back to simpler times. The appeal of creating an easy vintage heart cake lies not only in the delightful taste but also in the memories it conjures. Whether it’s a special occasion or just a treat for yourself, baking a heart cake connects generations, invoking nostalgia with each slice.
Vintage recipes often come with whimsical anecdotes and delightful techniques that have been passed down through families, creating a rich tapestry of culinary history. Think about it: the love shared over a grandmother’s cherished cake recipe can inspire you to whip up your own version in a modern kitchen. Plus, vintage cakes tend to be light and fluffy, owing to the wholesome fats and simple ingredients that make them irresistibly moist.
Did you know that the simplicity of vintage recipes often leads to healthier alternatives? Many vintage cakes rely on essential pantry staples like flour, sugar, and butter, skipping the processed ingredients found in today’s baking mixes. For example, using Turkey Bacon in savory recipes elevates your dish without compromising on flavor, allowing you to maintain a balance between classic and contemporary.
Why Choose an Easy Vintage Heart Cake?
Opting for an easy vintage heart cake is an excellent way to share your passion for baking without feeling overwhelmed. It’s a heartfelt gesture for birthdays, anniversaries, or just because! The recipe breaks down ingredients and techniques into manageable steps, making it accessible for even the novice baker.
Here’s what you can look forward to in this easily adaptable recipe:
- Simple Ingredients: Most of the components are probably already in your pantry.
- Customizable Designs: With a few flourishes, you can make it as simple or elaborate as you desire.
- Perfect for Sharing: It’s an ideal treat to share with friends, family, or even coworkers to brighten their day.
Are you curious about tips from baking enthusiasts? You can explore some incredible advice on resources like BBC Good Food or Allrecipes. Embracing a vintage cake tradition doesn’t just fill the belly; it also warms the heart, making it a recipe worth trying. Get ready to roll up your sleeves and dive into the whimsical world of easy vintage baking!
Ingredients for Easy Vintage Heart Cake
Essential ingredients you’ll need
Creating a delectable easy vintage heart cake requires a few basic yet essential ingredients that you likely have in your pantry. Gather these staples to kick off your baking adventure:
- 1½ cups all-purpose flour – This is the backbone of your cake.
- 1 cup granulated sugar – For that sweet touch.
- ½ cup unsalted butter – Adds richness; make sure it’s at room temperature!
- 2 large eggs – Eggs bind the ingredients together.
- 1 teaspoon baking powder – To create that lovely rise.
- ½ cup whole milk – Keeps the cake moist and tender.
- Vanilla extract – A splash adds delightful flavor.
Optional ingredients for customization
Want to put your creative spin on the easy vintage heart cake? Here are some fun optional ingredients to consider:
- Food coloring – For a vibrant cake or whimsical designs.
- Fresh fruits or nuts – Think berries or chopped walnuts for added texture.
- Frosting or whipped cream – Elevate your cake with a creamy topping.
- Sprinkles or edible glitter – To make your cake look even more special!
Baking can be a delightful experience, and customizing your cake makes it uniquely yours! For more inspiration, check out this resource on creative baking techniques that will elevate your baking game. Happy baking!
Step-by-Step Preparation for Easy Vintage Heart Cake
Creating an easy vintage heart cake can be a delightful experience, perfect for special occasions or just to enjoy with loved ones. Let’s walk through the preparation step by step to ensure your cake turns out nothing short of scrumptious!
Gather Your Tools and Ingredients
Before diving into the magical world of baking, first, you’ll need to gather all your essentials. A well-prepared baker is a happy baker! Here’s what you’ll need:
Tools:
- Heart-shaped cake pans (two)
- Mixing bowls
- A whisk or electric mixer
- Offset spatula
- Piping bags (optional for decoration)
- Cake stand or serving plate
Ingredients:
- 2 cups all-purpose flour
- 1 ½ cups granulated sugar
- ½ cup unsalted butter, softened
- 1 cup milk
- 3 ½ tsp baking powder
- 2 eggs
- 1 tsp vanilla extract
- ½ tsp salt
- Frosting (store-bought or homemade—more on this later!)
Having everything ready not only streamlines the process but also heightens the excitement. Plus, if you’re looking for excellent ingredient sources, check out King Arthur Baking for quality options.
Crumb-Coating Your Cake
Now that you have your ingredients, it’s time to create the base for your easy vintage heart cake. After baking your cake according to the recipe (remember to let it cool completely), the first step is the crumb-coating.
- Trim the Tops: Level any domed tops with a serrated knife to ensure a flat surface.
- First Layer of Frosting: Take a dollop of frosting and place it on one of your layers. Spread it evenly.
- Assemble the Layers: Stack the second layer on top, gently pressing down to secure.
- Apply Crumb Coat: Using a spatula, spread a thin layer of frosting around the entire cake. This acts like a seal, capturing any crumbs—hence “crumb-coating.” Don’t worry about perfection; this is just the base.
Crumb-coating not only creates a beautiful finish but also prevents those pesky crumbs from showing in your final layer of frosting.
Perfecting the Frosting Layer
Once your cake is crumb-coated and has chilled for about 30 minutes, it’s time for the real frosting magic! This layer is where your cake’ll truly shine.
- Choose Your Frosting Wisely: Whether you opt for a classic buttercream or a velvety cream cheese frosting, make sure it’s smooth and spreadable.
- Generous Application: Using your offset spatula, apply frosting liberally over the entire cake. Work from the top downward, smoothing out the sides as you go.
Don’t forget—this is an opportunity to get creative! You can always add food coloring to your frosting for a fun twist.
Smoothing Techniques for a Polished Look
To achieve that bakery-level finish on your easy vintage heart cake, a few smoothing techniques can be your best friends:
- Hot Spatula Trick: Dip your offset spatula in hot water and wipe it dry. Use it to smooth the frosting out, which will create a beautiful, glossy finish. This method helps meld the frosting edges seamlessly.
- Offset Spatula Control: Use the spatula to create gentle waves or patterns for a touch of character that’s still charming!
These simple hacks can elevate your cake’s presentation, making it look like it came straight from a pastry chef.
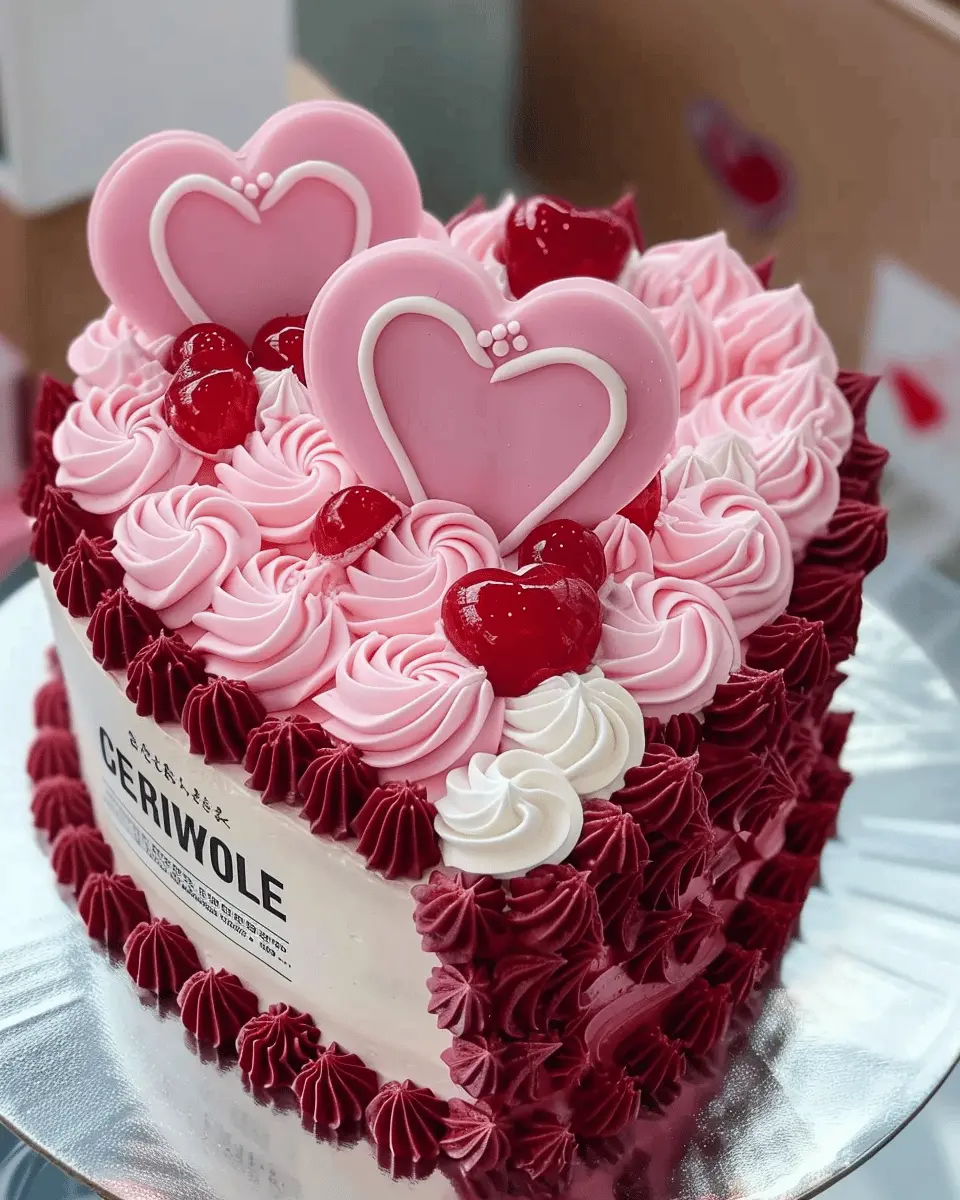
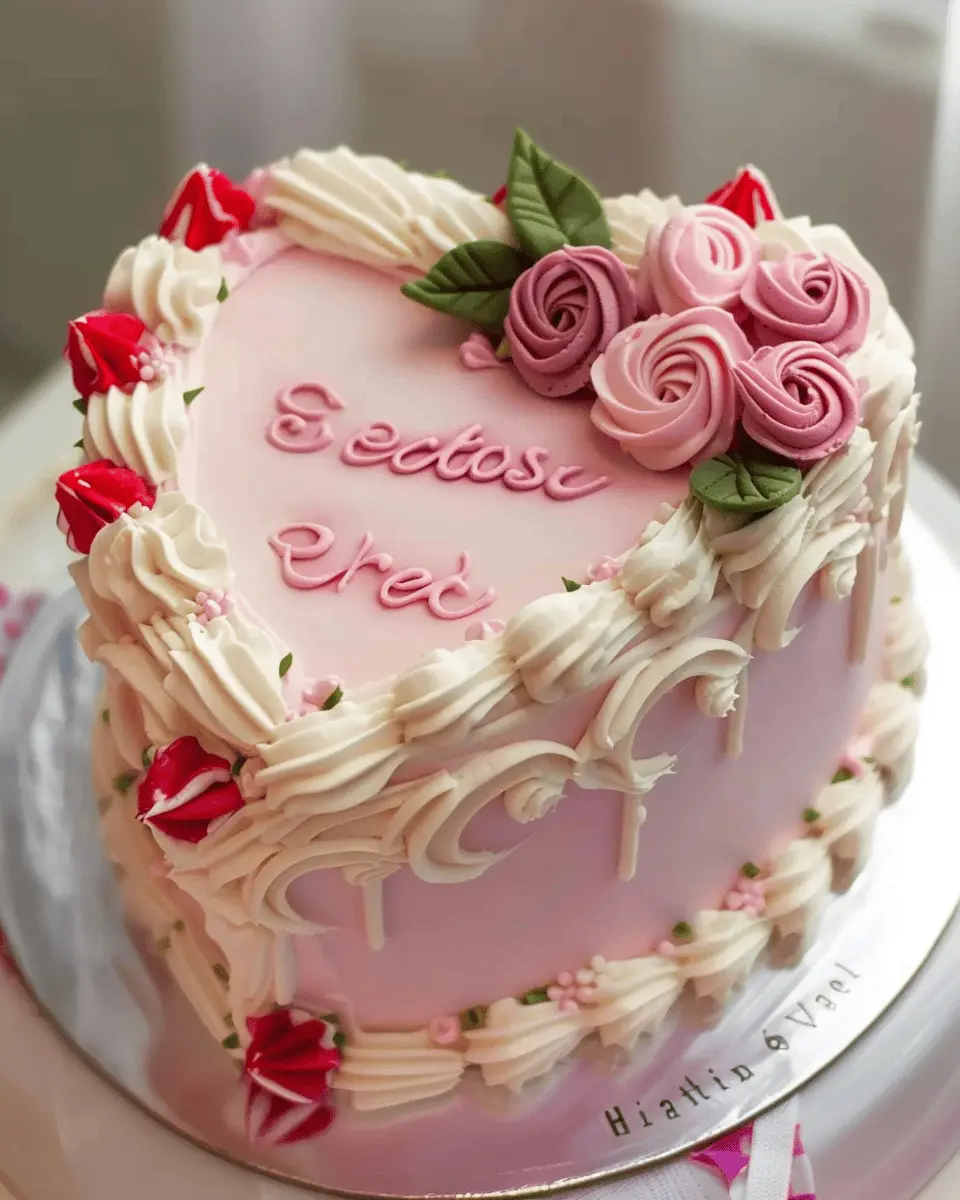
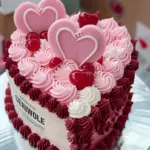
Adding Decorative Elements
Finally, to truly bring your easy vintage heart cake to life, it’s time for the decorative flair!
- Cherries: Top your cake with fresh cherries for that classic vintage look. Not only are they visually appealing, but they also add a pop of flavor.
- Chocolate Letters: Using melted chocolate, pipe out sweet messages or designs. If you’re feeling nostalgic, a simple “Love” or “Sweethearts” would fit perfectly.
Remember, when it comes to decorations, less is often more. A few well-placed elements can bring your cake together without overwhelming it.
Crafting an easy vintage heart cake isn’t just about following a recipe; it’s about enjoying the process and making memories along the way! So, don’t rush—savor each step, and your final creation will be as sweet as the occasion it celebrates. Happy baking!
Variations on Easy Vintage Heart Cake
Exploring variations of the classic easy vintage heart cake can transform a simple dessert into something uniquely memorable. Whether you’re celebrating Valentine’s Day or just want to impress guests, these delightful twists will keep your baking exciting and fun.
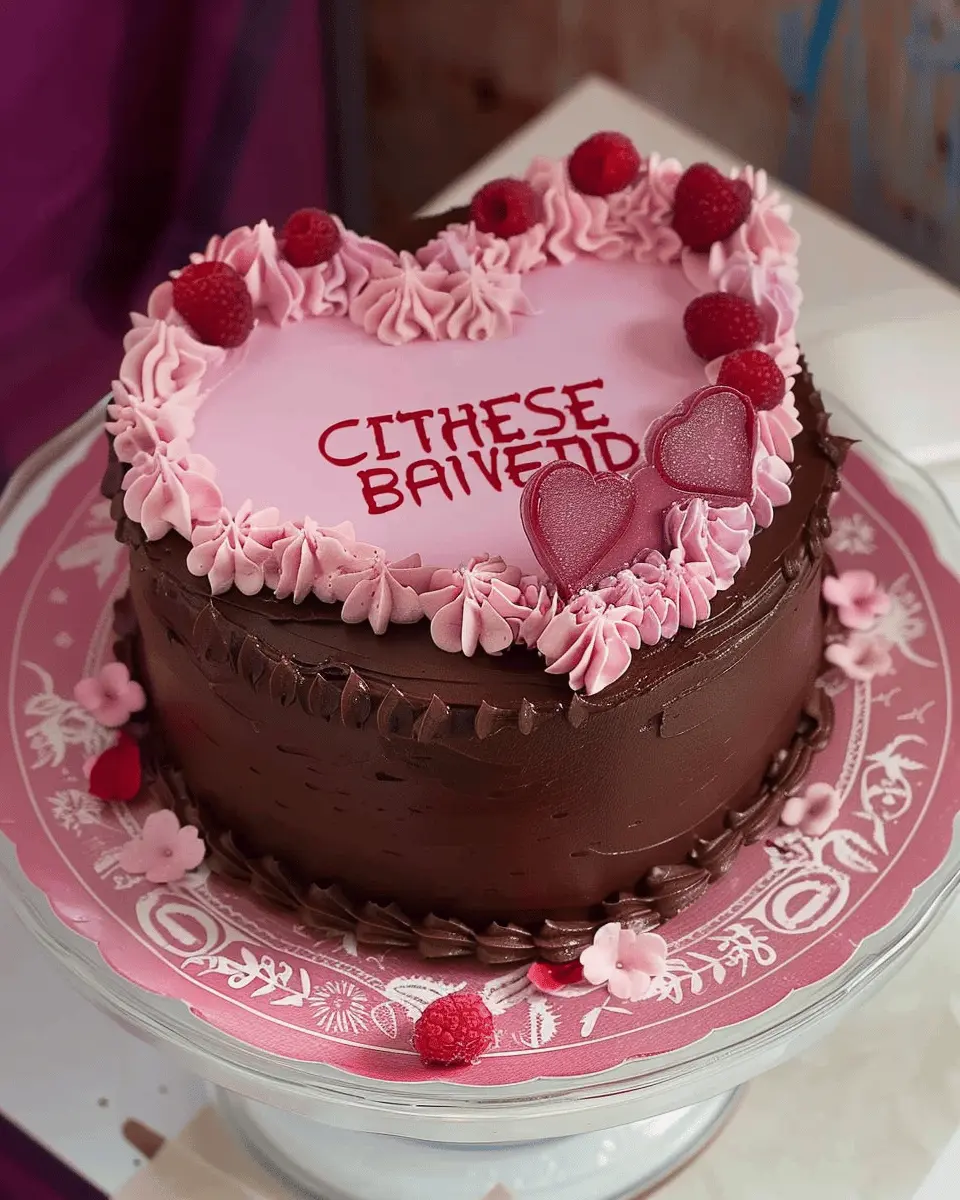
Red Velvet Vintage Heart Cake
Imagine the rich, moist texture of a red velvet vintage heart cake. With its vibrant color and cream cheese frosting, this cake is not just a feast for the taste buds but a visual treat as well. Here’s how to make your own:
- Ingredients: Use cocoa powder and red food coloring in your batter.
- Frosting: Whip up a cream cheese frosting to complement the subtle chocolate flavor.
- Presentation: Decorate it with edible gold leaf or berries for an extra touch of elegance.
Why settle for ordinary when you can go for extraordinary? This variant adds a touch of sophistication that’s perfect for any romantic occasion.
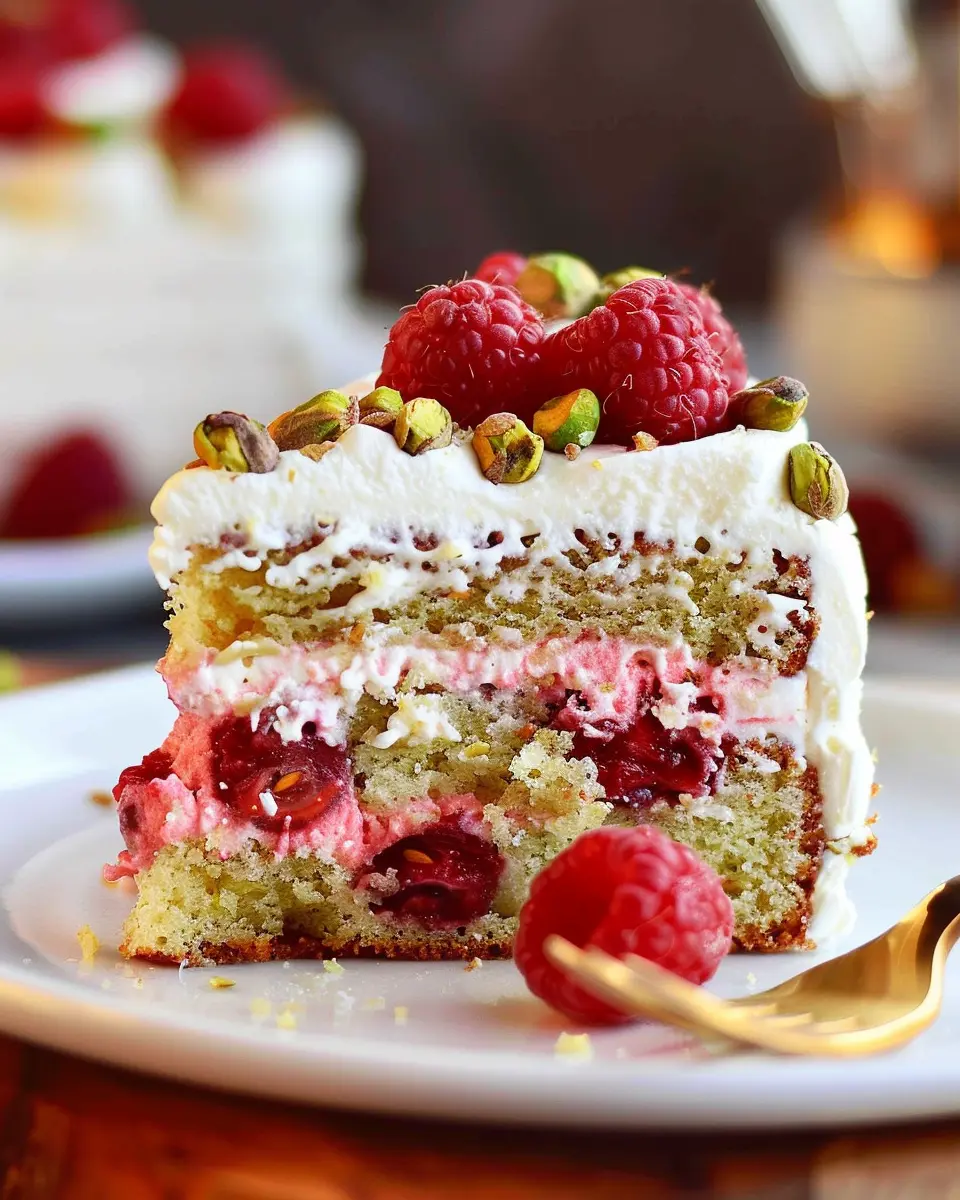
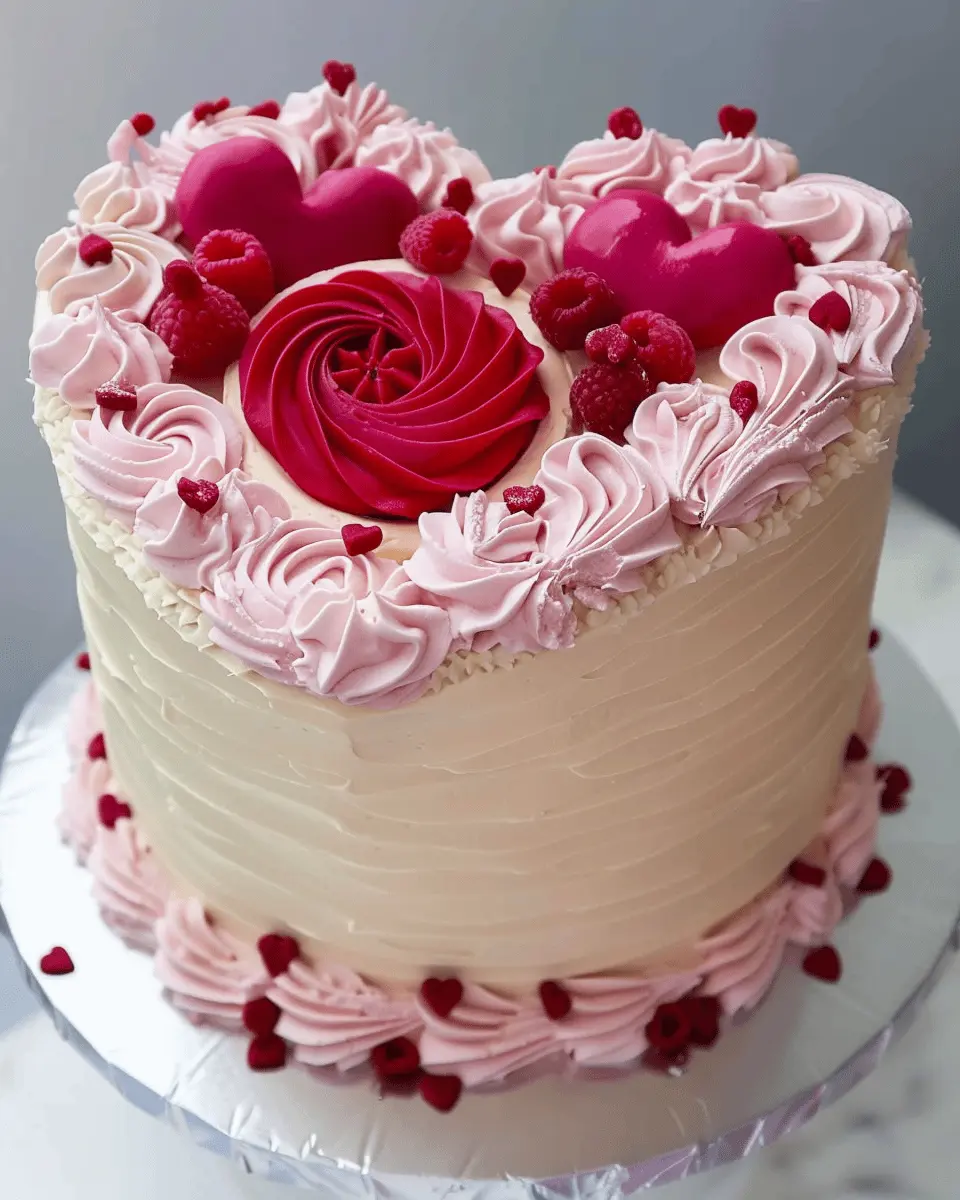
Chocolate Vintage Heart Cake
For chocolate lovers, a chocolate vintage heart cake is the perfect indulgence. It’s simple to create and sure to impress anyone with a sweet tooth:
- Ingredients: Incorporate high-quality cocoa for a rich flavor.
- Layers: Consider adding layers of ganache or chocolate mousse between the cake layers for a decadent experience.
- Garnish: Top with chocolate shavings or fresh raspberries to elevate its charm.
Did you know that chocolate is considered a mood booster? Unleashing your inner chocolatier can be quite rewarding, especially when you share it with loved ones.
For more tips on cake variations, check out sources like Cooking Light and BBC Good Food. With these variations, your easy vintage heart cake can become a delightful centerpiece for any occasion!
Cooking Tips and Notes for Easy Vintage Heart Cake
Common mistakes to avoid
When baking your easy vintage heart cake, one of the most common pitfalls is overmixing the batter. Stir until just combined to keep your cake light and fluffy. Be sure not to skip the room temperature ingredients! Cold butter or eggs can lead to a dense texture. Don’t forget to properly grease your heart-shaped pan; a little shortening or cooking spray goes a long way in preventing sticking.
Ensuring your frosting is the right consistency
A luscious frosting is key to elevating your easy vintage heart cake. If your frosting feels too thick, add a teaspoon of milk at a time until it’s spreadable. Conversely, if it’s too runny, incorporate powdered sugar gradually to thicken it. A classic buttercream with a creamy texture makes for perfect decorating—try this buttercream recipe from King Arthur Baking. Always taste as you go; it should be just sweet enough to complement the cake without overpowering it.
With these tips, your celebration-ready cake is sure to impress!
Serving Suggestions for Easy Vintage Heart Cake
Pairing with Coffee or Tea
One of the simplest ways to enjoy your easy vintage heart cake is alongside a warm cup of coffee or your favorite tea. The cake’s delightful sweetness harmonizes beautifully with the rich flavors of coffee. For tea lovers, consider pairing it with a floral or fruit-infused tea, as these delicate notes will enhance the cake’s nostalgic charm. If you’re looking for a specific suggestion, a classic Earl Grey or a refreshing chamomile can elevate your snack time.
Making it a Centerpiece for Special Occasions
Why not make your easy vintage heart cake the star of your next gathering? Whether it’s a birthday, anniversary, or a cozy get-together, this cake can serve as a stunning centerpiece. You can decorate it with fresh flowers or seasonal fruits to match the occasion, and if you’re feeling creative, add a personalized cake topper that speaks to the event’s theme. Your guests will surely be impressed and might even ask for the recipe! For more ideas on cake decorations and presentations, check out this comprehensive guide.
With these thoughtful serving suggestions, your easy vintage heart cake will not only taste fantastic, but it will also elevate any event!
Time Breakdown for Easy Vintage Heart Cake
When it comes to creating an easy vintage heart cake, understanding the time it takes is just as crucial as the recipe itself. This section breaks down the timing for you, ensuring a smooth baking experience!
Preparation Time
Expect to spend about 20-30 minutes prepping your ingredients. From measuring flour to mixing in those lovely vintage flavors, this is your moment to shine. This step is essential, as it sets the stage for your delightful creation.
Baking Time
If you’re using a standard oven, the baking time is about 25-30 minutes. Make sure to keep an eye on your cake, testing it with a toothpick; it should come out clean when it’s ready.
Total Time
In total, you’re looking at roughly 50-60 minutes from start to finish. So grab your apron and enjoy the process! For more baking tips, check out resources from King Arthur Baking or Serious Eats. Happy baking!
Nutritional Facts for Easy Vintage Heart Cake
Calories per slice
When you whip up this easy vintage heart cake, you might be pleasantly surprised to learn that each slice contains approximately 200 calories. This makes it an indulgent yet manageable treat for those special occasions. Just imagine serving this delightful cake at a gathering—who wouldn’t want to savor a slice?
Key nutritional components
Not only is this cake delicious, but it also packs some essential nutrients:
- Carbohydrates: The cake primarily consists of carbohydrates, providing a necessary energy boost.
- Fats: Each slice has about 8 grams of fat, making it rich and satisfying.
- Protein: It offers around 3 grams of protein, contributing to a balanced snack.
- Vitamins and minerals: Ingredients like eggs and milk used in the recipe deliver vitamins A, D, and B12, as well as calcium.
For more detailed nutritional insights, you can visit Healthline or Nutrition.gov. The combination of flavor and nutrition in an easy vintage heart cake makes it a fabulous choice for any dessert table.
FAQs about Easy Vintage Heart Cake
When it comes to baking the easy vintage heart cake, a few common questions often arise. We’re here to tackle these and ensure you have all the information you need for a delightful baking experience!
What are the best storage methods for vintage cakes?
To keep your easy vintage heart cake fresh and delicious, proper storage is key. Here’s how to do it:
- Room Temperature: Store the cake in an airtight container at room temperature for up to three days. This helps maintain its moisture and flavor.
- Refrigeration: If you need to keep it longer, you can refrigerate it for up to a week. Just make sure it’s well-wrapped to avoid drying out.
- Freezing: For extended storage, freeze the cake. Slice it into portions, wrap each piece tightly in plastic wrap, then place them in a freezer-safe bag. It can last for up to three months, ready for a future celebration!
Can I make this cake ahead of time?
Absolutely! Preparing your easy vintage heart cake ahead of time can save you stress when it comes time to serve. You can bake and cool the cake a day in advance. Just remember to wrap it well or store it in an airtight container. This lets the flavors meld beautifully overnight!
How do I customize the cake flavors?
One of the delightful aspects of the easy vintage heart cake is its versatility! Feel free to experiment with different flavors:
- Extracts: Swap vanilla extract for almond, lemon, or coconut for a unique twist.
- Fruits: Add fresh berries, zests, or even pureed fruits to the batter for added flavor.
- Toppings: Switch up the frosting with cream cheese, chocolate, or even a whipped ganache.
With these tips, your cake will be uniquely yours! For more baking tips, check out this expert advice on baking for inspiration. Happy baking!
Conclusion on Easy Vintage Heart Cake
Embracing the Joy of Homemade Baking
Baking your own desserts can be an incredibly fulfilling experience, and the easy vintage heart cake is no exception. Not only does it allow you to channel your creativity, but it also fills your home with comforting aromas that make memories come alive.
When you whip up this delightful cake, you’re not just creating a treat—you’re crafting moments to share with loved ones. Did you know that baking has been linked to enhanced well-being and stress relief? According to studies, engaging in this creative process can help boost your mood.
So, grab that mixing bowl and enjoy the delightful journey of baking your own easy vintage heart cake. Celebrate life, love, and kindness, one slice at a time.
PrintEasy Vintage Heart Cake: A Delightful Recipe to Cherish
Discover the delightful flavors of the Easy Vintage Heart Cake, a perfect treat for any occasion.
- Prep Time: 20 minutes
- Cook Time: 30 minutes
- Total Time: 50 minutes
- Yield: 1 cake 1x
- Category: Dessert
- Method: Baking
- Cuisine: American
- Diet: Vegetarian
Ingredients
- 2 cups all-purpose flour
- 1 and 1/2 cups granulated sugar
- 1 cup unsalted butter, softened
- 4 large eggs
- 1 cup whole milk
- 2 and 1/2 teaspoons baking powder
- 1 teaspoon vanilla extract
- 1/4 teaspoon salt
Instructions
- Preheat your oven to 350°F (175°C) and grease two heart-shaped baking pans.
- In a large bowl, cream together the butter and sugar until light and fluffy.
- Add the eggs one at a time, beating well after each addition.
- Mix in the vanilla extract.
- In another bowl, whisk together the flour, baking powder, and salt.
- Gradually add the dry ingredients to the wet ingredients, alternating with the milk, until the batter is smooth.
- Divide the batter evenly between the prepared pans.
- Bake for 25-30 minutes, or until a toothpick inserted into the center comes out clean.
- Allow the cakes to cool in the pans for 10 minutes before transferring them to a wire rack to cool completely.
Notes
- For added flavor, consider adding a tablespoon of lemon zest to the batter.
- This cake can be frosted with your favorite frosting or served plain with whipped cream.
Nutrition
- Serving Size: 1 slice
- Calories: 350
- Sugar: 28g
- Sodium: 200mg
- Fat: 16g
- Saturated Fat: 10g
- Unsaturated Fat: 4g
- Trans Fat: 0g
- Carbohydrates: 45g
- Fiber: 1g
- Protein: 4g
- Cholesterol: 80mg
Keywords: Easy Vintage Heart Cake, cake recipe, vintage cake, heart-shaped cake