Introduction to Easter Nest Cake
If you’re looking for a show-stopping dessert to celebrate the arrival of spring, the Easter Nest Cake should be right at the top of your list. Simple yet enchanting, this delightful cake encapsulates the joy of the season with its playful design and rich flavors. But what makes it a beloved springtime treat?
Why is the Easter Nest Cake a Springtime Favorite?
Spring is a time of renewal, and the Easter Nest Cake embodies that spirit perfectly. Its vibrant colors and whimsical presentation remind us of blooming flowers, chirping birds, and, of course, Easter festivities. As families gather to celebrate, this cake acts as a centerpiece—bringing everyone together over delicious flavors and creative designs.
-
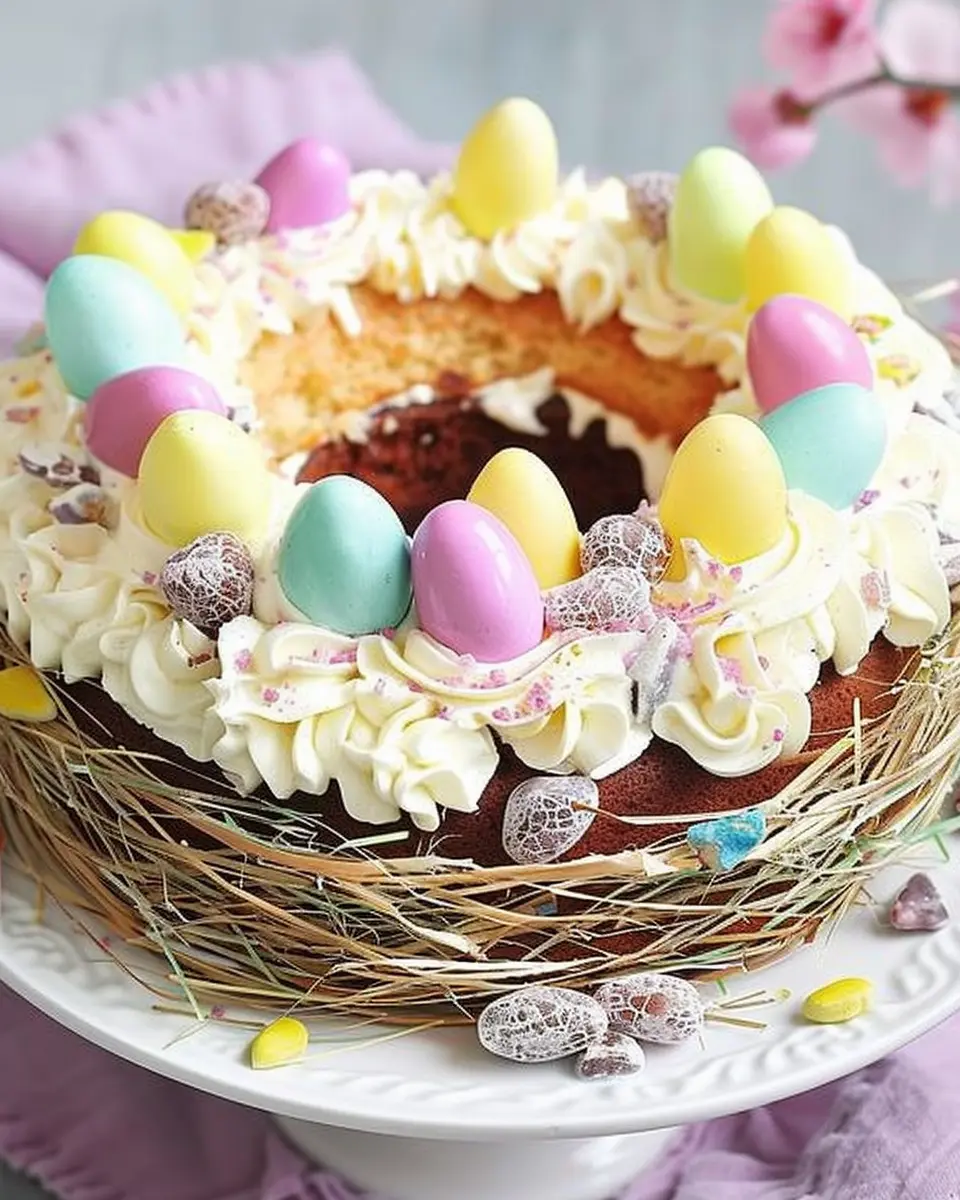
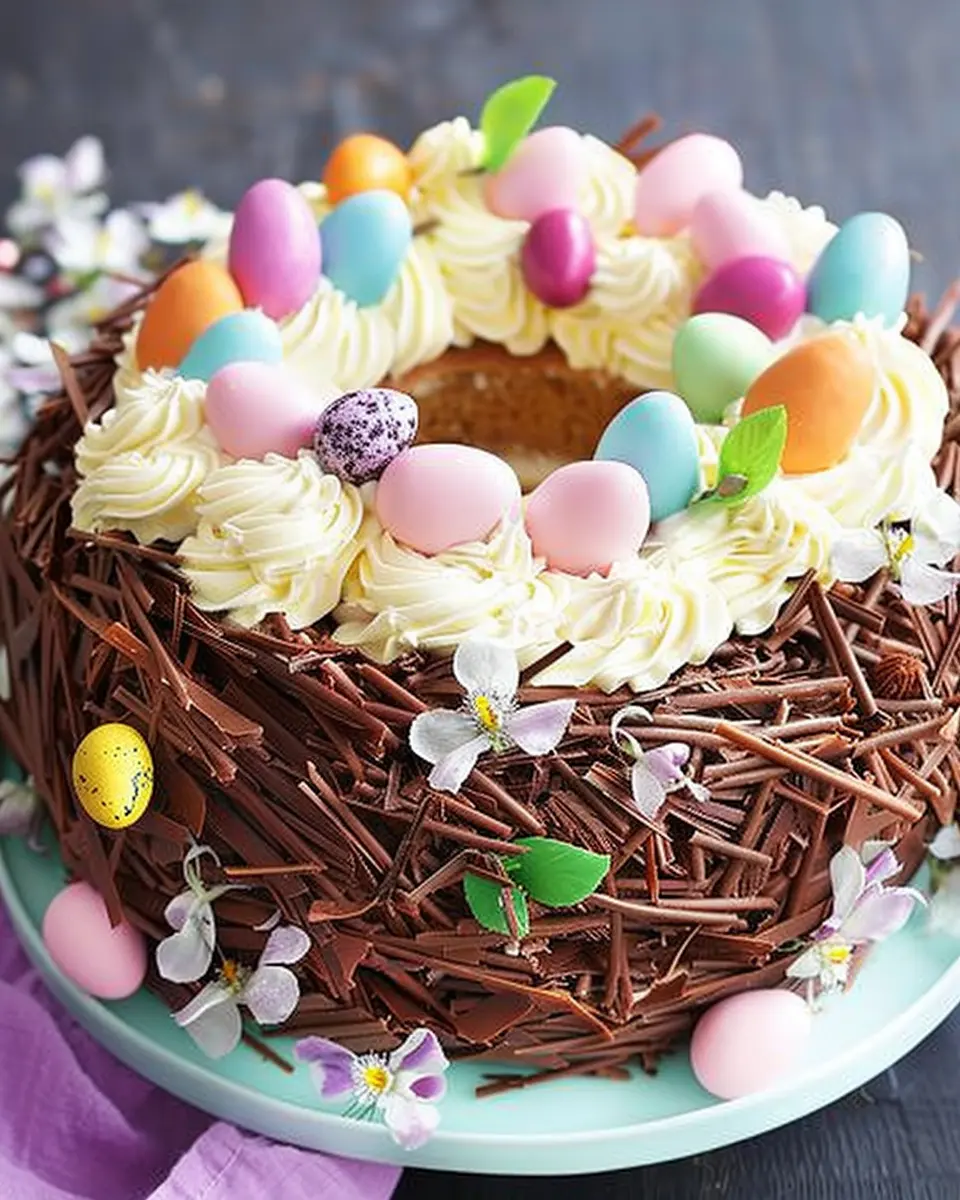
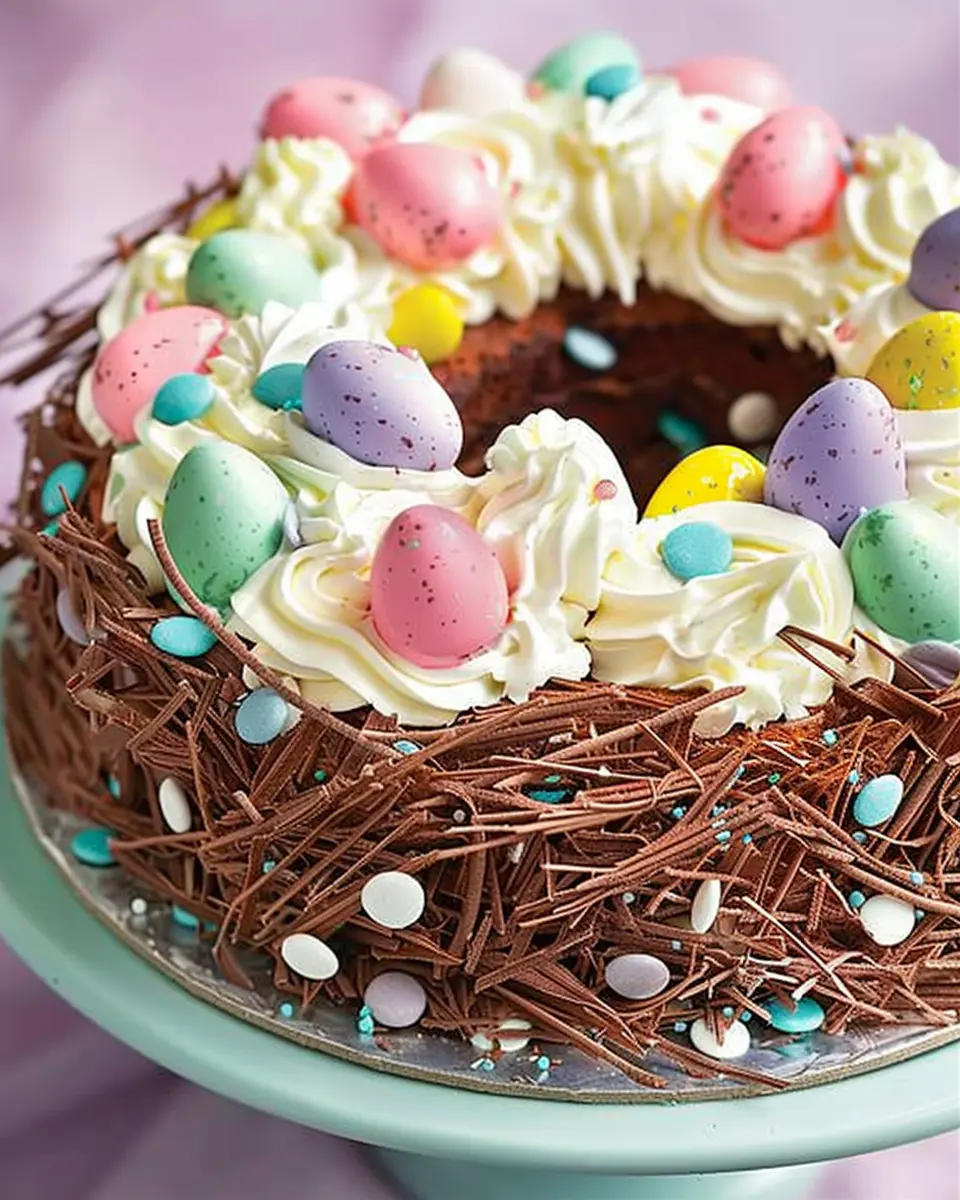
Visual Appeal: The cake mimics a nest filled with colorful candies or chocolates that resemble eggs, which is simply irresistible. Not only does it taste good, but it also makes for a great Instagram moment! You can learn more about creating captivating presentations from sources like the American Culinary Federation.
-
Versatile Flavor: Whether you love chocolate, vanilla, or a fruity twist, the Easter Nest Cake can be adapted to suit any palate. This versatility ensures every guest leaves with a smile.
-
A Tradition in the Making: Many families have started baking this cake as a yearly tradition, adding their own twists—from different frosting flavors to personal decoration styles. Have you considered making it your own?
Statistically speaking, desserts that engage both the eyes and the taste buds tend to create lasting memories. According to food psychology experts, visually appealing treats foster shared experiences and enhance our enjoyment of food. There’s something about enjoying a beautifully decorated cake that ignites joy and nostalgia.
Whether you’re hosting a festive brunch or treating loved ones to a sweet surprise, the Easter Nest Cake offers a delightful way to embrace the season. So roll up your sleeves—let’s create a charming springtime dessert that everyone will love. Stay tuned for our upcoming recipe!
Ingredients for Easter Nest Cake
Essential ingredients for a delightful treat
When whipping up your Easter Nest Cake, there are several key ingredients that will ensure your treat is both delicious and visually stunning. Here’s what you’ll need:
- Cake mix: Your favorite flavor will work wonders—chocolate, vanilla, or even lemon for a fresh twist.
- Eggs: Essential for binding the mixture together.
- Vegetable oil: Adds moisture and richness.
- Water or milk: To enhance the batter’s texture.
- Chocolate frosting: Perfect for the nest to hold everything together.
- Coconut flakes: Use sweetened or unsweetened to mimic nests, depending on your preference.
- Chocolate eggs: These little candies will be your decorative toppings, giving that festive look.
Optional ingredient enhancements
Want to take your Easter Nest Cake to the next level? Consider adding:
- Food coloring: Bright colors for the coconut can make it pop!
- Nuts: Chopped almonds or walnuts can add a delightful crunch.
- Fruity flavors: Tossing in some berries can offer a refreshing contrast to the sweetness.
Remember, experimenting with flavors and textures is where the magic happens! For further exploration of ingredients, check out this comprehensive guide on baking essentials that can transform your sweets into something special.
Step-by-Step Preparation of Easter Nest Cake
Creating a delightful Easter Nest Cake is not just about baking; it’s about crafting a beautiful centerpiece that will impress your guests and bring the spirit of spring into your home. Follow these simple steps to prepare your cake, and you’ll be on your way to serving a showstopper at your holiday gathering.
Set Up for Success
Before you dive into your cake preparation, it’s essential to prepare your workspace. A clean and organized kitchen is key to a smooth baking experience. Here are some tips:
- Clear your countertop of clutter, ensuring you have enough space for mixing, frosting, and decorating.
- Gather all your ingredients: cake mix (or from-scratch ingredients), eggs, sugar, flour, frosting, and festive candies.
- Equip yourself with essential tools like mixing bowls, a whisk, spatulas, and your favorite cake pan.
Having everything ready will streamline your process and keep the baking stress-free. According to cooking experts, a tidy workspace not only boosts efficiency but can also enhance creativity (source: Culinary Institute of America).
Create a Beautiful Base
Now that your workspace is ready, it’s time to place the cake on a serving platter. Once your cake has cooled completely—this is crucial to avoid a melty mess—choose a lovely platter that complements your cake’s colors.
- Tip: You might want to whip up two or three layers of cake for added height and depth. Stack them carefully, using a bit of frosting between layers to keep everything secure. This not only adds to the visual appeal but enhances the flavor!
Frost in Layers of Delight
Next comes the fun part—frosting the cake in a nest-like fashion. Use a piping bag or a spatula to create texture that resembles a nest. Here’s a quick guide:
- Start at the top: Apply a generous amount of frosting to the top layer first.
- Create swirls: Make circular motions, allowing some frosting to cascade down the sides to mimic the look of a cozy nest.
- Layer it on: Add frosting to the sides, building up the texture for a more rustic look. Feel free to use a fork or a knife to create ridges for added depth.
The trick is to have fun and be creative! Messy can be beautiful.
Bring It to Life with Candy
Once you’ve frosted your Easter Nest Cake, it’s time for the decoration with Easter candies. This part allows for so much personalization and creativity! Here’s how to go about it:
- Choose your candies: Popular options include mini chocolate eggs, jelly beans, or even chocolate bunnies. Consider vibrant colors that scream spring!
- Decorate the nest: Scatter candy lightly over the top of your cake, focusing on the center first, and let them slide down into the texture.
- Extras: You can even add edible grass made from shredded coconut tinted with green food coloring for an extra layer of charm.
By this stage, your cake should start looking like a springtime delight worthy of any celebration!
Perfect the Presentation
Finally, it’s time for those final touches and presentation. Take a step back and evaluate your cake:
- Smooth out any rough patches: A simple spatula can be used to give your frosting a sleek finish.
- Add a touch of nature: Sprigs of mint or small edible flowers can offer a beautiful contrast to the bright colors of your candies.
- Consider pairing your dessert: A light lemonade or berry-infused drink can complement your Easter Nest Cake beautifully.
Don’t forget to snap some pictures for social media. Your followers will appreciate the creative effort you put in. With these steps, you should be proud to present your Easter masterpiece!
For more Easter-inspired treats, feel free to explore our recipe section on Joy of Baking.
Baking is all about creativity and joy—so get in there and make your Easter Nest Cake a memorable one!
Variations on Easter Nest Cake
Creative Bunny-themed Decorations
Who doesn’t love a little whimsy alongside their dessert? Transform your Easter Nest Cake into a delightful centerpiece by adorning it with fun bunny-themed decorations. Use fluffy coconut shavings as “cotton candy” clouds, and sprinkle colorful mini eggs or jellybeans around the cake to mimic a playful Easter egg hunt. For a more personal touch, consider crafting little bunny figurines from fondant or using edible markers to add cute faces on marshmallow chicks.
If you have children or are hosting a family gathering, engage everyone in decorating. It’s a fantastic way to make memories while expressing your creative flair. Plus, if you want to take it a step further, why not check out some cool decoration ideas on blogs like The Spruce Eats?
Gluten-free Alternative Options
You shouldn’t have to miss out on a delicious Easter Nest Cake, even if gluten is a concern! Opt for gluten-free cake mixes available in most grocery stores, which are specifically formulated to provide that soft and moist texture you love. For a DIY approach, consider using almond flour or a blend of rice and tapioca flour in your cake batter. Both options yield a light and fluffy cake while still allowing you to enjoy that familiar flavor.
Remember to carefully read ingredient labels to avoid any hidden gluten, and always check brands that specialize in gluten-free products. Resources such as the Gluten Intolerance Group can be invaluable in ensuring that your cake remains safe and scrumptious!
Whichever variation you choose, your Easter Nest Cake will surely delight guests of all ages—making your celebration even more joyous!
Cooking Tips and Notes for Easter Nest Cake
Ensuring the frosting adheres well
For a beautiful Easter Nest Cake, it’s crucial that your frosting sticks like it truly means it. Start with a chilled cake; a cold surface helps keep your frosting in place. When applying the frosting, use an offset spatula to create smooth, even layers. A light crumb coat is also great. Just a thin layer of frosting around the cake traps any loose crumbs, making your final layer flawless.
Remember, the type of frosting matters too—cream cheese or buttercream both offer excellent adhesion and taste. If you want to elevate the flavor, consider adding zest from lemon or orange.
Choosing the best candies for decoration
Select candies that mimic the playful essence of Easter. Mini chocolate eggs, pastel-colored jelly beans, or even chocolate bunnies add a perfect whimsical touch to your Easter Nest Cake. For a natural look, consider using shredded coconut dyed green to represent grass. Mind you, not all candies are created equal—opt for high-quality options. Check out Wilton’s candy guide for a variety of delightful choices!
With these tips in hand, you’re all set to whip up an enchanting Easter Nest Cake that dazzles both the eyes and taste buds!

Serving Suggestions for Easter Nest Cake
Pairing Suggestions for a Festive Meal
When serving your Easter Nest Cake, consider creating a delightful spread that complements its playful charm. A well-rounded festive meal could include:
- Main Dishes: Think about serving Chicken Ham or even herb-roasted turkey, as these pair wonderfully with the cake’s sweetness. Roast Turkey Bacon can offer a delicious, crispy side.
- Salads: Light, vibrant salads with citrus or berry dressings brighten the table and balance out the richness of the cake. Try a classic Spring Greens Salad for freshness.
- Beverage Options: Opt for refreshing sparkling water infused with cucumber or mint. These drinks cleanse the palate and allow the rich flavors of the Easter Nest Cake to shine.
Creative Ways to Present the Cake
Presentation matters, especially during festive gatherings! You might consider these fun ideas for your Easter Nest Cake:
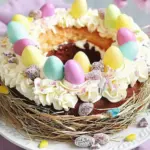
- Nest Theme: Place the cake on a bed of shredded coconut or chocolate shavings to mimic a nest, adding edible flowers or candy eggs on top for a playful touch.
- Tiered Stand: Use a tiered cake stand to showcase the cake with accompanying mini desserts or seasonal fruits, elevating the overall aesthetic.
- Personal Touch: Incorporate custom place cards at each guest’s seat with a small photo or memory from past Easters to spark conversation.
By thoughtfully pairing and presenting your Easter Nest Cake, you create a memorable experience for your guests. It’s all about the little touches that make your gathering feel special! For more festive ideas, check out Epicurious for seasonal recipes and entertaining tips.
Time Breakdown for Easter Nest Cake
Preparation Time
Making your delightful Easter Nest Cake starts with about 30 minutes of preparation. This is where you’ll gather your ingredients, mix your batter, and get everything ready for baking. If you enjoy multitasking, this is a great time to put on some music and perhaps experiment with flavors or decorations that resonate with spring!
Decoration Time
Once your cake has cooled, set aside around 20 minutes for decorating. This is where your creativity shines, from spreading icing to crafting the iconic chocolate nests. Make sure to have your colorful candies and sprinkles ready to bring that festive touch.
Total Time
When you wrap up both preparation and decoration, you’re looking at roughly 50 minutes to enjoy a beautifully crafted Easter Nest Cake. Remember, baking is as much about the journey as it is about the final product! If you’re interested in exploring more festive recipes, check out this resource for ideas that celebrate the season.
Nutritional Facts for Easter Nest Cake
When indulging in sumptuous desserts like the Easter Nest Cake, it’s helpful to understand its nutritional profile to balance enjoyment with health.
Calories per serving
Each slice of this festive cake contains approximately 350 calories. This number can vary depending on portion size and ingredients used, but it’s a reasonable estimate for a delightful Easter treat. This cake is perfect for those looking to enjoy a seasonal dessert without guilt.
Sugars and fats content
In terms of sugars and fats, each serving of the Easter Nest Cake has around 20 grams of sugar and 16 grams of fat. While these figures might seem high, remember that moderation is key. You can enhance the cake’s nutritional value by using whole grain flours or incorporating healthier alternatives.
Considering the joy it brings, the Easter Nest Cake can be a worthwhile splurge in your holiday celebrations. For more detailed nutritional insights, consider checking sources like the USDA FoodData Central or the American Heart Association.
FAQs about Easter Nest Cake
How can I make the cake more chocolatey?
If you’re like me and can never have enough chocolate, there are a few simple ways to amp up the chocolate flavor in your Easter Nest Cake. Consider adding a cup of chocolate chips or chunks to the batter for extra richness. Using dark cocoa powder instead of regular cocoa can also enhance the chocolatey depth. Another option is to drizzle a rich chocolate ganache over the finished cake for an indulgent touch.
What can I use if I don’t have a Bundt pan?
No Bundt pan? No problem! You can easily substitute with two 9-inch round cake pans or even square baking pans. Just adjust the baking time; round pans will typically take about 25–30 minutes. If you’re feeling adventurous, you could even use a muffin tin for smaller, personal-sized cakes, making it a fun option for serving at Easter brunch.
Is it possible to prepare the cake in advance?
Absolutely! Preparing your Easter Nest Cake in advance is a great way to save time on the holiday. You can bake the cake a day or two beforehand. Store it in an airtight container at room temperature, and wait to add any frosting or decorations until the day of serving. This will keep everything fresh and visually appealing.
If you’re ever in need of more tips or inspiration, resources like The Kitchn offer great guidance on baking techniques and storage solutions. Remember, the goal is to enjoy the process and savor the delicious end result. Happy baking!
Conclusion on Easter Nest Cake
Why an Easter Nest Cake is Perfect for Your Spring Celebrations
The Easter Nest Cake is a delightful centerpiece that’s not just visually appealing but also a taste sensation. As spring blooms, it’s the ideal treat to share with friends and family during festive gatherings. Its colorful candy topping mimics the joy of spring and Easter traditions, making it a fun project to involve your little ones in the kitchen.
Imagine the excitement on their faces as they add chocolate eggs to the nest—it’s a great way to create lasting memories. This cake is not merely about flavor; it’s a conversation starter and a symbol of togetherness.
So, why not make your next gathering memorable with an Easter Nest Cake? Check out TheSpruceEats.com for more creative ideas, or explore BonAppetit.com for mouthwatering spring recipes that complement your celebration perfectly. Celebrate spring in all its sweetness!
Easter Nest Cake: Easy and Delightful Spring Dessert Recipe
A delicious and easy-to-make Easter Nest Cake that is perfect for spring celebrations!
- Prep Time: 15 minutes
- Cook Time: 30 minutes
- Total Time: 45 minutes
- Yield: 8 servings 1x
- Category: dessert
- Method: baking
- Cuisine: American
- Diet: vegetarian
Ingredients
- 1 cup all-purpose flour
- 1 cup granulated sugar
- 1/2 cup unsweetened cocoa powder
- 1/2 cup butter, softened
- 3 large eggs
- 1 tsp vanilla extract
- 1/2 tsp baking powder
- 1/4 tsp salt
- 1 cup mini chocolate eggs
Instructions
- Preheat the oven to 350°F (175°C).
- In a mixing bowl, cream together the butter and sugar until light and fluffy.
- Add eggs one at a time, mixing well after each addition, then stir in the vanilla extract.
- Combine flour, cocoa powder, baking powder, and salt in a separate bowl, then gradually add to the wet ingredients;
- Pour the batter into a greased cake pan and bake for 25-30 minutes.
- Once baked, let the cake cool before frosting.
- Decorate with frosting and top with chocolate eggs to create a nest effect.
Notes
- For extra flavor, consider adding a hint of almond extract.
- This cake is best served fresh but can be stored for a couple of days at room temperature.
Nutrition
- Serving Size: 1 slice
- Calories: 350
- Sugar: 25g
- Sodium: 200mg
- Fat: 18g
- Saturated Fat: 10g
- Unsaturated Fat: 6g
- Trans Fat: 0g
- Carbohydrates: 40g
- Fiber: 2g
- Protein: 4g
- Cholesterol: 70mg
Keywords: Easter Nest Cake, spring dessert, easy cake recipe