Introduction to Chocolate Lace Designs
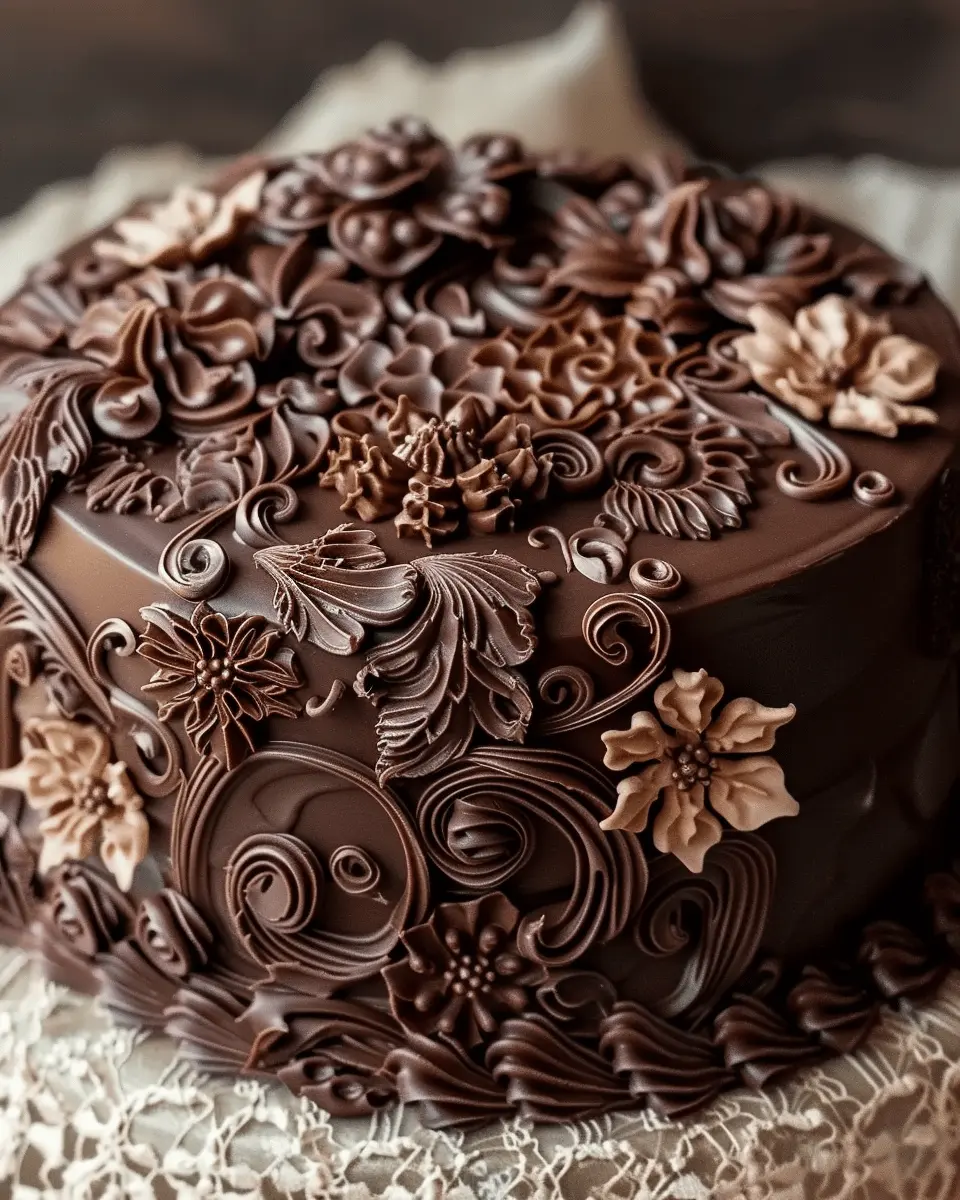
When it comes to baking and decorating, chocolate lace designs are truly a game-changer. They add an elegant touch to cakes, pastries, and treats, turning an ordinary dessert into a visually stunning masterpiece. Have you ever wondered how a simple dessert can suddenly dazzle your guests? The answer often lies in the delicate touch of chocolate lace.
Why Chocolate Lace Designs Are a Showstopper
Imagine this: you’ve spent hours creating a beautiful cake. It’s delicious, but without decoration, it could easily blend into the background of dessert options. This is where chocolate lace designs come in. They not only enhance the aesthetics of your creation but also showcase your skills as a baker. The intricate patterns can be customized to fit any theme or occasion, whether it’s a wedding, birthday, or just a casual gathering with friends.
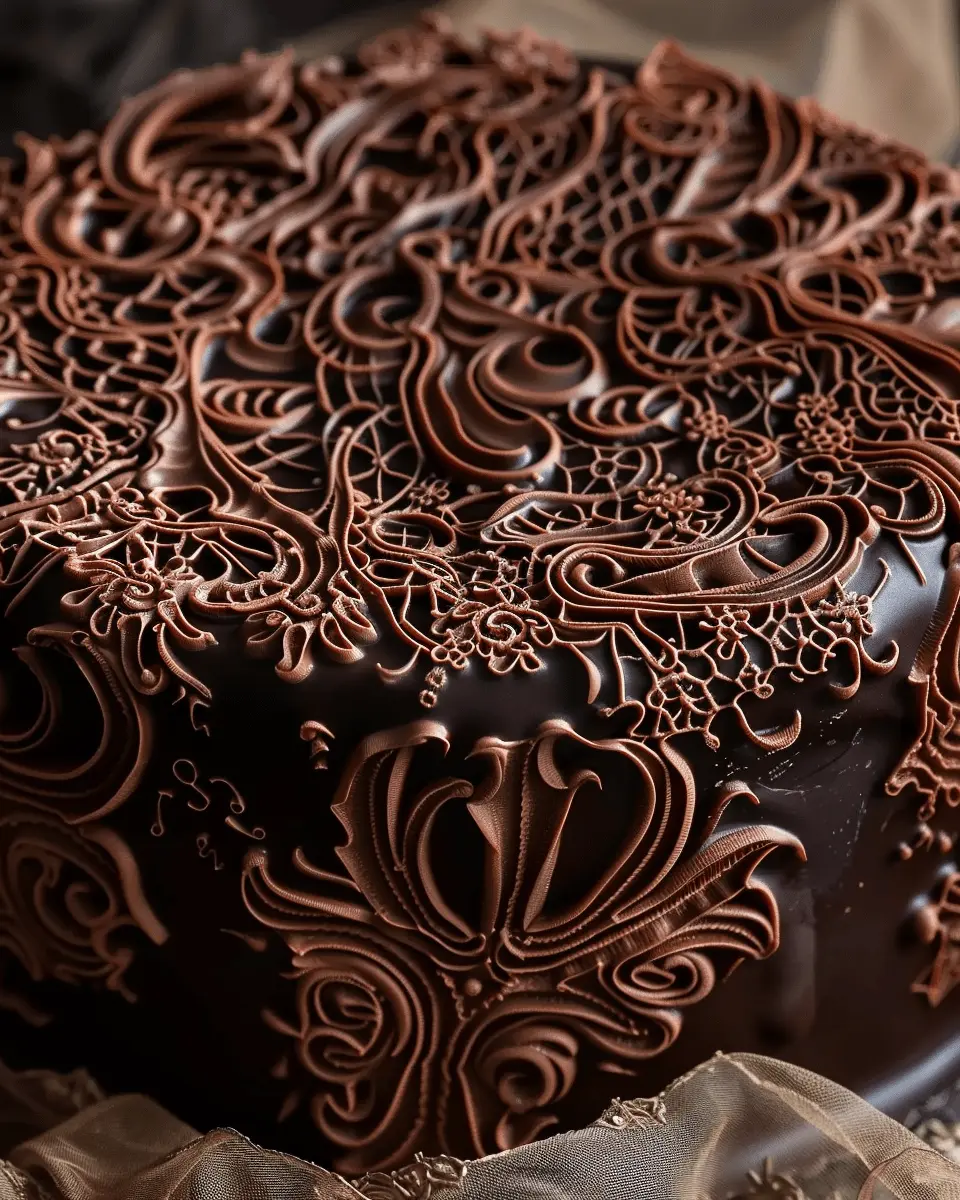
But what makes chocolate lace so captivating? For one, the contrast between the delicate chocolate and the rich flavors of your cake or pastry can create a delightful visual experience. According to the culinary experts at CIA, decorative details like lace can elevate dessert presentation, enticing guests before they even take their first bite.
Creating chocolate lace is surprisingly simple and requires minimal ingredients. All you need is high-quality chocolate and a piping bag to get started. As you pipe out your designs, the joy of seeing your vision come to life is like no other. Plus, to ease the pressure, if you’re worried about perfection, remember that imperfection gives character to your creations.
Consider this: when guests see intricate chocolate lace designs on your desserts, they’ll be impressed by your attention to detail. A beautifully adorned cake speaks volumes and can spark conversation. Have you ever had someone ask how you managed to create such elegant designs?
For more tips on enhancing your dessert presentations and exploring various techniques, check out articles on The Decorated Cookie or Cupcake Jemma for inspiration.
In the world of baking, where tastes and aesthetics meet, chocolate lace designs can undoubtedly make you shine, inviting compliments and unforgettable memories. Ready to take your dessert to the next level? Let’s dive into the recipe!
Ingredients for Chocolate Lace Designs
Essential Ingredients for Perfect Designs
Creating stunning chocolate lace designs starts with the right ingredients. To make your chocolate lace truly exceptional and visually striking, you’ll need:
- High-Quality Chocolate: Choose dark, milk, or white chocolate with a cocoa content of at least 60% for the best flavor and luster. Brands like Ghirardelli or Callebaut are excellent options.
- Cocoa Butter: This helps ensure your chocolate flow is smooth and aids in achieving a shiny finish. You can find cocoa butter at specialty baking stores or online.
- Piping Bags or Wax Paper: To form your intricate designs, use piping bags for precision. Alternatively, wax paper works wonders for easy transfer.
- Silicone Mats: If you want easy removal of your lace designs, invest in silicone mats. They’re reusable and non-stick, taking your creations to the next level.
With these essential ingredients, you’re well on your way to crafting beautiful chocolate lace designs. Ready to dive deeper? Check out resources from experts like The Spruce Eats to elevate your baking skills!
Step-by-Step Preparation of Chocolate Lace Designs
Creating stunning chocolate lace designs is both fun and rewarding. Not only do they add elegance to your desserts, but they are also surprisingly easy to make! Let’s walk through the process step-by-step to ensure your chocolate lace turns out beautifully.
Prepare Your Template
The first step is key when crafting your lace designs. Start by deciding on a pattern. You can use parchment paper to create your templates; simply draw or print out your desired lace design. Common motifs include floral patterns, swirls, or geometric shapes. Once you have your template, place it under a sheet of parchment paper. This allows you to see the design while keeping the surface clean.
Pro tip: For elaborately detailed lace, consider using lace-making molds available online or at baking supply stores. These molds can guide your chocolate piping perfectly.
Melt the Chocolate
Next, you’ll need to melt your chocolate. You can use high-quality chocolate chips or bars—dark, milk, or white according to your preference.
- Microwave Method: Place chopped chocolate in a microwave-safe bowl. Heat in short intervals (about 20 seconds), stirring in between until completely smooth.
- Double Boiler Method: Fill a saucepan with about an inch of water and bring it to a simmer. Place a heatproof bowl on top, and add your chocolate. Stir occasionally until melted.
Ensure that no moisture gets into the chocolate, as this can cause it to seize. For an even healthier twist, consider using sugar-free chocolate or dark chocolate with a high cocoa percentage for a richer flavor.
Transfer to a Piping Bag
Once your chocolate is melted, let it cool slightly. Carefully pour the melted chocolate into a piping bag fitted with a small round tip. If you don’t have a piping bag, a resealable plastic bag with a corner snipped off will work too!
Helpful Hint: If you’re using multiple colors of chocolate, you can melt each type separately and layer them in a piping bag to create a unique look in your lace design.
Pipe the Lace
Now comes the fun part: piping your lace! Hold the piping bag at a 45-degree angle and carefully trace your design on the parchment paper. Start with the outline, then fill in any intricate details. Take your time, and remember that practice makes perfect!
Creative Freedom: Don’t be afraid to get creative! If you have extra melted chocolate, try freestyle piping to create unique doodles or even initials for a personalized touch.
Create Double-Thick Lace (Optional)
For a sturdier lace design, consider creating a double-thick version. After your first layer of piping is done, allow it to set slightly before piping a second layer on top. This extra thickness will give your lace more durability and make it easier to work with when decorating cakes or pastries.
Chill Until Firm
Once you’ve finished piping, it’s time to chill your designs. Place the parchment paper with your chocolate lace in the refrigerator for about 30 minutes or until the chocolate has fully set. This is a crucial step, as it helps the lace maintain its shape when you remove it.
Release and Store
After chilling, gently peel the parchment paper away from the lace. If you notice any pieces are sticking or breaking, they may need a bit more time to set.
- Storage Tips: Store your chocolate lace designs in an airtight container at room temperature or in the fridge for up to a week. Keep them separated with layers of parchment paper to prevent sticking.
There you have it! With these easy steps, you can create beautiful chocolate lace designs that will impress your friends and elevate your desserts. Whether you’re decorating a cake for a special occasion or simply indulging in a sweet treat, these lace designs are sure to shine. Happy baking!
For more amazing tips and tricks for chocolate artistry, check out websites like Serious Eats and America’s Test Kitchen.
Variations on Chocolate Lace Designs
Creating stunning chocolate lace designs is an artistic endeavor that can elevate any dessert. Here, we’ll explore unique variations with different types of chocolate to suit your preferences.
Bold Designs with Dark Chocolate
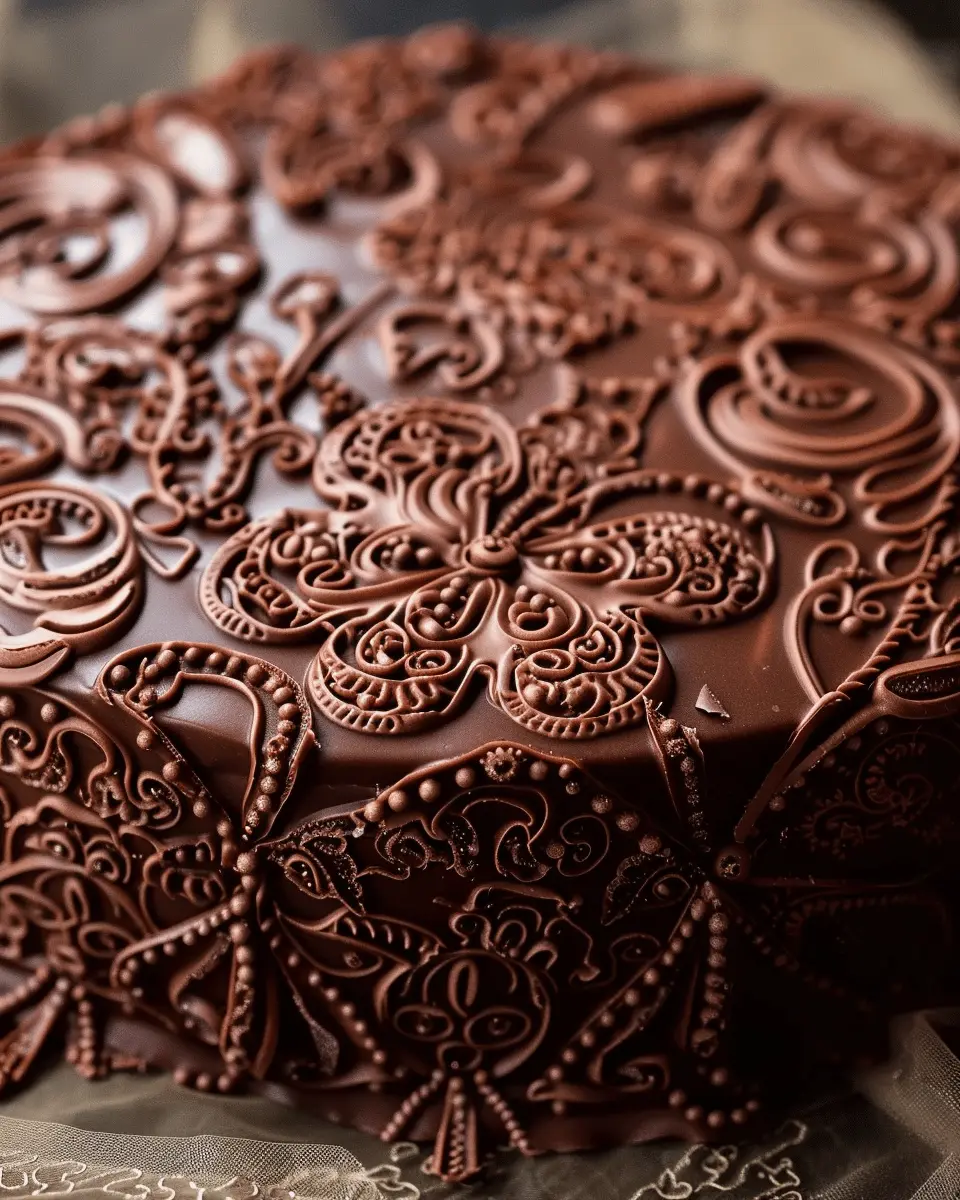
Dark chocolate offers a wonderful depth of flavor, making it perfect for those who appreciate a rich, bittersweet taste. Using high-quality dark chocolate (at least 65% cocoa), you can create intricate lace designs that not only look elegant but also pack a flavor punch.
-
Techniques: Consider using a piping bag fitted with a small nozzle to achieve delicate lines and patterns. Try swirling the chocolate or creating geometric shapes. The contrast of dark chocolate against lighter desserts can be very striking.
-
Pro Tip: For a bit of fun, add a pinch of sea salt to your melted dark chocolate. This not only enhances the chocolate flavor but can also create a nice visual contrast that your guests will love.
Want to dive deeper? Check out this detailed guide on melting and working with chocolate from a trusted culinary source.
Colorful Lace with White Chocolate
While dark chocolate is popular, white chocolate can be a fantastic canvas for chocolate lace designs, particularly when you want to play with colors. You can easily dye white chocolate with food coloring to create vibrant hues.
-
Custom Touches: Using colored cocoa butter or gel food coloring, you can make your lace designs a vivid focal point. Think pastels for spring or wild, bold colors for a festive gathering.
-
Layering: Consider drizzling the colored white chocolate over a base layer of plain white chocolate to add depth and intricate patterns.
Creating these designs not only impresses your friends but also allows you to express your creativity. When you’re ready to get started, why not look into options for sustainable chocolate sourcing? It makes the experience even more enjoyable!
Cooking Tips and Notes for Chocolate Lace Designs
Tips for Successful Chocolate Melting
Melting chocolate can be tricky, but with a few key steps, you can achieve the perfect consistency for your chocolate lace designs. Use high-quality chocolate for the best flavor and texture. Chop the chocolate into uniform pieces to ensure even melting. Use a double boiler or the microwave with short bursts, stirring frequently. Be wary of water; even a drop can cause your chocolate to seize. For detailed guidance on melting methods, check this resource.
Best Practices for Piping Technique
When it comes to piping your chocolate lace designs, practice makes perfect! Start with the right piping bag—disposable ones are usually easiest. Fill your bag only halfway for better control. Hold the bag at a 45-degree angle and use consistent pressure to create even lines. Don’t be afraid to experiment with different patterns; the beauty of lace is in its delicacy! You can even watch tutorial videos on YouTube to refine your technique.
Serving Suggestions for Chocolate Lace Designs
As a Cake Decoration
When it comes to showcasing your baking skills, chocolate lace designs are a stunning addition to any cake. They can elevate a simple confection into a masterpiece. Picture a rich chocolate cake adorned with delicate lace accents. Not only do they add an artistic touch, but they also provide a delightful textural contrast.
- Consider using them for special occasions like birthdays or weddings.
- Try incorporating different colors of chocolate to match themes.
- Serve your cake on a beautiful stand to enhance the aesthetic.
In Desserts Like Parfaits or Tarts
Chocolate lace designs aren’t just for cakes; they can jazz up other desserts too! Imagine creating a layered parfait with creamy layers of yogurt and fresh berries, topped with a delicate chocolate lace piece. It adds a visual element that is simply irresistible.
- Use them as a garnish for tarts filled with rich ganache or creamy custard.
- They can also make for a fantastic contrast with fruit-based desserts.
Feeling inspired? Explore more ways to enhance your desserts with chocolate lace by checking out Baker’s Journal for expert tips. Embrace the versatility of chocolate lace designs to impress friends and family with your sweet creations!
Time Breakdown for Chocolate Lace Designs
Preparation Time
Creating chocolate lace designs is more of an art than a science, but the good news is that prep time is short—around 15 minutes! You’ll need to measure out your chocolate, prepare your piping bag, and get your baking sheets ready.
Setting Time
Once you’ve piped your gorgeous designs, they’ll need some time to set. Typically, you’ll want to leave them to harden for about 30 to 60 minutes—perfect for a quick coffee break while you admire your handiwork!
Total Time
In total, you’re looking at roughly 1 to 1.5 hours from start to finish. This makes chocolate lace designs an elegant yet manageable project for your next gathering. For more tips on working with chocolate, check out this expert guide. Remember, a bit of patience pays off in the beauty of your finished product!
Nutritional Facts for Chocolate Lace Designs
When crafting your delightful chocolate lace designs, it’s essential to keep nutrition in mind. Understanding the nutritional value can help you enjoy these sweet treats guilt-free.
Calories
A typical serving of chocolate lace designs contains approximately 120 calories. While that may sound like a lot, remember that moderation is key when indulging in sweet treats.
Sugar Content
You’ll find around 10 grams of sugar in each serving. This provides a sweet flavor boost but be cautious of your overall sugar intake, especially if you’re watching those daily numbers.
Fat Content
Each serving includes about 7 grams of fat, primarily from the chocolate. Choosing high-quality chocolate can make a difference in both taste and nutritional value. For healthier options, consider using dark chocolate varieties, which often come packed with antioxidants.
For more insights on chocolate and health benefits, check out resources from Healthline and Mayo Clinic.
FAQs about Chocolate Lace Designs
Can I Use Milk Chocolate Instead of Dark?
Absolutely! While dark chocolate provides a rich flavor that pairs beautifully with many desserts, milk chocolate can also be a delectable choice for your chocolate lace designs. It tends to be sweeter and creamier, which might appeal more to those with a preference for milder flavors. Just remember, the melting and molding process remains the same, so feel free to experiment with both types to see what works best for your creations!
How Do I Store Leftover Chocolate Lace?
Storing your leftover chocolate lace designs is quite simple! After they have cooled and set completely, gently layer them between sheets of parchment paper in an airtight container. Keep the container in a cool, dry place away from direct sunlight. If you want to keep them even longer, you can store them in the refrigerator. Just be careful, as temperature changes can make them brittle.
What If My Chocolate Lace Cracks?
Cracks can happen, but don’t fret! If your chocolate lace has cracks, you can still salvage it. Melt a little more chocolate and use it as “glue” to carefully attach the cracked pieces back together. Alternatively, you could embrace the cracked look for a rustic vibe in your dessert presentations. Sometimes, those imperfections can add character and charm to your chocolate lace designs.
For more tips on chocolate techniques, check out resources like Fine Cooking or Serious Eats. Happy decorating!
Conclusion on Chocolate Lace Designs
Elevate Your Dessert Game with Lace Designs
As you step into the world of chocolate lace designs, you’ll discover a delightful way to elevate your dessert presentations. These intricate, delicate designs not only add an aesthetic touch but also make your sweets stand out at any occasion. Imagine the compliments you’ll receive when your friends or guests see a beautiful cake adorned with these edible masterpieces!
Lace designs are surprisingly easy to create with a little practice. Whether you’re planning a casual gathering or a lavish celebration, incorporating these chocolate accents can transform even the simplest treat into something extraordinary. Don’t hesitate to explore resources like The Chocolate Life or Serious Eats for more inspiration and tips!
So, grab your piping bags and let your creativity flow—your desserts are about to become extraordinary!
Chocolate Lace Designs: The Best Indulgent Treats for Every Occasion
Discover the exquisite world of Chocolate Lace Designs and learn how to create these delightful treats for any celebration. Perfect for weddings, birthdays, or just because!
- Prep Time: 20 minutes
- Cook Time: 10 minutes
- Total Time: 30 minutes
- Yield: 12 pieces 1x
- Category: Dessert
- Method: Baking
- Cuisine: French
- Diet: Vegetarian
Ingredients
- 1 cup all-purpose flour
- 1/2 cup cocoa powder
- 1/4 cup sugar
- 1/2 cup unsalted butter, melted
- 2 large eggs
- 1 teaspoon vanilla extract
- 1/4 teaspoon salt
Instructions
- Preheat your oven to 350°F (175°C).
- In a bowl, mix together the flour, cocoa powder, and salt.
- In another bowl, whisk together the melted butter, sugar, eggs, and vanilla extract.
- Gradually add the dry ingredients to the wet ingredients, stirring until well combined.
- Using a piping bag, pipe lace designs onto a parchment-lined baking sheet.
- Bake for 7-10 minutes or until the edges are crisp.
- Allow to cool before carefully removing from the parchment.
Notes
- Make sure to let the lace designs cool completely before handling.
- These can be stored in an airtight container for up to a week.
Nutrition
- Serving Size: 1 piece
- Calories: 120
- Sugar: 15g
- Sodium: 50mg
- Fat: 8g
- Saturated Fat: 5g
- Unsaturated Fat: 2g
- Trans Fat: 0g
- Carbohydrates: 12g
- Fiber: 1g
- Protein: 2g
- Cholesterol: 30mg
Keywords: Chocolate Lace Designs