Introduction to Apple Crisp
When it comes to quick and delightful desserts, apple crisp is a longstanding favorite, especially among young professionals who are often juggling a busy lifestyle. Why is this classic dish so appealing? Simply put, it perfectly combines convenience, comfort, and deliciousness — ideal for anyone with a packed schedule looking to whip up something sweet after a long day.
Why apple crisp is a go-to dessert for young professionals
For those of us navigating careers and the complexities of adult life, the last thing we need is a complicated recipe. Enter apple crisp, a delightful dessert that requires minimal ingredients and effort, making it accessible to even the most kitchen-challenged among us. With just a handful of apples, oats, sugar, and butter, you can create a dish that feels like a warm hug on a chilly evening, allowing you to enjoy home-cooked goodness without spending hours in the kitchen.
The beauty of apple crisp lies in its versatility. You can modify the recipe to suit your taste—maybe add a dash of cinnamon for warmth, or throw in some walnuts for added crunch. If you’re interested in more variations, consider exploring ideas for healthy swaps like using almond flour or coconut sugar, which can add unique flavors while keeping it guilt-free. For some helpful tips and variations, check out resources like Serious Eats.
Did you know that a study from the University of Massachusetts found that simple homemade desserts can enhance your mood and even reduce stress? After a grueling day of work, nothing beats the aroma of baked apples wafting through your home, beckoning you to relax and indulge a little.
Additionally, apple crisp can be made in batches and stored in the fridge or freezer, making it perfect for busy weeks. A small scoop served warm, topped with your favorite ice cream or yogurt, offers a simple yet satisfying treat. So, the next time you’re craving something sweet or gearing up for a last-minute gathering, remember: a classic apple crisp is your best ally.
In a world that often demands a lot from us, indulging in something homemade, warm, and comforting can be the perfect antidote. Let’s dive into the delicious details of how to create your own!
Ingredients for Apple Crisp
Creating a delightful apple crisp is simpler than you might think! The beauty of this dish lies in its wholesome ingredients, which come together to create that perfect balance of sweet and tart flavors. Here’s what you’ll need:
- For the Filling:
- 6 medium apples (Granny Smith or Honeycrisp work beautifully)
- 1/2 cup granulated sugar
- 1 tablespoon lemon juice
- 1 teaspoon cinnamon
- 1/4 teaspoon nutmeg (optional)
These core ingredients provide a delicious depth to your apple crisp. If you want to take it up a notch, consider adding a handful of chopped nuts or dried fruits for texture and flavor.
- For the Topping:
- 1 cup rolled oats
- 1 cup all-purpose flour
- 1/2 cup brown sugar
- 1/2 teaspoon salt
- 1/2 cup unsalted butter, melted
As you gather these ingredients, imagine the comforting aroma of cinnamon and baked apples filling your kitchen. Want to know more about the benefits of apples? Check out this article. Happy baking!
Preparing Apple Crisp
Making apple crisp is not just about the end result; it’s about the delightful journey of bringing this warm, comforting dish to life. With its sweet and tart apples, crunchy topping, and a hint of spice, it’s no wonder this dessert is a fan favorite. Let’s dive into the steps to create an apple crisp that your friends and family will rave about!
Gather Your Ingredients
Before you get your hands dirty, it’s essential to have all your ingredients ready. Here’s what you’ll need:
-
For the filling:
-
6 cups of sliced apples (Granny Smith or Honeycrisp work well)
-
1 cup granulated sugar
-
1 tablespoon lemon juice
-
1 teaspoon ground cinnamon
-
¼ teaspoon salt
-
Optional: A pinch of nutmeg for extra flavor
-
For the topping:
-
1 cup rolled oats
-
1 cup all-purpose flour
-
¾ cup packed brown sugar
-
½ cup cold butter, cubed (you could use plant-based butter if preferred)
-
½ teaspoon baking powder
-
½ teaspoon cinnamon
Make sure your apples are fresh and local if possible; they provide the best flavor. If you’re interested in the benefits of using fresh ingredients, check out this article on farm-to-table practices.
Prepare the Apples
Start by prepping your apples. Wash them thoroughly, then peel and slice them into thin pieces for even cooking. As you slice them, toss the apple slices in a large bowl with lemon juice, sugar, cinnamon, and salt. The lemon juice not only adds brightness to the flavor but helps prevent browning. It’s a crucial tip that prevents your beautifully prepared apples from turning an unappetizing brown before they hit the oven.
Make the Apple Filling
Now that your apples are ready, it’s time to create the filling. In a large bowl, combine the sliced apples with the sugar, cinnamon, and salt mixture. Stir gently to coat the apples evenly, allowing those flavors to mesh beautifully. The blend of sweetness and spice will enhance your apple crisp’s depth. Let this mixture sit for about 10-15 minutes. This resting time allows the apples to release some juices, which makes for a more succulent filling.
Prepare the Oat Topping
In a separate bowl, prepare the topping. This part is where your crisp gets its crunchy and irresistible texture. Combine the rolled oats, all-purpose flour, brown sugar, baking powder, and cinnamon. Using your fingers or a pastry cutter, cut in the cold butter until the mixture resembles coarse crumbs. This is the moment to let loose and have a little fun with your food—who knew baking could feel so therapeutic? If you prefer a healthier option, consider using whole wheat flour instead.
Assemble and Bake the Apple Crisp
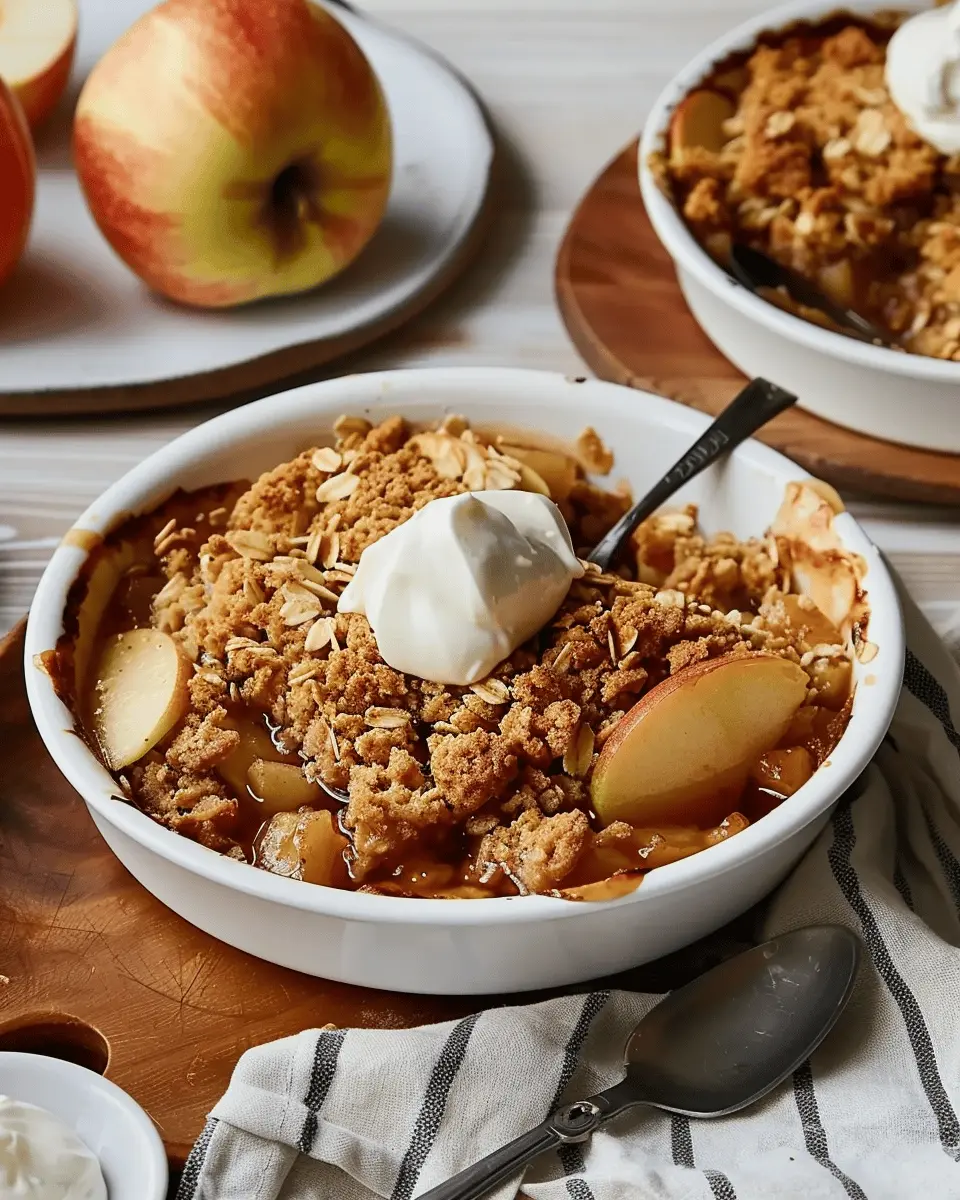
Preheat your oven to 350°F (175°C). Grab a baking dish—something around 9×13 inches works splendidly. Pour the apple filling into the dish and spread it out evenly. Top it generously with your oat mixture, ensuring all those lovely apples are covered.
Place your assembled apple crisp in the oven and bake for about 30-40 minutes, or until the topping is golden brown and the apples are bubbling. Your kitchen will fill with a heavenly aroma that might make it hard to wait! When it’s done, let it cool for a few minutes before serving.
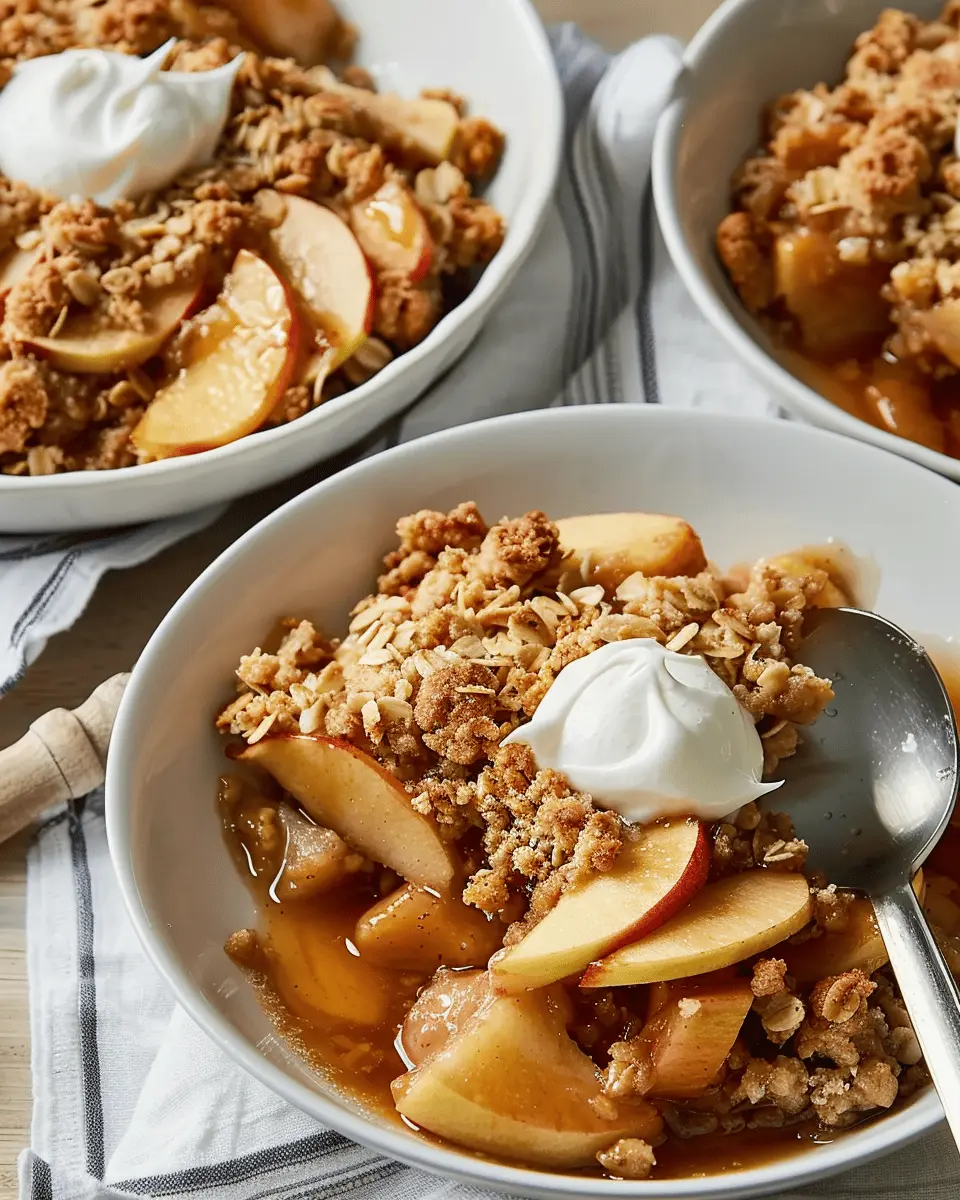
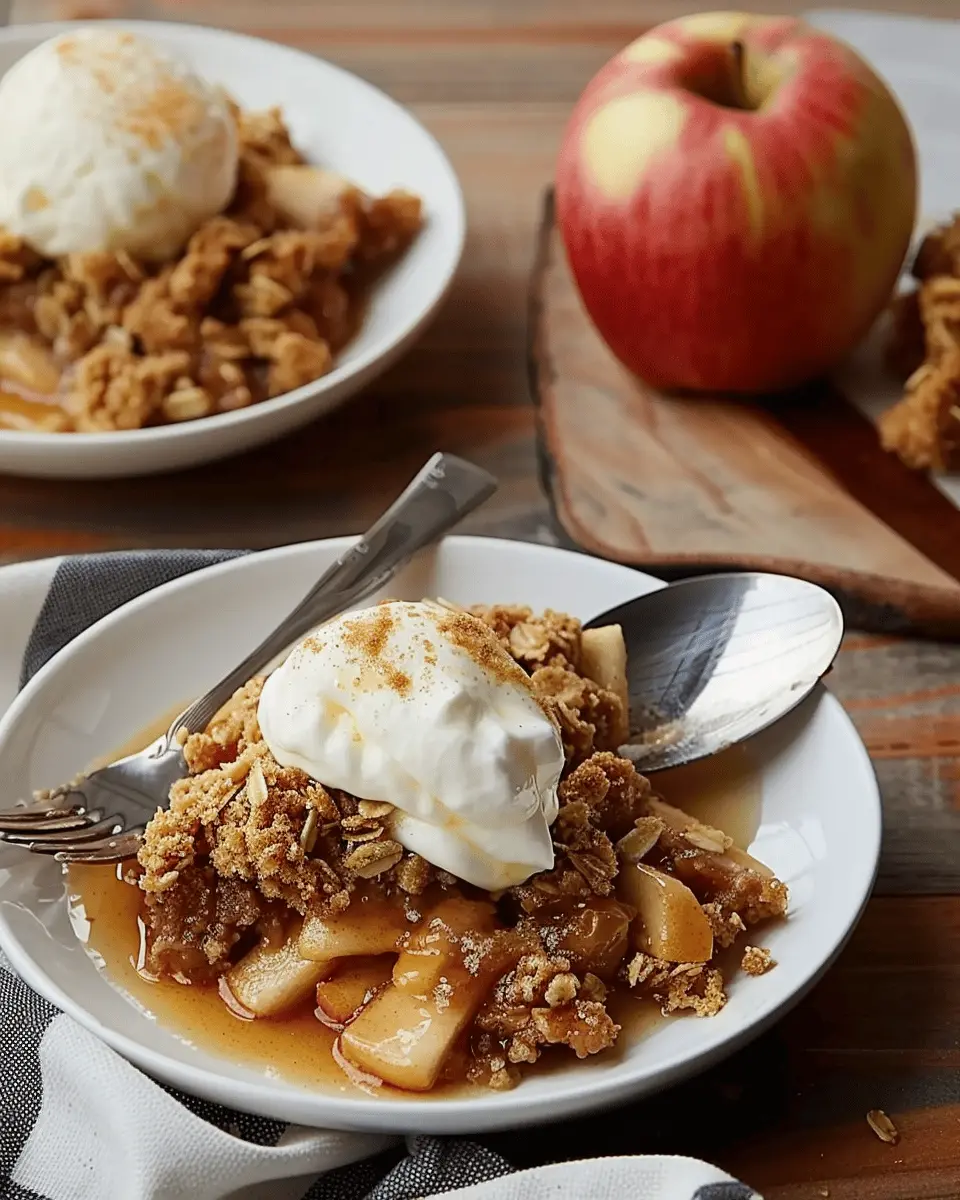
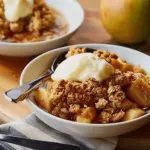
Nothing beats a warm serving of apple crisp topped with a scoop of vanilla ice cream or a dollop of whipped cream. It’s pure bliss! Enjoy the experience of creating and savoring this delightful dessert.
For more insights on baking tips and tricks, I recommend checking out America’s Test Kitchen for expert advice and tutorials. Happy baking!
Variations on Apple Crisp
When it comes to apple crisp, the possibilities are truly endless! If you’re looking to elevate your dessert game, consider these delightful variations that pack flavor and texture.
Adding nuts or seeds for crunch
Want to add a little extra crunch to your apple crisp? Incorporating nuts or seeds can give it that satisfying bite. Consider mixing in:
- Walnuts: Their earthy flavors pair perfectly with sweet apples.
- Pecans: A classic choice, they add richness and a buttery taste.
- Pumpkin seeds: For a unique twist, sprinkle in some pumpkin seeds for a hint of nuttiness.
Each adds a delightful crunch while boosting nutritional value, with healthy fats and protein. Plus, if you’re adventurous, why not try a maple syrup drizzle as a finishing touch?
Explore different fruit combinations
While apples are the star of the show, blending in other fruits can create a symphony of flavors. Here are some combinations that are worth exploring:
- Pears: Sweet, juicy pears mix beautifully with apples for a textural contrast.
- Berries: Adding blueberries or raspberries can introduce a tartness that complements the sweetness of apples.
- Stone fruits: Think peaches or plums for a summer-inspired twist.
Experimenting with different fruits can elevate your apple crisp and lead to unique flavor profiles that impress friends and family. If you’re curious about seasonal fruit choices, check out this handy guide on seasonal fruits.
So next time you whip up a classic apple crisp, don’t hesitate to think outside of the box! Whether it’s the crunch of nuts or the burst of mixed fruits, you can create a dessert that’s not just good but truly exceptional.
Cooking Tips and Notes for Apple Crisp
Choosing the Right Apples
When it comes to making a delicious apple crisp, the type of apples you choose can make or break your dish. Opt for a mix of tart and sweet varieties, such as Granny Smith and Honeycrisp. Tart apples provide a lovely contrast to the sweetness of the topping, while the Honeycrisp adds great texture and flavor. Don’t hesitate to experiment! According to Food52 source, a blend will give your crisp a more complex and satisfying taste.
Best Practices for Storing Leftovers
After enjoying your homemade apple crisp, you’ll want to preserve those delicious leftovers. Store them in an airtight container at room temperature for up to two days. For longer storage, pop them in the fridge, where they’ll stay good for about five days. To reheat, just warm it in the oven for a few minutes. This way, the topping stays crispy while the apples retain their juicy goodness—perfect for that comforting dessert taste! Don’t forget, you can amp it up by serving it with a scoop of vanilla ice cream or a drizzle of caramel sauce. Happy cooking!
Serving Suggestions for Apple Crisp
Pairing with Ice Cream or Whipped Cream
Nothing complements a warm apple crisp quite like a generous scoop of vanilla ice cream or a dollop of fresh whipped cream. The contrast of the hot, spiced apples with the cool, creamy topping creates a delightful balance that is hard to resist. Consider using homemade whipped cream for a touch of luxury that can elevate your dessert game. You might even want to experiment with flavors—think cinnamon ice cream for a festive twist or caramel flavor to enhance the apple experience.
If you’re in the mood for something lighter, opt for a yogurt-based topping, which can add creaminess without the extra sugar. Check out this easy homemade whipped cream recipe for an effortless treat!
Drizzling with Caramel Sauce
For an indulgent finish, drizzling warm caramel sauce over your apple crisp is a game changer. The richness of the caramel melds beautifully with the sweet and tart flavors of the apples. You can use store-bought caramel or make your own to impress guests with your culinary skills. A simple recipe like this one for homemade caramel can be a rewarding experience.
Tip: For a contrasting crunch, sprinkle some chopped nuts on top after drizzling the caramel. This not only adds texture but also enhances the overall flavor profile. Enjoy your apple crisp with friends and savor every delicious bite!
Time Breakdown for Apple Crisp
Preparation Time
Getting started on your apple crisp adventure? You’ll need about 15–20 minutes for preparation. This includes peeling and slicing the apples, which can be quite therapeutic and allows you to breathe in that sweet, fruity aroma. Consider cranking up your favorite playlist to make it even more enjoyable!
Baking Time
Now for the most mouthwatering part! Bake your apple crisp for about 30–35 minutes. This is when the scent will really fill your home, tempting everyone nearby. You’ll know it’s ready when the topping is golden brown and the apples are bubbling delightfully.
Total Time
All in all, you’re looking at around 50–55 minutes from start to finish. That’s not too bad, right? In just under an hour, you’ll have a delicious dessert that’s perfect for sharing or savoring on your own. Plus, check out this guide on the benefits of baking at home to enhance your culinary skills!
Nutritional Facts for Apple Crisp
When indulging in a delicious serving of apple crisp, keeping track of the nutritional facts can help you make the most of your treat.
Calories per Serving
A typical serving of apple crisp contains about 200 to 300 calories, depending on the portion size and specific ingredients used. This means it can fit quite nicely into a balanced diet, especially when enjoyed in moderation.
Key Nutrients to Note
In addition to its delightful taste, apple crisp offers several nutritional benefits:
- Fiber: Apples are high in dietary fiber, which aids digestion and keeps you feeling full.
- Vitamins: Apples provide Vitamin C and various antioxidants, which support your immune system.
- Healthy Fats: If you opt for nuts in your topping, you’ll add some healthy monounsaturated fats.
For more nutrition insights, consider checking resources like the USDA FoodData Central. So, the next time you treat yourself to apple crisp, rest assured you’re enjoying a dish that’s not only satisfying to your taste buds but also brings a sprinkle of nutrition to your plate.
FAQs about Apple Crisp
Can I make apple crisp gluten-free?
Absolutely! Making a gluten-free apple crisp is simple and just as delicious. Swap out regular flour for gluten-free alternatives like almond flour, oat flour, or a gluten-free all-purpose flour blend. Be sure to check that your oats are certified gluten-free, as cross-contamination can occur. This way, you can enjoy a comforting dessert without any gluten worries!
What kinds of apples are best for crisp?
The type of apples you choose can really elevate your apple crisp. Look for apples that are firm, tart, and hold their shape while baking. My favorites include:
- Granny Smith: Tart and juicy, they add a nice contrast.
- Honeycrisp: Sweet and crisp, these are perfect for balancing flavors.
- Braeburn: Their unique flavor is a delightful addition.
Mixing varieties can add depth to your dish, so feel free to experiment!
How long can I store apple crisp?
You can store leftover apple crisp in an airtight container in the fridge for about 3-5 days. The toppings may lose some crispiness, but it will still taste amazing! If you’re looking to save it for even longer, consider freezing it before baking. Once frozen, it can last up to three months. Just remember to bake it straight from the freezer, adding a few extra minutes to the cooking time for a delightful dessert on demand.
For more tips on topping variations and storage methods, check out resources from thekitchn.com or foodnetwork.com. Happy baking!
Conclusion on Apple Crisp
Why Making Apple Crisp Is Worth It
Making apple crisp is a delightful way to celebrate the flavors of fall and create a comforting dessert that warms the heart. The process is simple, requiring just a few ingredients, most of which you may already have in your pantry. As you slice buttery apples and blend oats, flour, and sugar for the topping, you’re not just preparing a treat; you’re crafting memories.
Plus, a homemade apple crisp can easily be customized with your favorite spices or nut toppings. Did you know that homes filled with the aroma of baking fruit desserts can evoke feelings of nostalgia? Instead of opting for store-bought desserts, why not indulge in the taste and satisfaction of baking from scratch? Your friends and family will surely appreciate the effort, and you’ll enjoy the process just as much as the delicious results. For tips on variations and storage methods, check out this resource on baking basics.
Apple Crisp Delight: A Simple, Indulgent Recipe for All Ages
A delicious and easy recipe for apple crisp that is perfect for any occasion.
- Prep Time: 20 minutes
- Cook Time: 50 minutes
- Total Time: 1 hour 10 minutes
- Yield: 8 servings 1x
- Category: Dessert
- Method: Baking
- Cuisine: American
- Diet: Vegetarian
Ingredients
- 6 cups sliced apples
- 1 cup brown sugar
- 1 cup rolled oats
- 1 cup all-purpose flour
- 1/2 cup unsalted butter, softened
- 1 teaspoon cinnamon
- 1/2 teaspoon nutmeg
Instructions
- Preheat the oven to 350°F (175°C).
- In a large bowl, mix sliced apples with cinnamon and nutmeg.
- Spread the apple mixture in a greased baking dish.
- In another bowl, combine brown sugar, oats, flour, and softened butter until crumbly.
- Sprinkle the oat mixture over the apples evenly.
- Bake for 45-50 minutes until the top is golden brown and the apples are tender.
- Let cool for a few minutes before serving.
Notes
- Serve with vanilla ice cream for an extra treat.
- This dish can be made ahead of time and baked just before serving.
Nutrition
- Serving Size: 1 slice
- Calories: 220
- Sugar: 15g
- Sodium: 150mg
- Fat: 9g
- Saturated Fat: 5g
- Unsaturated Fat: 3g
- Trans Fat: 0g
- Carbohydrates: 34g
- Fiber: 2g
- Protein: 2g
- Cholesterol: 20mg
Keywords: Apple Crisp, dessert, easy recipe, baking