Introduction to Sandwich Rolls
Making your own sandwich rolls can be one of the most rewarding kitchen experiences. Sure, it might seem like a chore at first, but picture this: the aroma of freshly baked rolls wafting through your home, the satisfaction of crafting something delicious from scratch, and the joy of serving them warm to your family and friends. When you whip up a batch of no-knead sandwich rolls, you’re not just baking—you’re creating an experience!
Why You Should Make Your Own Sandwich Rolls
The benefits of homemade sandwich rolls go beyond just taste. When you bake at home, you gain complete control over the ingredients you use. This means no preservatives, no artificial flavors, and no weird additives. Instead, you can opt for high-quality flour, sea salt, and your choice of healthy grains. Interested in whole grains? Consider incorporating some whole wheat flour for added nutrition.
Moreover, making your own rolls can be surprisingly easy! The no-knead method means less time spent in the kitchen and minimal effort on your part. Imagine simply mixing the ingredients, letting them rise, and tossing them in the oven—plus, you can even get creative with mix-ins like herbs, cheese, or olives.
The Benefits of Homemade Versus Store-Bought
Let’s break it down:
-
Freshness: There’s nothing like a freshly baked roll. Store-bought options can sit on shelves for days or even weeks. A homemade roll is a treat that you can truly savor.
-
Customization: Want whole grain? Go for it. Craving a hint of garlic? Toss it in! Homemade rolls give you the freedom to tailor each batch to your taste preferences and dietary needs.
-
Economical: Buying high-quality rolls at your local bakery can add up. By making your own, you not only save money but also ensure you’re getting a product that meets your standards.
To elevate your sandwich rolls, check out resources like King Arthur Baking for tips on bread-making or The Kitchn for creative fillings. You’ll find inspiration to take your sandwich game to the next level.
So, are you ready to embark on your sandwich roll journey? Let’s dive into the recipe and get those rolls rising!
Ingredients for Sandwich Rolls
When you’re whipping up these delicious sandwich rolls, it all starts with the right ingredients. Here’s a quick overview of what you’ll need to create these fluffy delights.
Essential ingredients you’ll need
- All-purpose flour: This is your base—choose a quality brand for the best results.
- Instant yeast: For that perfect rise, go for instant yeast; it doesn’t require proofing.
- Salt: A must-have for flavor; don’t skimp on this.
- Warm water: Not too hot, just warm enough to activate the yeast.
- Olive oil: Adds moisture and flavor, making your rolls irresistibly soft.
Having these core ingredients will set you on the right path to bake your sandwich rolls effortlessly!
Optional add-ins for extra flavor
Want to take your sandwich rolls up a notch? Consider adding:
- Herbs and spices: Dried oregano or garlic powder can elevate basic dough.
- Cheese: Add shredded cheese for a cheesy twist, either mixed into the dough or sprinkled on top.
- Seeds: Sprinkle sesame or poppy seeds for a delightful crust.
- Vegetables: Finely chopped roasted bell peppers or olives blend well into the dough.
Experiment with these optional ingredients to create a flavor profile that’s uniquely yours! Trust me, everyone will be asking for your secret. Check out this guide on flavor pairings for more inspiration!
With just a few simple yet effective ingredients, you’ll be on your way to enjoying satisfying sandwich rolls that friends and family will love.
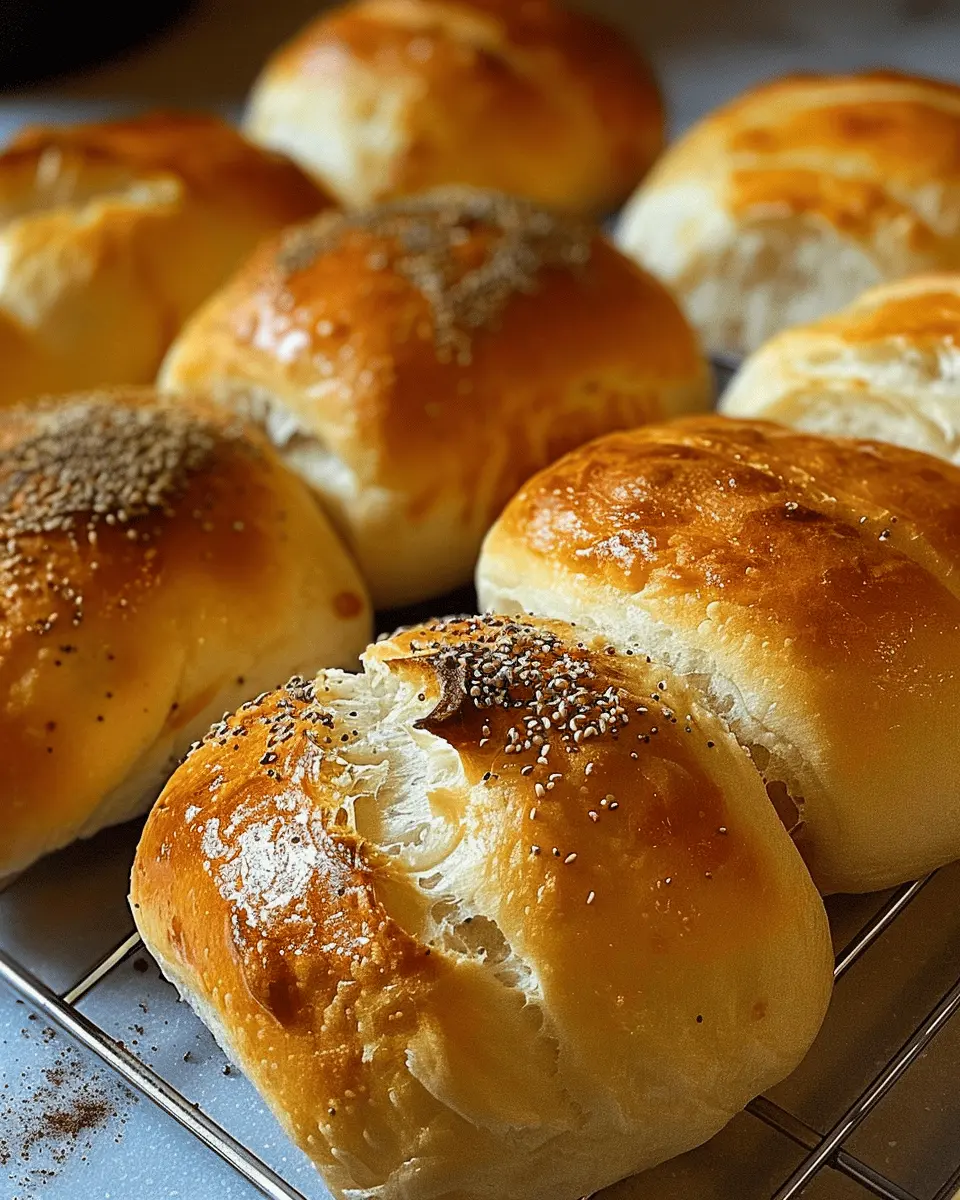
Preparing Sandwich Rolls
When it comes to making the perfect sandwich rolls, the process culminates in a delightful combination of science and artistry. You get to watch simple ingredients transform into golden-brown, fluffy rolls that can elevate any sandwich. Let’s dive into the steps required to prepare these no-knead beauties.
Gather Your Ingredients
To whip up these delicious sandwich rolls, you’ll need a few pantry staples. Here’s a quick list of what to gather:
- All-purpose flour – 4 cups
- Warm water (about 110°F or 43°C) – 1 3/4 cups
- Yeast (instant or active dry) – 1 packet (2 1/4 teaspoons)
- Salt – 1 tablespoon
- Sugar – 1 teaspoon
- Olive oil – a splash (optional, for flavor)
Having these ingredients ready makes the process smoother and more enjoyable. There’s something so satisfying about measuring out your supplies and knowing that a delicious meal is just a few steps away.
Mix the Wet Ingredients
In a large mixing bowl, combine the warm water, yeast, and sugar. Give it a quick stir to help activate the yeast—this ensures your rolls will rise beautifully. If you’re using instant yeast, you don’t need to wait, but if you’re opting for active dry yeast, let it sit for about 5-10 minutes until it becomes frothy. This step is crucial as it shows your yeast is alive and ready to work its magic!
Combine the Dry Ingredients
Now, let’s shift our focus to the dry ingredients. In another bowl, mix together the flour and salt. Using a whisk helps aerate the flour, which contributes to the fluffiness of your sandwich rolls. Once mixed, gradually add the dry ingredients into the yeast mixture.
Forming the Dough
Using a spatula or wooden spoon, gently combine the wet and dry ingredients until just mixed. You want a shaggy dough with no dry patches—overmixing isn’t necessary. This is a no-knead recipe, after all! It’s okay if the dough seems a bit sticky; that’s a sign of moisture which will result in delectable rolls.
First Fermentation Process
Cover the bowl with plastic wrap or a clean kitchen towel, and let it rest at room temperature for about 2 hours. During this time, the dough will rise and bubble, creating a lovely texture. This fermentation period allows the flavors to develop, making your sandwich rolls even tastier.
Shaping the Rolls
Once the dough has doubled in size, it’s time to shape those rolls. Lightly flour your work surface and scrape the dough out of the bowl. With floured hands, divide the dough into equal pieces, roughly the size of a golf ball. Gently shape each piece into a round roll by tucking the ends under. This helps create a nice surface tension, which leads to a beautiful rise during baking.
Second Fermentation Process
Place the shaped rolls on a parchment-lined baking sheet, ensuring there’s space between each roll. Cover them again with a kitchen towel, and let them ferment for an additional 30-45 minutes. This second fermentation is vital for achieving that airy texture.
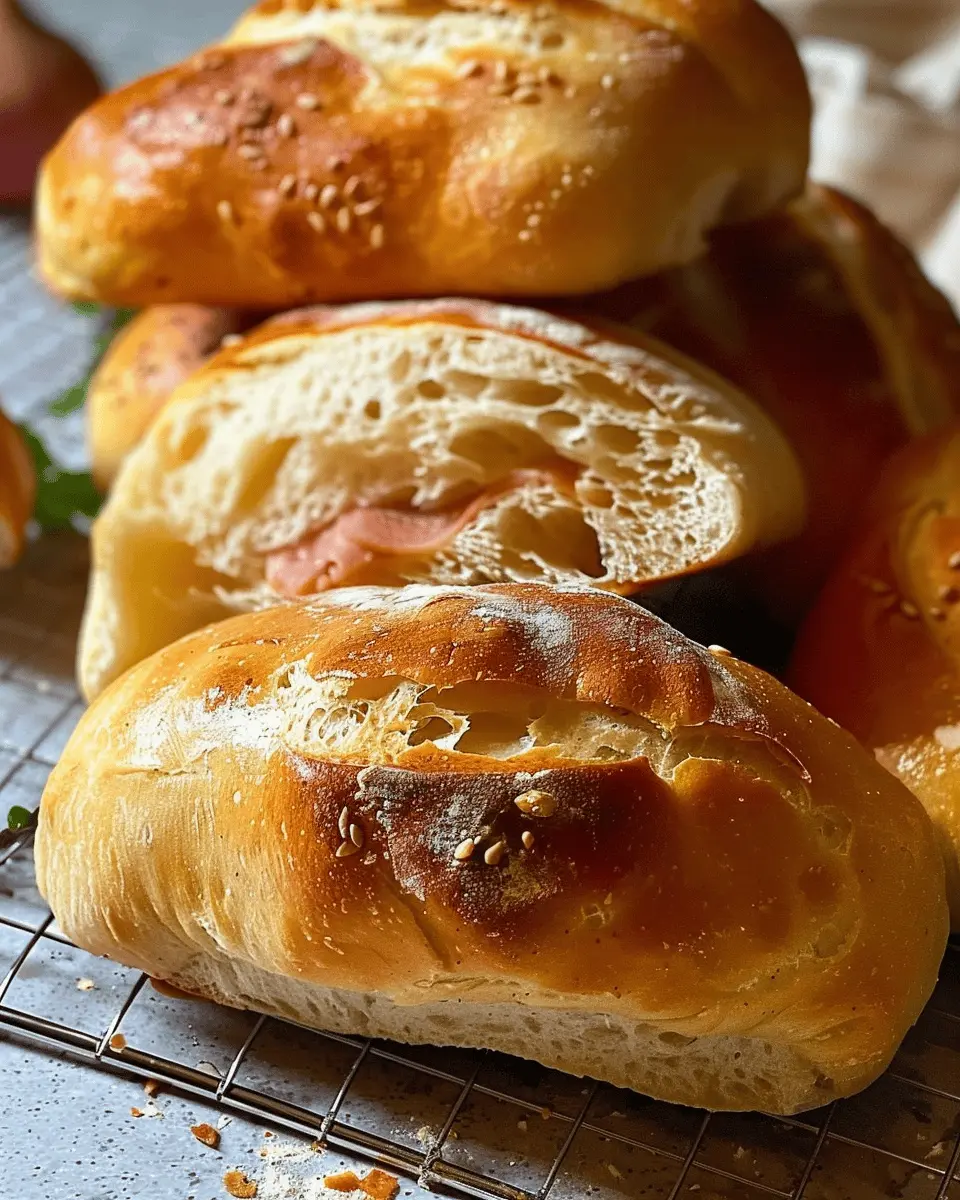
Baking the Sandwich Rolls
Preheat your oven to 375°F (190°C). Once the rolls have risen, pop them in the oven and bake for 25-30 minutes or until they are golden brown and sound hollow when tapped on the bottom. The aroma that fills your kitchen during this time is simply irresistible!
Let the sandwich rolls cool on a wire rack before slicing. This allows the interior to set just right for your turkey bacon or chicken ham sandwiches. Enjoy your creation with your favorite fillings, and don’t forget that homemade rolls are a game changer for your lunches!
For tips on filling options and more baking inspiration, check out resources from King Arthur Baking or Sally’s Baking Addiction. Happy baking!
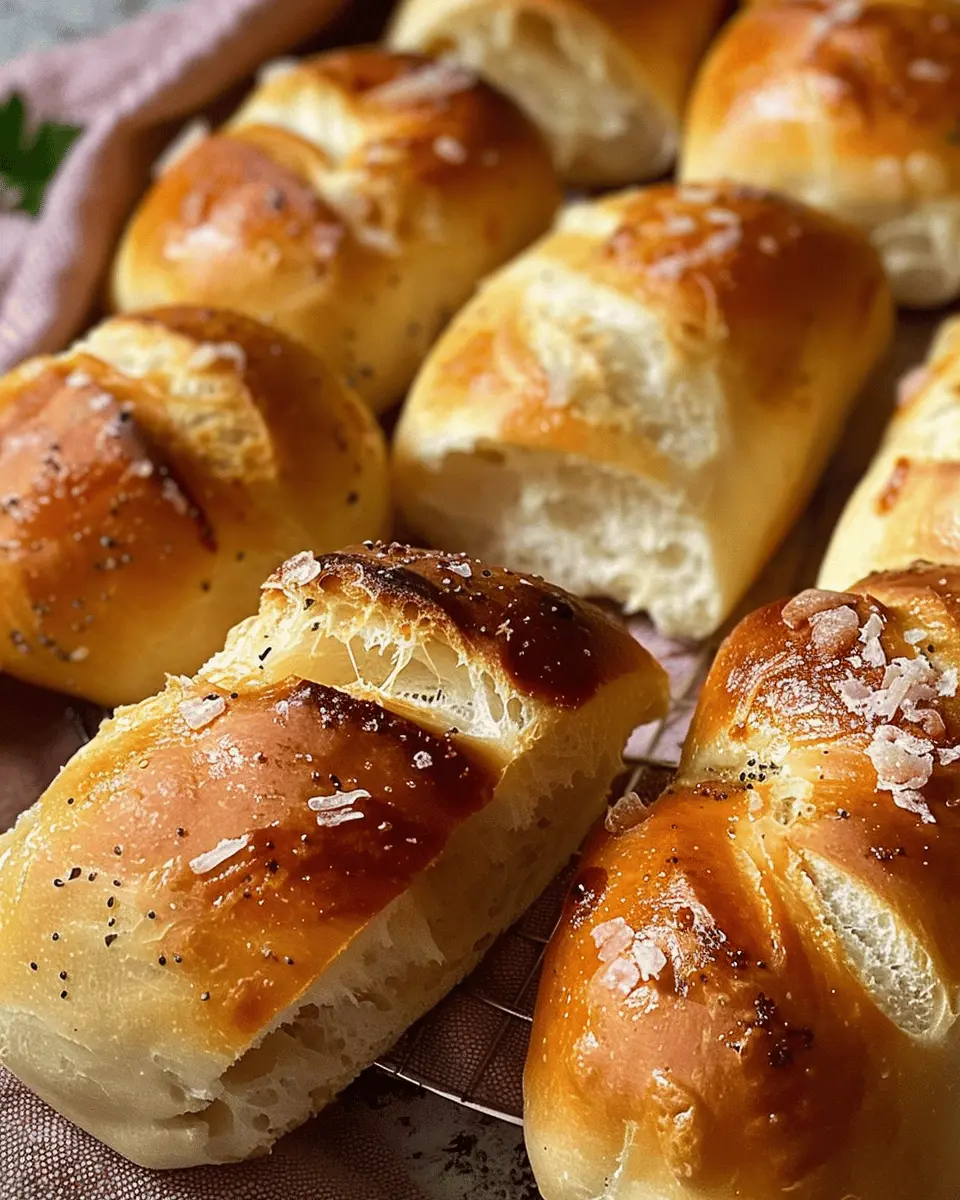
Variations on Sandwich Rolls
Sandwich rolls are a versatile blank canvas that invites creativity in the kitchen. Whether you’re in the mood for something classic or a little unconventional, these variations will surely satisfy your cravings.
Asian-inspired sandwich rolls
Why not turn your go-to sandwich into something that bursts with unique flavors? For an Asian twist, consider adding ingredients like sesame oil, soy sauce, or even hints of ginger to the dough. After baking, fill your rolls with teriyaki chicken, crunchy veggies, or pickled carrots for that authentic taste. This combination not only elevates your sandwich game but is also perfect for meal prep when you want something quick and tasty during busy workdays. Check out this delicious teriyaki chicken recipe for ideas!
Whole wheat sandwich rolls
If you’re looking for a healthier option, trying whole wheat sandwich rolls is a no-brainer. Substitute half of the all-purpose flour with whole wheat flour to add fiber and nutrients without sacrificing flavor. These rolls provide a nutty taste that pairs wonderfully with a range of fillings, from turkey bacon to roasted veggies. Did you know that whole grains can contribute to heart health? Eating them regularly may even lower the risk of several chronic diseases, making them a smart addition to your diet.
Herb-infused sandwich rolls
For those who appreciate a savory kick, herb-infused sandwich rolls are a must-try. Incorporating fresh or dried herbs like rosemary, thyme, or basil right into the dough transforms plain rolls into aromatic masterpieces. Not only do they taste fantastic, but they also make your kitchen smell incredible as they bake. Fill them with your favorite ingredients, like chicken ham or grilled cheese, for a satisfying meal that appeals to the senses.
Whatever variation you choose, these sandwich rolls are sure to impress and keep your lunchtime exciting.
Cooking Tips and Notes for Sandwich Rolls
Common Mistakes to Avoid
Making sandwich rolls can be incredibly rewarding, but there are a few common pitfalls to watch out for:
- Ignoring the resting time: Allow your dough to rest properly. This helps develop flavor and texture. Skipping this step can lead to dense rolls.
- Overcrowding the pan: Give your rolls enough space to expand. If they’re too close, they won’t rise properly.
- Not measuring ingredients accurately: Baking is a science! Be precise with flour and water ratios for the best results.
Substitutions for Dietary Restrictions
While these sandwich rolls are versatile, here are some substitutions to accommodate different diets:
- Gluten-free option: Substitute regular flour with a gluten-free blend like almond or coconut flour.
- Dairy-free alternative: Use unsweetened plant-based milk instead of cow’s milk.
- Vegan rolls: Swap out any cheese or butter for nutritional yeast and olive oil.
With these tips and substitutions, you can create sandwich rolls that everyone can enjoy! For more comprehensive guidance, check out King Arthur Baking for their expert advice on baking basics.
Serving suggestions for Sandwich Rolls
Pairing ideas for a delicious meal
When it comes to enjoying your freshly baked sandwich rolls, the right pairings can elevate your meal. Here are some delicious combinations to inspire you:
- Turkey Bacon & Avocado: Layer crispy Turkey Bacon, creamy avocado, and fresh spinach for a burst of flavors.
- Chicken Ham & Swiss Cheese: The nutty taste of Swiss cheese complements Chicken Ham perfectly. Add some sliced pickles for a tangy kick.
- Veggie Delight: Explore a medley of roasted vegetables like zucchini, bell peppers, and eggplant with a drizzle of balsamic glaze.
For the perfect side, consider a light sesame ginger salad or some sweet potato fries to round off the meal. These pairings not only taste great but are also a feast for the eyes.
Creative ways to serve sandwich rolls
The beauty of sandwich rolls lies in their versatility. Here are some fun and creative serving suggestions:
- Mini Sliders: Cut your rolls into smaller pieces and stuff them with your favorite fillings for simple slider options. They’re perfect for gatherings!
- Dunking Delight: Serve your rolls alongside a warm bowl of soup or a tangy dipping sauce. This adds a hearty touch.
- Breakfast Rolls: Fill them with scrambled eggs, cheese, and a bit of salsa for a unique breakfast experience.
Feeling adventurous? Check out these ideas for more inspiration to perfectly complement your sandwich rolls!
Time Breakdown for Sandwich Rolls
Understanding the time commitment for these delicious sandwich rolls is key to planning a successful baking day. Here’s a quick breakdown:
Preparation Time
Getting everything ready takes about 15 minutes. You’ll gather your ingredients and mix them together without the need for kneading!
Fermentation Time
After prep, let the dough rest for approximately 12-18 hours. This long fermentation is what gives our sandwich rolls their incredible flavor and texture.
Baking Time
When fermentation is done, preheat your oven and bake the rolls for about 20-25 minutes until golden brown.
Total Time
In total, you’re looking at around 13-19 hours, including fermentation, but most of that is hands-off! This flexibility makes planning a breeze.
Feel free to check out more expert baking tips from resources like King Arthur Baking or The Kitchn to enhance your baking skills!
Nutritional facts for Sandwich Rolls
When creating delicious sandwich rolls, it’s essential to consider the nutritional content that complements your culinary creation. Let’s break down the key nutritional facts you should know.
Calories
Each sandwich roll typically contains around 150-200 calories, making it a hearty base for your favorite fillings without going overboard on caloric intake. This balance makes it perfect for a light lunch or a satisfying snack.
Protein
These rolls can provide a decent source of protein, with about 5-7 grams per roll, especially if you fill them with tasty options like Turkey Bacon or Chicken Ham. Protein is crucial for repair and growth in your body, making these rolls a great choice when you’re on the go.
Sodium
While keeping an eye on sodium is vital, a single sandwich roll usually has between 200-300 mg. If you’re mindful of your salt intake, pair them with fresh ingredients like veggies or legumes to enhance flavor without adding extra sodium.
For more detailed nutritional information and tips on making wholesome fillings, check out the USDA FoodData Central for additional resources. Enjoy crafting your perfect sandwich rolls!
FAQs about Sandwich Rolls
When it comes to making sandwich rolls, you might have some questions in mind. Let’s clear things up so you can enjoy your rolls to the fullest!
Can I freeze sandwich rolls?
Absolutely! Freezing sandwich rolls is a great option if you want to prepare ahead. Once they have cooled completely, place them in an airtight freezer bag. Don’t forget to separate each roll with parchment paper to prevent them from sticking together. They can stay in the freezer for up to three months. When you’re ready to enjoy them, simply thaw them at room temperature or pop them in the oven for a few minutes to regain that fresh-baked taste.
How do I store leftover sandwich rolls?
To keep your sandwich rolls fresh, store them in a bread box or an airtight container at room temperature. This will usually keep them good for about two to three days. If you want to extend their shelf life, consider wrapping them in plastic wrap and placing them in the refrigerator. Just remember, refrigeration can sometimes alter the texture slightly, making them a bit denser.
What can I use as a filling for sandwich rolls?
There are countless delicious fillings to experiment with! Here are a few ideas:
- Turkey Bacon and Avocado: A protein-packed choice that’s both filling and tasty.
- Chicken Ham and Cheese: Keep it classic with a twist.
- Grilled Vegetables and Hummus: Perfect for a vegetarian option.
- Spicy Tuna Salad: For something a bit different, this can be a refreshing change.
Feel free to mix and match to create the perfect sandwich rolls that suit your palate! For more ideas, you can check out Eat This Not That for health-driven inspiration or Taste of Home for a plethora of creative filling recipes. Happy rolling!
Conclusion on Sandwich Rolls
The Joys of Making Homemade Rolls
There’s something truly special about crafting your own sandwich rolls. The aroma wafting through your kitchen, the satisfaction of watching dough rise, and the joy of biting into a fresh, warm roll can turn a simple meal into a delightful experience. Homemade rolls elevate any sandwich—from turkey bacon to chicken ham—into a culinary masterpiece that even your friends will envy.
Share Your Experience
I encourage you to dive into this no-knead sandwich roll recipe. Give it a go, and don’t keep the joy to yourself! Share your creations on social media or in the comments below. Did they turn out as fluffy as you hoped? What delicious fillings did you use? Engaging with others will not only inspire you but also help build a community of enthusiastic home bakers.
For even more inspiration, check out Serious Eats for tips on enhancing your bread-making skills!
Sandwich Rolls: Easy No Knead Recipe for Turkey Bacon Delight

Discover the easiest way to make soft and delicious sandwich rolls without the need for kneading. Perfect for turkey bacon sandwiches!
- Prep Time: 10 minutes
- Cook Time: 45 minutes
- Total Time: 12 hours 55 minutes
- Yield: 12 rolls 1x
- Category: Bread
- Method: Baking
- Cuisine: American
- Diet: Vegetarian
Ingredients
- 4 cups all-purpose flour
- 2 teaspoons salt
- 2 teaspoons instant yeast
- 2 cups warm water
- 1 tablespoon olive oil
Instructions
- In a large mixing bowl, whisk together the flour, salt, and yeast.
- Add the warm water and olive oil, stirring until a wet, shaggy dough forms.
- Cover the bowl with plastic wrap and let it rest for 12 to 18 hours at room temperature.
- Preheat your oven to 450°F (230°C) and place a Dutch oven inside to heat.
- Turn the dough out onto a floured surface, shape it into a ball, and let it rest for 30 minutes.
- Carefully remove the hot Dutch oven, place the dough inside, cover with the lid, and bake for 30 minutes.
- Remove the lid and bake for an additional 15 minutes until golden brown.
Notes
- For extra flavor, add herbs or spices to the dough.
- Make sure to measure ingredients accurately for the best results.
Nutrition
- Serving Size: 1 roll
- Calories: 200
- Sugar: 1g
- Sodium: 360mg
- Fat: 3g
- Saturated Fat: 0.5g
- Unsaturated Fat: 2g
- Trans Fat: 0g
- Carbohydrates: 38g
- Fiber: 1g
- Protein: 6g
- Cholesterol: 0mg
Keywords: Sandwich Rolls, No Knead, Turkey Bacon