Introduction to Cherry Thumbprint Cookies
What are Cherry Thumbprint Cookies?
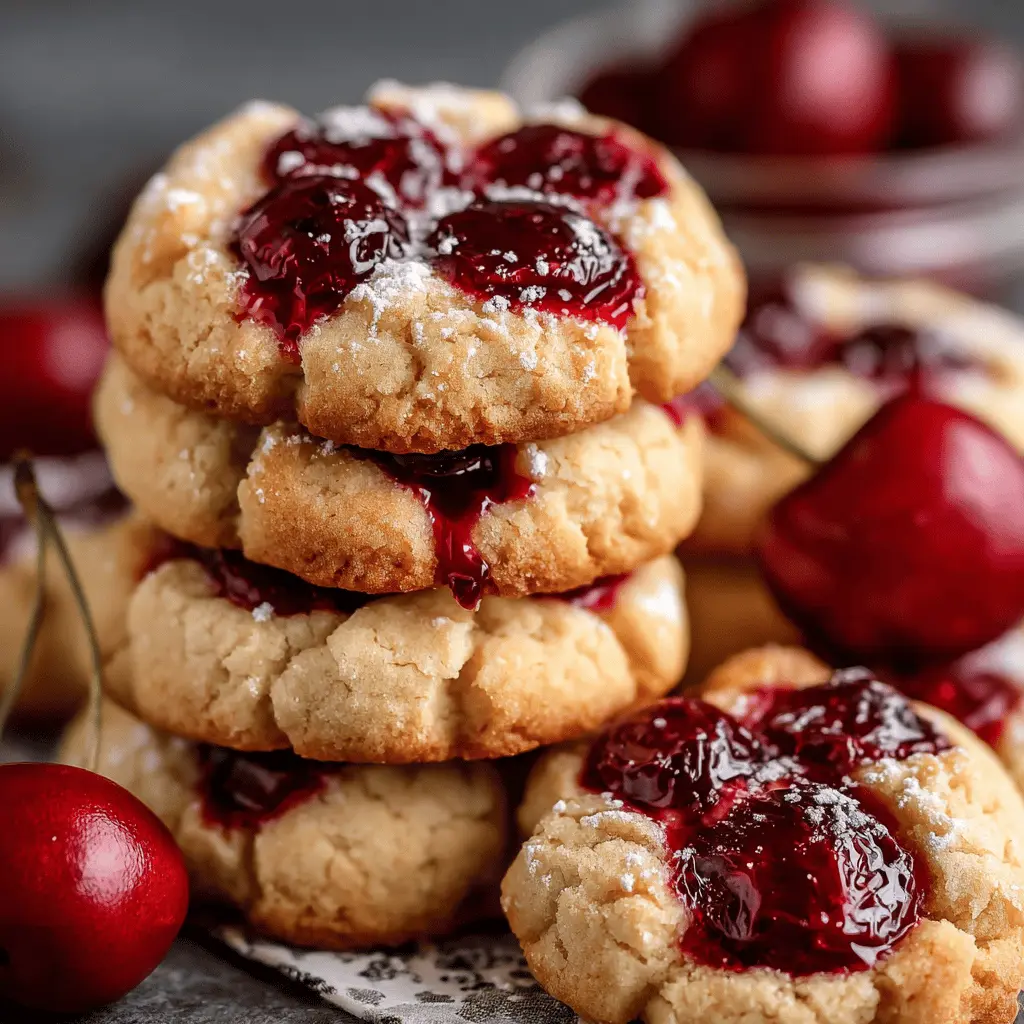
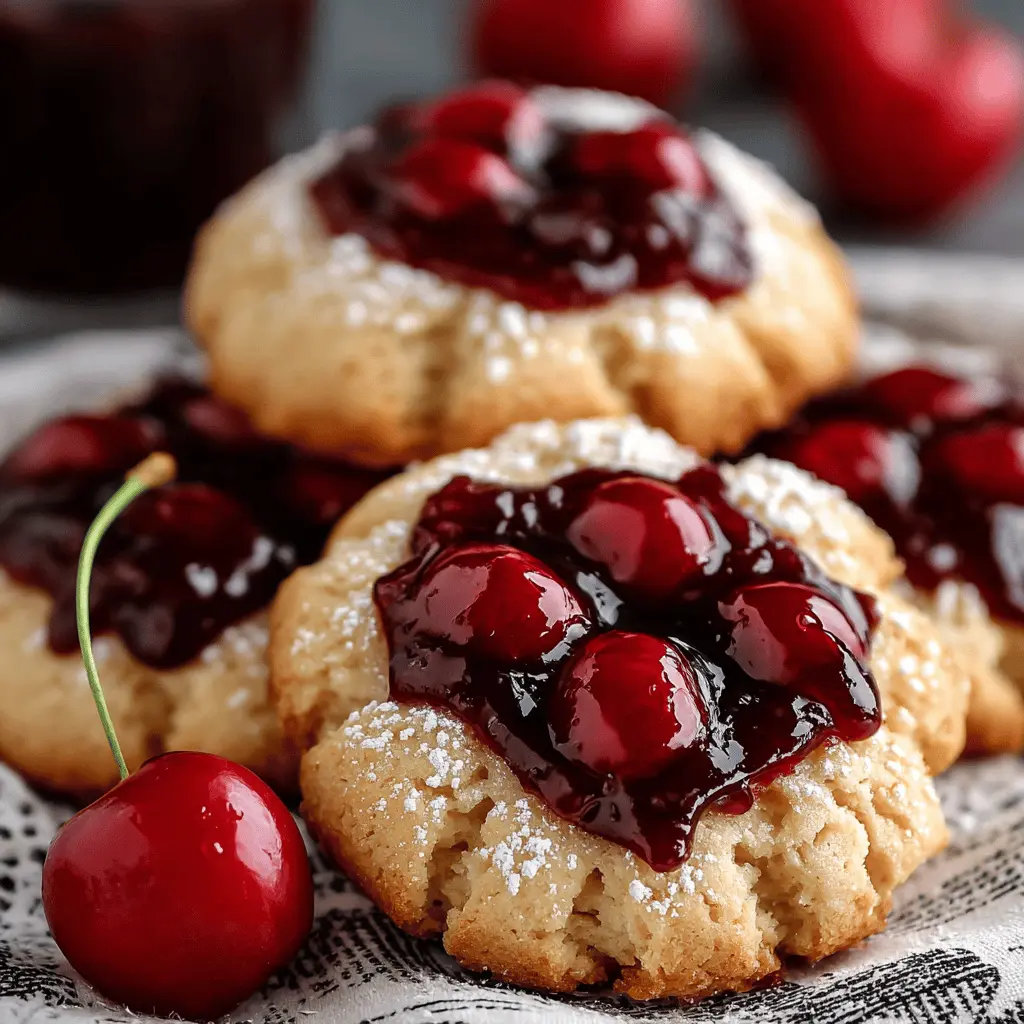
Cherry Thumbprint Cookies are an irresistible classic that combines a soft, buttery cookie base with a delightful surprise in the center—sweet cherry preserves. Commonly enjoyed during holiday gatherings or as a quick afternoon snack, these cookies are not only delicious but also visually appealing with their unique thumbprint designs. The process of creating these treats is simple and rewarding, perfect for bakers of all levels. If you’re looking to impress friends or add a personal touch to a gathering, these cookies are a must-try!
The traditional recipe typically includes essential ingredients like flour, butter, sugar, and, of course, your favorite cherry jam or preserve. The beauty of Cherry Thumb Cookies lies in their versatility; you can experiment with different fruit fillings, like raspberry or apricot, to suit your taste.
A Sweet Personal Story
I still remember the first time I attempted to make cherry thumbprint cookies. It was a chilly afternoon, and I wanted to whip up something special for my friends. As I gathered my ingredients, I could practically hear the laughter from my kitchen memories—my grandmother teaching me how to bake. She always emphasized the importance of making a mess, as that’s where the magic happens.
With flour flying and cherries simmering on the stove, I accidentally dropped a spoonful of preserves onto the floor. Instead of panicking, I chuckled and thought about how cooking should be fun, not a chore. That day, I learned that baking is not just about the end product but also the joy of the process.
My initial cookies turned out to be a bit misshapen, but they were delicious! As we sat munching on those slightly imperfect treats, I realized that homemade cookies offer not just flavor but a heartwarming sense of community. Every bite brought back memories, laughter, and connections, reminding us that food can be a universal language, bridging gaps between us.
If you’re interested in the background of these cookies or finding additional recipes, check out this informative piece that dives into the world of thumbprint cookies!
Ingredients for Cherry Thumbprint Cookies
Essential ingredients you need
To whip up some delightful Cherry Thumb Cookies, you’ll need a handful of simple yet essential ingredients. Here’s what you should gather:
- All-purpose flour – 2 cups helps form the base of the dough.
- Unsalted butter – 1 cup, softened for that rich flavor and tender texture.
- Granulated sugar – 3/4 cup to sweeten your cookies perfectly.
- Powdered sugar – 1/4 cup adds a touch of smooth sweetness.
- Vanilla extract – 1 teaspoon for a delightful aroma and taste.
- Egg yolk – 1 large yolk provides richness.
- Cherry preserves – 1/2 cup, the star of the show!
These ingredients can typically be found in your pantry or easily sourced from a local grocery store like Whole Foods.
Alternative ingredients for flexibility
Don’t have everything on hand? No worries! Here are some alternatives to ensure your baking adventure remains stress-free:
- Flour substitutes – You can use gluten-free all-purpose flour if needed.
- Butter alternatives – Coconut oil works well for a dairy-free version.
- Sweetener swaps – Try honey or maple syrup for a different twist, but adjust the liquid balance.
Feel free to get creative! Remember that the essence of Cherry Thumb Cookies lies in that ooey-gooey cherry filling, which you can also switch with raspberry or apricot preserves for a fun variation. Happy baking!
Step-by-Step Preparation of Cherry Thumbprint Cookies
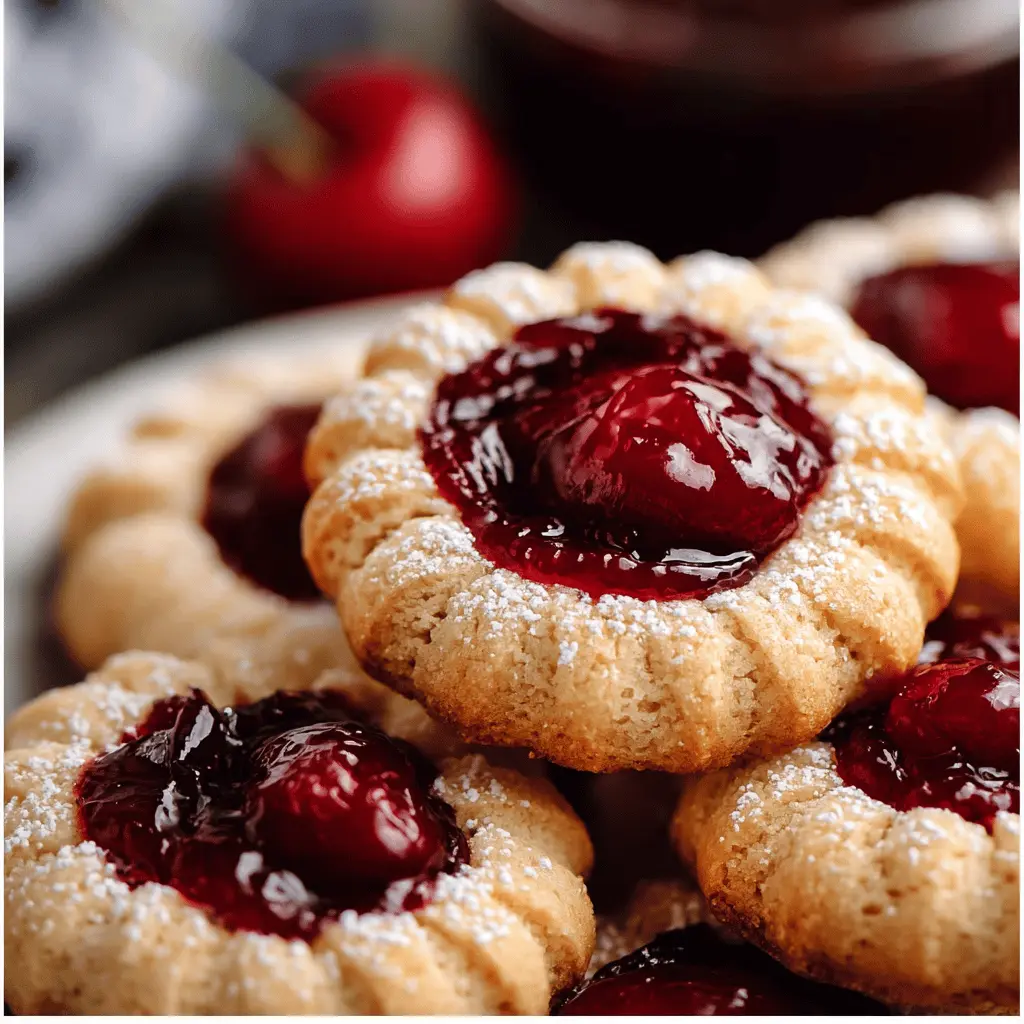
Cherry Thumb Cookies are an irresistible treat that combine a buttery cookie base with the tart sweetness of cherry filling. These cookies not only provide a delightful sweetness but also look beautiful on a dessert platter. Let’s roll up our sleeves and dive into each step of creating these delicious little gems!
Preheat your oven
Before you start mixing your ingredients, it’s essential to preheat your oven to 350°F (175°C). Preheating ensures that your cookies bake evenly and achieve that perfect golden-brown hue. It’s a small step, but trust me, it makes a significant difference in the final product!
Cream the butter and sugar
In a large mixing bowl, take ½ cup of softened butter and add ¾ cup of granulated sugar. Using a handheld or stand mixer, beat the butter and sugar together on medium speed until the mixture is fluffy and light in texture. This usually takes about 2-3 minutes. The creaming process is vital as it incorporates air, leading to a tender cookie. Don’t have a mixer? You can also use a wooden spoon—just be prepared to put in a bit more elbow grease!
Incorporate the egg and vanilla
Next, add in one large egg and one teaspoon of pure vanilla extract. Beat the mixture until everything is well combined. The vanilla adds a lovely aromatic flavor that complements the sweetness of the cherry filling. Did you know that the proper incorporation of egg is crucial for the cookie’s structure? So make sure everything is mixed thoroughly!
Mix the dry ingredients
In a separate bowl, whisk together 1 ½ cups of all-purpose flour, ½ teaspoon of baking powder, and a pinch of salt. Mixing the dry ingredients separately helps ensure that the baking powder distributes evenly throughout the dough, promoting even rising. It’s these small details that elevate homemade cookies from good to great.
Combine wet and dry ingredients
Gradually add the dry mixture to your wet mixture, stirring until just combined. Be cautious not to over-mix; this will help maintain the tender texture of your Cherry Thumb Cookies. If you start to see the flour disappear into the batter, you’re on the right track!
Shape the cookies
Using a tablespoon or a cookie scoop, scoop out portions of dough and roll them into balls about one inch in diameter. Place them on a parchment-lined baking sheet, spacing them about two inches apart. This step is perfect for those who enjoy the meditative quality of cookie dough shaping. Remember, the more evenly shaped your cookies, the more uniform they’ll bake!
Create the thumbprint and fill
Here comes the fun part! Using your thumb or the back of a round teaspoon, gently press down into the center of each cookie to create a well. Don’t press too hard—you want that cookie to hold its shape while still cradling your delicious cherry filling. Once you’ve made your indents, fill each well with about half a teaspoon of cherry preserves. You can use homemade or store-bought; just make sure the flavor is cherrylicious!
Bake to perfection
Now it’s time to bake your Cherry Thumb Cookies! Place the baking sheet in the preheated oven and bake for 12-15 minutes or until the edges are lightly golden. The aroma that fills your kitchen during this time is sure to be mouthwatering! Once baked, allow the cookies to cool on the sheet for about 5 minutes before transferring them to a wire rack to cool completely. This helps them firm up and keeps them from falling apart.
And there you have it! Your freshly baked Cherry Thumb Cookies are ready to impress. They make an excellent addition to any gathering or a delightful treat just for you. Enjoy the process, savor each bite, and remember: baking is all about sharing joy! For more baking tips and inspiration, check out resources like The Kitchn or BBC Good Food. Happy baking!
Variations on Cherry Thumbprint Cookies
When it comes to Cherry Thumb Cookies, there’s no limit to the delightful twists you can put on this classic treat. Let’s dive into some scrumptious variations that are sure to impress your friends and family.
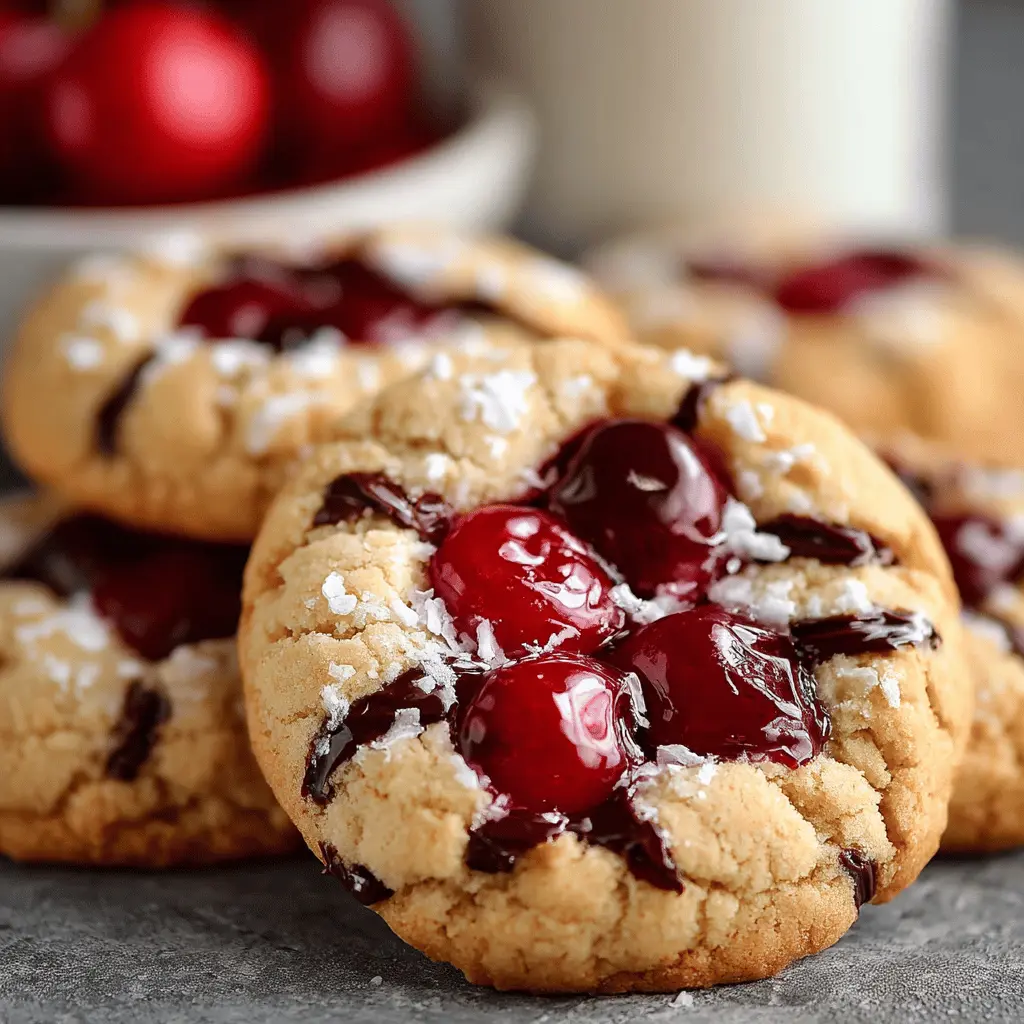
Indulge in Chocolate Cherry Thumbprint Cookies
Imagine biting into a soft cookie with a luscious chocolate center and a tangy cherry burst—heaven, right? For chocolate cherry thumbprints, blend cocoa powder into your cookie dough and form your thumbprints. Instead of cherry jam, you can fill them with rich chocolate ganache or cherry preserves. This variation not only satisfies your chocolate cravings but also offers a perfect harmony of flavors. Plus, it pairs wonderfully with a cup of hot tea or coffee!
Nutty Versions of Thumbprint Cookies
For those who crave extra texture, consider adding nuts to your Cherry Thumb Cookies. Walnuts, pecans, or almonds can be finely chopped and mixed into your dough, giving your cookies an earthy flavor and crunch. Alternatively, sprinkle some crushed nuts on top before baking for a delightful finish. Not only do they look sophisticated, but they also add nutritional benefits such as healthy fats and protein, making them a guilt-free indulgence!
Bright and Zesty Lemon-Infused Thumbprint Cookies
If you’re looking to refresh your palate, lemon-infused thumbprint cookies are an excellent choice. Incorporate fresh lemon zest and a splash of juice into your cookie dough for a bright, citrusy kick. Instead of cherry filling, use a homemade lemon curd or lemon marmalade. The tartness of the lemon beautifully complements the sweetness of the sugar cookie base, creating a delightful balance that’s perfect for spring gatherings.
For more inspiration on tweaking cookie recipes and discovering new flavor combinations, check out the resources available at Serious Eats or The Kitchn! With these variations, your Cherry Thumb Cookies can evolve with the seasons and your mood.
Cooking Tips and Notes for Cherry Thumbprint Cookies
Chilling the Dough for Better Texture
To achieve the perfect Cherry Thumb Cookies, don’t skip the chilling step! Refrigerating your dough for at least 30 minutes will enhance the texture, making them less prone to spreading. This results in beautifully shaped cookies that hold their form during baking. Plus, it gives the flavors a chance to meld together beautifully!
Using a Cold Baking Sheet
For an even better baking outcome, consider using a cold baking sheet. This can help prevent the cookies from spreading too much, ensuring they’ll be thick and soft. If your baking sheet has been sitting in a warm kitchen, pop it in the fridge for a few minutes before placing your cookie dough on it.
Dusting with Powdered Sugar or Chocolate Drizzle
Finish off your delightful Cherry Thumb Cookies with an elegant touch! A light dusting of powdered sugar adds a classic aesthetic, while a drizzle of melted chocolate can elevate the flavors. This not only enhances the presentation but also adds a rich contrast to the sweet cherry filling.
For more inspiration on cookie decorations, check out resources from Food Network or Martha Stewart. Happy baking!
Serving Suggestions for Cherry Thumbprint Cookies
Pairing with Coffee or Tea
There’s something delightful about enjoying Cherry Thumb Cookies with a comforting cup of coffee or tea. The sweetness of the cherry filling complements the rich, nutty notes of coffee, while a smooth herbal tea can balance the cookie’s texture. Experiment with different brews—like a bold dark roast or a fragrant chamomile—to find your perfect pairing. When hosting friends, consider creating a little coffee bar with various options. This not only elevates the experience but also encourages casual conversations about flavor preferences.
Serving at Gatherings or as Gifts
Cherry Thumb Cookies are not just delicious; they’re also visually appealing, making them ideal for gatherings or as thoughtful gifts. Their charming appearance and delectable taste can brighten any dessert table. When serving at a party, arrange them on a decorative platter for an inviting display. If you’re gifting them, consider packaging them in a quaint box with a personalized note. Trust us—who wouldn’t appreciate a homemade treat? For tips on creative packaging, check out this guide on food gifting ideas. Whether enjoyed at home or shared with others, these cookies are sure to bring a smile!
Time Breakdown for Cherry Thumbprint Cookies
Preparation time
Making Cherry Thumb Cookies is a delightful way to spend some time in the kitchen! You’ll need about 15 minutes to gather your ingredients and mix the dough. Ensure you have everything ready to avoid any mid-baking surprises.
Baking time
Once your dough is prepared, the real magic happens in the oven. Bake your Cherry Thumb Cookies for 12 to 15 minutes. You’ll know they’re done when the edges turn a light golden brown, making your kitchen smell irresistible.
Total time
In total, you’re looking at around 30 minutes from start to finish. Perfect for a quick treat or an impressive dessert for friends! Whether you’re planning a cozy gathering or just satisfying your sweet tooth, these cookies won’t take too long to whip up.
For cookie baking tips, check out Allrecipes for more inspiration!
Nutritional Facts for Cherry Thumbprint Cookies
If you’re a fan of Cherry Thumb Cookies, you might be curious about their nutritional profile. Here’s a quick breakdown to quench your curiosity and help you enjoy these delicious treats without guilt.
Calories
On average, one Cherry Thumbprint Cookie contains approximately 100 calories. This makes them a delightful, albeit indulgent, snack option for your afternoon coffee break.
Protein
These cookies offer a modest protein content of around 1-2 grams per cookie. While they aren’t a significant source of protein, pairing them with a glass of milk can give you that boost!
Sugar Content
Expect about 8-10 grams of sugar in each cookie, depending on how much cherry filling you use. If you’re mindful of your sugar intake, consider topping your cookies with a fruit spread with no added sugars for a healthier twist.
For more healthy dessert options, check out this resource on nutrition. Enjoying these little sweets can be part of a balanced diet when enjoyed in moderation!
FAQs about Cherry Thumbprint Cookies
Can I use different fruits for filling?
Absolutely! One of the best things about Cherry Thumb Cookies is their versatility. While cherry filling is a classic, feel free to experiment with your favorites. Raspberry, blueberry, or even peach preserves can add a unique twist. Just ensure the fruit filling isn’t too runny to maintain the cookie’s integrity. Check out this fruit preserves guide for ideas!
What’s the best way to store these cookies?
To keep your Cherry Thumb Cookies fresh, store them in an airtight container at room temperature for up to a week. If you want to keep them for longer, placing them in the fridge can help maintain their flavor and texture. Just remember to let them come to room temperature before indulging for the best experience!
Can I freeze the unbaked dough?
Yes, freezing unbaked dough is a great way to prep ahead! Simply wrap it tightly in plastic wrap, then place it in a zip-top bag, squeezing out as much air as possible. You can store it in the freezer for up to three months. When you’re ready to bake, just thaw it in the fridge overnight and follow the same baking instructions. For more freezing tips, the USDA Food Safety website has great resources.
Whether you’re baking for a special occasion or just treating yourself, understanding these tips will ensure your Cherry Thumb Cookies come out perfect every time!
Conclusion on Cherry Thumbprint Cookies
Recap the joy of homemade cookies
There’s something truly special about creating a batch of Cherry Thumb Cookies right in your own kitchen. The aroma wafting through the air, the vibrant colors, and the delightful flavors make the effort worthwhile. Every bite combines a buttery sweetness with tart cherry goodness, reminding us why homemade treats hold a special place in our hearts.
Encouragement to try baking them
So why not step into the world of baking? These cookies are not only easy to make but also a fantastic way to impress friends or indulge yourself. Grab your ingredients, embrace your creative side, and let the magic happen. Besides, who doesn’t love the feeling of sharing delicious cookies? For more tips and variations, you can check resources like BBC Good Food for inspiration! Your baking adventure awaits!
PrintCherry Thumb Cookies: Easy and Irresistibly Delicious Treats
These Cherry Thumb Cookies are a delightful treat, bursting with flavor and easy to make.
- Prep Time: 15 minutes
- Cook Time: 15 minutes
- Total Time: 30 minutes
- Yield: 24 cookies 1x
- Category: Dessert
- Method: Baking
- Cuisine: American
Ingredients
- 1 cup unsalted butter, softened
- 1 cup granulated sugar
- 1 teaspoon vanilla extract
- 2 cups all-purpose flour
- 1/2 teaspoon salt
- 1 jar cherry preserves
Instructions
- Preheat your oven to 350°F (175°C).
- In a mixing bowl, cream together the butter and sugar until light and fluffy.
- Add the vanilla extract and mix until combined.
- Gradually add the flour and salt, mixing until a dough forms.
- Form the dough into small balls and place them on a baking sheet.
- Make an indentation in each ball with your thumb and fill with cherry preserves.
- Bake for 12-15 minutes or until golden brown.
- Let cool before serving.
Notes
- For a twist, try using different fruit preserves.
- Make sure the butter is softened for easier mixing.
Nutrition
- Serving Size: 1 cookie
- Calories: 150
- Sugar: 10g
- Sodium: 50mg
- Fat: 7g
- Saturated Fat: 4g
- Unsaturated Fat: 2g
- Trans Fat: 0g
- Carbohydrates: 20g
- Fiber: 0g
- Protein: 1g
- Cholesterol: 30mg
Keywords: Cherry Thumb Cookies, easy cookies, delicious treats